|
Panasonic GF-1 Camera
+ Lenses |
24th January 2014
- I continue to use my GF1 camera but I have now also purchased a
Panasonic G6 Compact System Camera
which I use with the same Micro 4/3rds lenses. That ongoing 2014 review
can now be accessed using the blue link.
I
have always desired a small and light digital camera for everyday use.
Ideally
a 'Hybrid Version' of the Leica M7
Rangefinder 'Film' Camera and the Nikon FM3a SLR 'Film' Camera with the
same small and lightweight lenses.
I had read
up on the Panasonic GF-1
'digital' camera which is small and light with a 4/3rds
sensor. It has an excellent 20mm f1.7 'Prime' autofocus lens but it can
also utilise interchangeable lenses and with adapters it can also use
Leica M and Nikon AI-s Lenses, as well as other legacy lenses. It also
has video, although for me (a stills photographer) this is not a
pre-requisite. The reviews and the sample images on the Internet seem
promising, although it is not a '35mm full frame' sensor camera. The
GF1 has a x2 crop sensor (a 20mm lens = 40mm depth of field) which
according to the reviews provides a reasonably high ISO image quality
and at wide apertures, a tighter
depth of field than a small compact camera.
I liked the
idea as it combined the viewing style of the SLR with the 'mirror less'
operation of the Rangefinder and it could be set-up to perform like a
small rangefinder camera.
I thought it was worth purchasing and giving it a try
- the 20mm f1.7 autofocus lens with it's 40mm field of view would be more than
adequate for everyday casual use.
This article has one
main (Diary) page and additional (Window Jump) pages -
Main Page of Diary
(Last Update - 19th January 2012)
Image Sample - Galleries
(Window Jump Pages)
Further Information (Window Jump Pages)
________________________________________________________________________
The Panasonic GF1 Digital Camera
The Build + Handling
This is one well built digital camera - it feels solid and yet - compact and lightweight. The LCD screen is perhaps the weakest part and
I sense that it could be easy to damage, more so due to it's length
which tends to weaken it's frame. Once I added my 'stick on'
Giottos 3" LCD
Glass
Protector, the entire LCD was strengthened and I no longer worried about
damaging it. The GGS LX3 glass protector is (apparently) a better
'overall' fit and offers the same resilience. I shoot 4:3 ratio so the
Giottos frame size of 3" works out fine.
I found the menu and controls very easy to set-up (for my use) and the
GF1 autofocus can be used just like a DSLR and/or a small rangefinder
camera.
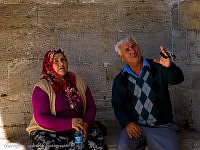 I
captured this spot (1 area) AF shot in Istanbul with the GF1 and the
14-45mm Lens combination at 45mm (90mm field of view), whilst being pushed along by a crowd of
people. The other settings were ISO:100, aperture f5.6 and the
shutter at 1/200th second. The 14-45mm Lens image stabilisation worked very well. I
captured this spot (1 area) AF shot in Istanbul with the GF1 and the
14-45mm Lens combination at 45mm (90mm field of view), whilst being pushed along by a crowd of
people. The other settings were ISO:100, aperture f5.6 and the
shutter at 1/200th second. The 14-45mm Lens image stabilisation worked very well.
The actual handling of this small camera can prove quite
difficult if you are trying to adjust the settings with the external
viewfinder at your eye. There is no doubt in my mind, that the GF1 is a
dream to use with the LCD and it's own compact Panasonic autofocus
lenses plus the EVF for those difficult light situations.
With either the
Panasonic 20mm f1.7 or the 14-45mm f3.5 - f5.6 OIS Lens fitted, the GF1 can
be carried in one hand with a wrist strap for backup. The built in grip
is more than adequate for holding with your fingers but I carry the GF1
with the 14-45mm lens and hood fitted 'cupped' across the lens in my
hand - very lightweight and pleasant to hold.
The GF1 for Point and Shoot
I have never used
the GF1 in this way, which is basically selecting the
iA
Intelligent Auto Switch top dial, pointing the
camera and pressing the shutter. I expect that the GF1 will perform as
good or better than any standard 'Point & Shoot' compact digital camera
thanks to its technology and in particular its larger sensor.
However, just like
any compact or similar digital camera in
iA
Intelligent Auto the GF1 is 'not that smart'
as to be able to properly compose all the scenes (especially in very
uneven light conditions) and produce images with top quality dynamic
range and image quality. The scene selections in the menu will help
enormously and I suspect that the majority of users will be more than
happy with the image end results.
To 'achieve the
maximum' that this little digital camera can achieve you are forced to
study the manual side of the camera and in particular using A for
Aperture Priority Mode, ISO, AE Exposure Lock, Shutter Focus Lock, Bracketing
and shoot 'RAW' files as opposed to camera jpegs. The ability to post
process 'RAW' files in software would be an added bonus.
Would I purchase the
GF1 as a 'Point and Shoot' Camera only........the answer is no. The GF1
is more expensive than a PS compact and it has much more to offer with
its manual controls, bracketing and video. It would be ideal to purchase
it as a 'point and shoot' but only if you plan to develop your
photographic skills!
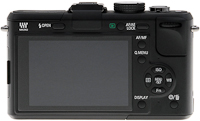
My GF1
Main Controls
I set my GF1
to be used similar to 'film' cameras that I used over thirty years ago.
I programmed it as per my
GF1 Menu & Control
Settings
and I concentrated on
using these main controls and buttons on the camera. These controls
all interact, so any change I make to one directly affects the others.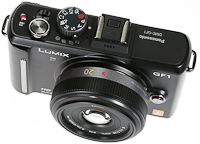
A (Aperture Priority) Top Control (Round Switch on Top)
I use this top control A which sets up the camera to allow me to set the
aperture of the lens. I set the aperture (using the Control Wheel) and
the camera takes an exposure reading of the scene and automatically sets
the shutter speed for me.
Control Wheel (Top Right of Camera Back)
Aperture + Exposure Compensation Setting
After I have set A - I can then rotate the control wheel which allows me
to set the aperture of my choice - f1.7 for a wide open lens
 which
produces a 'narrow focus' depth of field and to f8 for a stopped down
lens (less light is allowed in) which produces a 'larger focus' depth of
field - I tend never to use f11+ as diffraction sets in and the image
quality deteriorates. which
produces a 'narrow focus' depth of field and to f8 for a stopped down
lens (less light is allowed in) which produces a 'larger focus' depth of
field - I tend never to use f11+ as diffraction sets in and the image
quality deteriorates.
The control wheel when pressed in and then rotated will allow me to
alter the cameras exposure metering by increasing the exposure + or
decreasing -. I normally have this set to -2/3rds permanently as
the GF1 tends to slightly overexpose it's metering by +2/3rds. When I
have a scene in the LCD/Viewfinder that requires less or more exposure,
I can use the control wheel to change the metering to suit.
AF Button (Left Button on Menu Set Control Pad - Camera Back)
I tend to have this button automatically programmed in the A Top
Control + Menu Settings for spot (1 area) autofocus. I use this most of
the time with my lenses and I can 'pin point' the area I want in focus
in a scene. This button will also allow me to select 23 area autofocus
for general shots which require the camera to measure off the overall
scene for the best focus.
Fn Button (Bottom Button on Menu Set Control Pad - Camera Back)
I tend to have this button automatically programmed in the A Top
Control + Menu Settings for 'multiple' full exposure metering. When
required, I can use this button to quickly change it.
ISO Button (Top Button on Menu Set Control Pad - Camera Back)
This is similar to the old film days where you select the ISO for the
speed of the film - ISO:100 for slower film to ISO:800+ for faster film.
In the film days the slower the film the less the grain on the image and
the image quality was optimum. The faster the film the more grain and
the image quality was not as good. Faster film tended to be used for low
light shots and faster moving subjects. It is the same today with the
modern digital sensor but grain is now known as 'noise'. The ISO setting
of my choice, using the ISO button and menu, plays an important part as
ISO:100 will match a slower shutter to my choice of aperture whilst
ISO:800 will select a much faster shutter speed.
AF/AE Button
(Camera Back)
I have this button
programmed to 'lock the exposure' not the AF Focus. After I have set-up
the camera for the shot, I may find that the scene requires less or more
exposure and I may want to lock that exposure so that I can focus on a
part of the scene only. I have two choices, I can use the control wheel
and adjust the metering and then press the AE button to lock the
exposure (press again unlocks it) or I can raise/lower the camera and lock an exposure as the
metering of the camera automatically changes as it sees more light or
less light. This then allows me to focus on my given subject and even
re-arrange my scene in the LCD/Viewfinder - see the Shutter Button part
below.
GF1 Image Bracketing
(Camera Top Panel Switch - In Front of Top Control)
When I have a scene where it is difficult to judge the proper exposure,
I use the GF1 bracketing feature - the switch on the top of the camera.
Using this, I can take multiple and differently exposed shots of the
same scene and select the image with the best exposure.
Shutter (Half Press Focus) Button
(Camera Top)
Using the shutter
button, I can half press it to autofocus on the part of the scene that I
want in focus (using the Spot - 1 Area AF) and by still holding the half
press, I can re-arrange my scene in the LCD/Viewfinder and then fully
press down the button to take the shot. This is ideal for 'isolating the
focus' of subjects in an overall scene.
Image Inspection
on Playback - Highlight Blink Mode
In the set-up menu of my GF1, I have Highlight = On as for
'everyday' use I
never refer to the histogram. I use the 'highlight blink' on the
'immediate' image playback on the LCD which I use to inspect for blown
areas of the picture which will blink white/black on the image. I find
this the simplest method as very often I am on the move and I might just
get a second shot before the subject is gone.
GF1 Menu Setup
-
My GF1 -
Menu + Control Dial Settings Window
GF1 Parts
+ Bags List
-
GF1 Parts + Bags List
GF1 - LCD -
Image Capturing
The first images I have taken with the GF-1 using it's LCD live view were captured in appalling
weather and the darkness of the day on the ground coupled with a very
bright 'storm' sky made it extremely difficult to see the ground part of
the scene. Whilst this was a downside - the actual
image captured was 'true' to the image I had seen before
pressing the shutter. The manual states that you can raise the brightness level in LCD Auto Power Mode or use the LCD Power Mode
and have it much brighter all the time. The downside with all (non
default) options is - what you see on the screen may not be what is
actually captured in the final image. For the moment I am remaining with the
default option (what you see is what you get). I found that if the image
exposure is set-up properly then the image is much clearer. With scenes
which have a more 'even balance of light' throughout the image, the
LCD viewing is much clearer to the eye.
I did a test at dusk and found that with an 'evenly dark' lit scene the
LCD displayed a very bright and easy to see image.
GF1 - DMW-LVF1E
'External Live' Viewfinder
I purchased this viewfinder and
fitted/plugs into the 'flash hot shoe' of
the GF1. It looks great on
the camera and works very well. You press a small button at the side of
the viewfinder to 'toggle' the live view image between the viewfinder
and the LCD - the image play back also follows the live view mode you
have chosen. You cannot use the LCD and the Viewfinder at the same time. The eyesight diopter works well and I was able to adjust the viewfinder
to my eyes very easily.
The GF1 is larger
that a compact camera and smaller than a Leica M9 Rangefinder or a Canon
450D DSLR. Due to it's size and when you are using the external
viewfinder (optional) it can be difficult to handle and the control
buttons are quite difficult to access when the viewfinder is pressed up
against your eye. It remains the only real solution for using the GF1
with manual focus or legacy lenses.
I had compared the GF1 with it's 14-45mm Lens against my Canon 5D DSLR
with it's Canon 24-105L Lens and I enjoyed going back to the Canon Viewfinder so much
that I really started to dislike the Panasonic External Viewfinder.
I found myself using the GF1 LCD - more and more with the 20mm and
14-45mm lenses.
If you have
used a full 35mm frame or a smaller sensor based DSLR - you are going to
be very disappointed with the GF1's external viewfinder. It is like
'chalk and cheese' and takes a lot of getting used to. Never the less
for those important shots where the sun has blown away the view on the
LCD - the external viewfinder is the only real option.
The viewfinder came with a black snap fastener
case which holds the viewfinder in special grooves inside and has a snap
fastener on the back to clip it to a bag strap.
The viewfinder display
is similar to the LCD, in that
the actual image captured was 'true' to the image I had seen in the
viewfinder before pressing the shutter. The downside (like the LCD) is
that dark foreground images with highlights are difficult to
'completely' see clearly, especially with landscapes where there is a
very dark foreground section. I could
have changed the LCD/External Viewfinder to the auto power mode and
brightened up the viewing area but I would rather have a true image
displayed all the way through to capture. I found that if the image
exposure is set-up properly then the image is much clearer.
With scenes which have a more 'even balance of light' throughout the
image, the
DMW-LVF1E
viewing is much clearer to the eye. I did a test at dusk and found that
with an 'evenly dark' lit scene the external viewfinder displayed a very
bright and easy to see image.
The 'one wrinkle' is that the small plastic guard has to be removed from
the camera to slide the viewfinder into it's place. Whilst this is very
easy to accomplish, I was left with the small guard in my hand and I
wondered if I could cope with always fitting the viewfinder to the
camera not to mention the distinct possibly that I would eventually lose
the plastic guard.
I
have since resolved the on/off camera problem by leaving the external
viewfinder - permanently attached to the camera. The small plastic guard
and the viewfinder case are now safely stored in the house.
Image Quality + Exposure Compensation
My early tests have shown that the GF-1
in default 'multiple weighted metering' set-up will 'very easily' produce blown highlights. The jpegs
straight out of the camera also appear quite weak. To overcome this to
some degree, I have set the GF1 exposure metering to -2/3rds which I
have set all the time. I have no problem with the -2/3rds setting
as I normally use the exposure lock AE button to lock my scene's
exposure by raising the camera up or down to find a scene exposure that
suits my eye without touching the exposure compensation setting - in this way
if I do not use the AE button, the camera is by default already set-up
-2/3rds to assist avoid blown highlights. I have expanded on this
further down the page in the 20mm f1.7 Lens section.
Video + Hyperfocal Use
I now use the GF1 with the Lumix 20mm f1.7
lens for video. I have it set-up for manual under my C2
switch. The choice of settings for video are really down to whether you
want video for the television or the PC. I have mine set-up for Mpeg
(PC) but the main setting change in the video menu settings is to switch
the Continuous Focus=OFF and with the AF/MF button menu set the camera
to MF for manual focus.
When I want to use video, I switch to C2,
switch the camera off and then on. The GF1 and the 20mm are now setup
for 'Hyperfocal' mode (see the hyperfocal section below under the Lumix
20mm f1.7 lens section). I never touch the lens focus ring and the focus
remains constant and the 'depth of field' is dependent on the aperture
setting. I tend to have it all pre-set for ISO:100 and aperture
f8..............I then make changes to the ISO and if required to the
aperture, dependent on the light conditions. I always attempt to work at
the lowest ISO that provides me with an aperture of f8 and a shutter
speed of at least 1/20sec but preferable a higher shutter speed if
possible.
If you also set the Custom Menu for Shoot W/O Lens=ON ..............you
can also use manual focus lenses for video, such as the Voigtlander 25mm
f0.95 lens.
RAW + Jpeg Image
Files
I shoot 'RAW' image files and then post process them in computer
software to produce tiffs and jpeg image files which are far superior
than the jpeg straight out of the
camera.
One note of caution, if you set-up the GF1 for Black & White
(monochrome) shots with RAW + Jpegs............the camera will produce a
Colour RAW image file, not BW..........only the camera produced jpeg will be BW.
Dynamic Range
- Graduated Filter - Software Processing
The Internet
reviews are accurate in their description of the 'narrow
dynamic range' of the Panasonic GF-1 in difficult conditions. This is
particularly true when shooting a bright sky with a very dark foreground area.
The GF1
is no different to other digital compact cameras. Any small compact that
produces RAW and/or Jpeg images can experience
just as much
difficulty with dynamic range........blown highlights, dark foregrounds
and difficulty in exposing 'very unevenly' lit scenes.
My 'partial' answer to a narrow
dynamic range, which predominantly appears in images with bright skies
and dark foregrounds, is to use a screw type '2 stop' gray graduated soft
filter. I captured this image on a very overcast day with heavy
mist.
 Using the grad' I can create a dramatic
'stop' difference between the top and bottom of an image - this way I
can broaden the dynamic range of the camera by lightening the foreground
of the image but retaining the quality of the skyline.
Combined with this -
I will always shoot 'bracketed' images (if there is time) in conditions where the correct
exposure could be in doubt and then I select the best exposed image. Using the grad' I can create a dramatic
'stop' difference between the top and bottom of an image - this way I
can broaden the dynamic range of the camera by lightening the foreground
of the image but retaining the quality of the skyline.
Combined with this -
I will always shoot 'bracketed' images (if there is time) in conditions where the correct
exposure could be in doubt and then I select the best exposed image.
Usually when you capture complex
lit scenes, even
a '2 stop' graduated gray filter may not cut the mustard. SilkyPix Software, which is bundled with the GF1 can help to overcome
the narrow dynamic range and assist recover the overall image quality
but it can only go so far. I started to use Adobe Lightroom
3
Software to provide me with the tools to 'recover and broaden' the
dynamic range of images which otherwise I would have rejected.
I find that to
achieve 'optimum image quality' with the correct 'light' balance the GF1
images require more post processing than my Canon 5D MK1 DSLR. When I returned from Istanbul and using Adobe Lightroom 3, I
found that most of my GF1 images required more than just the 'basic' RAW
conversion to Jpeg, which was a slight disappointment. When using
Lightroom 3 it is absolutely imperative that you use a proper
GF1.dcp profile
which is accessed through the Lightroom 'camera calibration' section and
can be set-up as a base for all your pre-sets.........this will save you
a serious amount of time and provide you with more 'pop' and the correct
colours for your final images.
The 52mm Graduated
Filter Assembly
This assembly is screwed onto the
front of the Hoya 46mm HMC UV filter (the 52mm hood is optional for very
sunny days). I did not fit the graduated assembly on the front of the
20mm lens as the lens (when camera switched off or powers down in power
save mode) retracts inside the lip of it's outer casing - a (46-52mm)
step up filter adapter will block this and create a malfunction. The
graduated filter assembly is a neat solution for using in 'all day
carrying mode' especially for bright sky/heavy shadow scenes. I
marked the top metal rim of the graduated filter ring (the top of the
gray part of the glass) with a piece of white plastic tape. This makes
it very easy to use in the field as you always know what is the top.
There is no camera malfunction or any vignetting effect by using the
Hoya 46mm UV filter plus the Tiffen 46-52mm step up adapter/B+W 52mm
graduated filter/Hama 52mm hood assembly screwed on the front of the
20mm lens.
The Lee 75
Rangefinder Graduated 2 x Filter + Polariser Kit is an alternative
solution which is great for landscape work and similar projects where
the camera is on a tripod - although I am not sure if the 46mm
adapter supplied with the 75 Kit is flat against the outer casing of the
20mm lens and will block the lens retraction?
________________________________________________________________________
Lumix 20mm f1.7
Lens
This lens is
very small, the
casing is made of plastic and it has exceptional image quality. I only
use it in autofocus mode and so far it has performed very well. When I
first used this lens, I noticed it had a 'rasping' noise when the
autofocus moved the lens in and out - I am not sure if this is the gear
mechanism or the lens plastic casing which is causing it. It is still
there when you listen carefully but I have become used to it and no
longer seem to hear it when I am taking pictures. Apparently it is a
known condition and it is not a fault. Due to the finish of the lens, I
am not confident that muck will not get in between the glass and the
case, so I have permanently fitted a Hoya 46mm UV HMC Filter which
safely allows the lens to withdraw into its casing at power down or in
power save mode.
For image
samples from my GF1 camera -
GF1+20mm Stills Video
"NEW"
Also
GF1+20mm Stills Video -
National Museum of Scotland
"NEW"
Camera and Lens Malfunction
I learned that if you fit any kind of adapter to the front of the 20mm
lens, which blocks it from withdrawing into it's outer casing (when the
camera is switched off or powers down in power save mode) - the camera
will lock up for manual and autofocus until you remove the adapter
(typically in my case this was a 46-52mm step up filter adapter)
Therefore I fit my 46-52mm step up graduated filter kit to the front of
the Hoya UV filter and there is no problem!
Lumix 20mm f1.7
Lens -
Rangefinder (Street) Mode
I
have found that if I want the best out of the 20mm Lens for street
photography and I
 want accuracy of the overall exposure with the GF1
camera then I tend to shoot as I did over thirty years ago with 'basic'
film cameras but now with the luxury of autofocus instead of manual
focus. want accuracy of the overall exposure with the GF1
camera then I tend to shoot as I did over thirty years ago with 'basic'
film cameras but now with the luxury of autofocus instead of manual
focus.
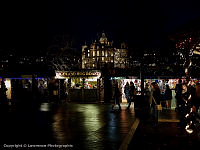
Some of my first shots were taken during the 2009 Christmas period in
Edinburgh, which was typical weather in Scotland for that time of the
year. The GF1 and the 20mm f1.7 Lens handled it all very well and I was
very pleased with the results. The 'Hogs Roasts' image was shot at
ISO:800, aperture f2 and 1/60sec for the shutter.
I now tend to use the LCD (in default mode) for day and night shots as it gives me
the best results in combination with the exposure lock AE button. There
is no guessing as I can quickly change the scene in the LCD by pointing
the camera at different lighting for different exposures and toggling
the AE button until I have an exposure that suits. The external
viewfinder is also excellent for 'night' photography and it's display is
similar to the LCD but the overall viewing size is smaller. During the
day when the LCD viewing is lost due to the light conditions, the
external viewfinder is the only solution but it is far from excellent.
For day and night photography, I tend to always shoot with -2/3rds exposure compensation
(sometimes more) to avoid blown out highlights. My GF1 tends to
multiple weight meter at +2/3rds and brings out the 'immediate
front scene' exposure but over exposes the brighter area such as skylines.
I invariably use the AE exposure lock button to pre-set the exposure of
my shots so leaving the GF1 permanently set-up to -2/3rds which is not a
problem - it also means that when I power up the GF1 to take pictures,
it is always set for -2/3rds and ready for any 'snap' shot.
A typical 'Night' street
shot
I use the same method for day and night shots,
I normally capture a shot with these controls and in the following order
-
* Set ISO:800 (I will go
to ISO:400/200/100 & especially ISO:100 for day shots if possible)
* Set Top Control to A - for aperture priority mode
* Set Aperture for f2 or f1.7 (Usually f4 - f5.6 for day shots)
* Set for multiple
weighted metering
* AE 'Exposure Lock' Button (raise or lower GF1 for exposure choice &
lock)
* Focus (Spot) 1 Area AF on
subject and lock/hold with half press shutter
* Recompose scene and fully press shutter button
* Check the image on
immediate playback using the 'Highlight' blinking indicator
Street shots at night can be difficult
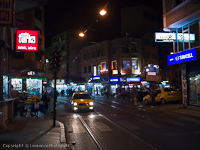 as I am attempting to achieve a
reasonably fast shutter speed to avoid camera/lens shake and minimise the movement/blur of people. I find that on 75% of the shots in
'real darkness' I am shooting at ISO:800. The 20mm Lens will allow me to
operate at shutter speeds of 1/15th second without camera/lens shake but
obviously will not prevent people/cars blur. This taxi shot was captured
at ISO:800, aperture f2.8 and shutter at 1/100th second. as I am attempting to achieve a
reasonably fast shutter speed to avoid camera/lens shake and minimise the movement/blur of people. I find that on 75% of the shots in
'real darkness' I am shooting at ISO:800. The 20mm Lens will allow me to
operate at shutter speeds of 1/15th second without camera/lens shake but
obviously will not prevent people/cars blur. This taxi shot was captured
at ISO:800, aperture f2.8 and shutter at 1/100th second.
I
use the LCD to frame the entire street area that I intend
to shoot through and allow the exposure 'multiple weighted' metering to match the different
lit areas, until I achieve an overall exposure that I like. To achieve
this, I do not change the exposure metering compensation, I simply raise
or drop the camera which changes the shutter speed and alters the
overall image in my eye, then I lock the exposure using the AE button on
the back of the camera - I can toggle the AE on/off until I achieve the
exposure for the scene I like.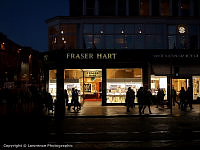
Now with the exposure locked I am free to 'focus
on any subject' that I like by using the spot - 1 area focus, half
pressing the shutter and holding down to autofocus the lens and
locking the focus.
Still with the shutter held half down, I can now
re-compose the entire scene and finally press the shutter full down to
take the shot. This of course all happens very quickly, especially after
I have locked my exposure. I still find it much faster than using the
GF1 in manual mode, especially when the light is constantly changing and
is very uneven. One important point is that the LCD/External Viewfinder should be
in default mode and then what you see is usually what you get!
I would purchase
 the combo for 'night shots' alone, the f1.7 or f2
aperture provides a great depth of field in the street and yet in the
right circumstances with this 20mm lens, I can create a narrow band of
focus, I prefer f2 when possible as the image
quality has the edge on f1.7. the combo for 'night shots' alone, the f1.7 or f2
aperture provides a great depth of field in the street and yet in the
right circumstances with this 20mm lens, I can create a narrow band of
focus, I prefer f2 when possible as the image
quality has the edge on f1.7.
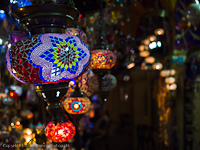
This image of the 'Turkish Lantern' is an example of tight focus with
the lens in (spot) 1 area focus on the front of the lantern. I
think it is excellent for although the GF1 and the 20mm Lens are
displaying a field of view of 40mm - it must be remembered that this is
actually a 20mm lens and it is the sensor 2x crop of the GF1 that
displays 40mm.
So all in all, quite an impressive out of focus at f2. I own quite a
number of lenses including Canon L lenses but I have never purchased a
lens like this Lumix 20mm f1.7 which delivers such high image quality
and is so in-expensive for what you get.
The GF1 images from the 20mm F1.7 Lens
handle very well for extensive post processing.
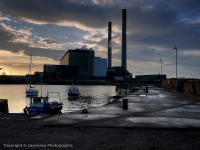 This
shot of the dark harbour was taken at ISO:100, aperture f8 and shutter
at 1/400th second. I also used a '2 stop' graduated grey filter but the
image still lacked the atmosphere that I wanted, so I created 3 separate
jpeg exposures from the original RAW file using SilkyPix software and
then blended them in Photomatix HDR Software. Today, I would use Adobe
Lightroom 3 and the RAW file to achieve a similar effect without
blending. This
shot of the dark harbour was taken at ISO:100, aperture f8 and shutter
at 1/400th second. I also used a '2 stop' graduated grey filter but the
image still lacked the atmosphere that I wanted, so I created 3 separate
jpeg exposures from the original RAW file using SilkyPix software and
then blended them in Photomatix HDR Software. Today, I would use Adobe
Lightroom 3 and the RAW file to achieve a similar effect without
blending.
The GF1 with the correct profile in Adobe Lightroom 3 Software
 will
process RAW files to tiff and jpeg rather well. This is a shot of melons
that I captured in Istanbul with the 20mm lens. It was shot at ISO:100,
aperture f5.6 and shutter at 1/250th second. will
process RAW files to tiff and jpeg rather well. This is a shot of melons
that I captured in Istanbul with the 20mm lens. It was shot at ISO:100,
aperture f5.6 and shutter at 1/250th second.
I am very pleased with the end results but there is no doubt that to
achieve the optimum results from the GF1, I have to work with RAW files
and Adobe Lightroom 3 software. I cannot achieve quite the same quality
or the flexibility from
Panasonic's SilkyPix software, which is bundled with the camera.
LR3 is a very powerful software package and
 I am using it for all my 'RAW' conversions, including BW monochrome from
colour images.
I am using it for all my 'RAW' conversions, including BW monochrome from
colour images.
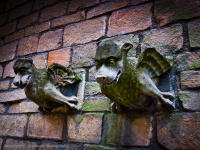
This image taken of 'York Dragons' with the 20mm lens was shot at
ISO:100, aperture f4 and shutter at 1/100th second in York, England.
This is HEAVILY processed for effect and I am sure it will not be to
everyone's taste, I am not sure I like it. However it is my experiment
with heavy saturation, contrast and some vignetting. I suppose it has
some form of 'look' and I think it has atmosphere?
For the meantime, I have decided to stay with LR3 for all my monochrome
conversions as I like to work with RAW colour files.
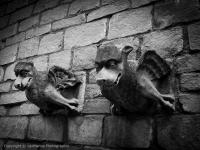
This black and white image of the 'York Dragons' is a LR3 conversion
example. My first with the GF1 and hopefully as I progress, I will
achieve better results.
It is converted from the RAW colour file (not a colour version jpeg) and is
reasonable for a first attempt.
Again I have applied some vignetting around the image for effect and to
concentrate the eye on the dragons. The saturation and contrast have
been boosted.
'Carpets for the Grand
Bazaar' -
Lumix 20mm f1.7
Lens
Image
I captured this 'Carpets
for the Grand Bazaar' image using the 20mm lens and the above AE method
-
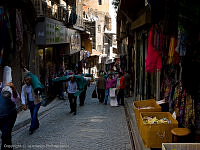 exposure metering had been
set -1 for general outdoor scenes in Istanbul where the sun was extreme.
In this street
scene the alleyway was extremely black, dark and
the shaft of light at the end was extremely bright. exposure metering had been
set -1 for general outdoor scenes in Istanbul where the sun was extreme.
In this street
scene the alleyway was extremely black, dark and
the shaft of light at the end was extremely bright.
Even at -1 the
buildings in the bright shaft of light would be burnt out and would have
no definition, the sky definition would be gone. I knew that within a
few minutes I would be out of the alleyway and into the full sun so I
did not want to change the exposure compensation but I used the AE
method described and obtained the best shot that I could whilst on the
move.
As it turns out the sky is still
blown out but at least the buildings in the light, still have some
definition and that is with AE locking an exposure of around -2 and
producing a faster shutter speed to darken down the bright shaft of
light but of course also the alleyway.
I am pleased with the image which
still required the alley itself to be slightly 'front lit' using Adobe Lightroom 3 in post processing. It remains as near to the actual scene
as is possible, albeit the foreground is lighter to enable the
viewer to see the detail.
Lumix 20mm f1.7
Lens -
Hyperfocal Mode
According to
Wikipedia
hyperfocal distance is a distance beyond which all
objects can be brought into an "acceptable" focus. There
are two commonly used definitions of hyperfocal
distance, leading to values that differ only slightly:
Definition 1:
The hyperfocal distance is the closest distance at which
a lens can be focused while keeping objects at infinity
acceptably sharp; that is, the focus distance with the
maximum depth of field. When the lens is focused at this
distance, all objects at distances from half of the
hyperfocal distance out to infinity will be acceptably
sharp.
Definition 2:
The hyperfocal distance is the distance beyond which all
objects are acceptably sharp, for a lens focused at
infinity.
The distinction between the two
meanings is rarely made, since they have almost
identical values. The value computed according to the
first definition exceeds that from the second by just
one focal length.
Whilst the Lumix 20mm f1.7 Lens is an autofocus
lens it can also be used in Hyperfocal Mode.
I
only use hyperfocal
for 'street photography' and I preset depth of field from a 'fixed'
infinity back into my image.
To achieve this you can
switch the lens to manual in the GF1 menu
(AF/MF Button - set to
Manual Focus)
and then switch the GF1 off and then back on - this will set the lens to
an infinity focus and (depending on your aperture of choice) a depth of
field back from infinity. From then on you do not touch the lens focus
ring and it will remain on infinity. You can also set this up as a
dedicated switch by pre-setting a Top Control Dial but you still have to
switch the camera off and back on again for the dedicated switch to
work.
My
Top Control Dial, C2
programmed to be a dedicated manual lens and 'Hyperfocal' switch (I use C2)
seems to have no point but it does because............I use my GF1 in aperture
priority mode A
all the time and I only ever 'toggle' the AF modes (1
Area Spot
or 23 Area Focus). If I used A and changed it to manual then switched
off and on for hyperfocal I stand a real chance that when I put the
camera away in my bag for later use, I will have forgotten that
A
is set
to manual. This might ruin my chance of a 'snapshot' when I later grab
the camera, switch on and it is still set to manual (hyperfocal)
especially if I have changed the lens from the 20mm to my 14-45mm zoom
when I put the camera away. By using C2
only for manual and hyperfocal I
have become used to switching to C2
solely for that purpose and also switching back to A
before I put the camera away. I also now use C2
for video in hyperfocal and manual focus modes.
I did some brief
tests and elected to use aperture f8 for my hyperfocal settings which
gave me a subject at (comfortably) 2 metres from the lens in focus and
out to infinity. I am sure that the 20mm f1.7 Lens will operate with a
subject in focus at a closer distance but 2 metres will suit me. The
lens could be set for optimum image quality at f4 and I am sure (after
tests) that this hyperfocal range would suit many people who use the GF1
for street photography.
I feel that for tighter depths of field and
isolated subjects I tend to
use the GF1 just like a rangefinder
with 1 area focus (spot) mode and go
for fast focus on the 'chosen' subject at wide aperture. The 20mm f1.7
Lens is surprisingly able to provide tight depths of field at f1.7 and
f2 apertures.
Lumix 20mm f1.7
Lens - Optimum Image
Quality
In my opinion the GF-1 + 20mm f1.7 Lens
delivers 'optimum' image quality between aperture settings f2 to f4. At f1.7 and also f5.6 to f8 the quality remains exceptional but below
optimum. At f11 to f16 the quality of the image begins to suffer from
diffraction - f11 is still very acceptable. I would not use f16 unless I
had no other choice. Having said that, I doubt very much that Print
Sizes up to 8" x 6" would display any of the diffraction weaknesses of
this lens.
This image 'Shade of Topkapi Palace' in Istanbul,
 was
captured at f4 aperture but the ISO was mistakenly left at ISO:400 (I
had been shooting indoors prior to the shot) but the overall quality of
the image remains very good. was
captured at f4 aperture but the ISO was mistakenly left at ISO:400 (I
had been shooting indoors prior to the shot) but the overall quality of
the image remains very good.
I tend to take as many shots as possible at ISO:100 and at aperture f4
to gain the maximum image quality that the GF1 can deliver. Shutter
speed is important for 'hand held' shots and in combination with ISO:100
and f4, I try to keep the shutter (when possible) to at least 1/50th
second but I have gone slower to 1/15th second without any problem.
The 20mm lens suffers from flare or coma on the edge of bright lights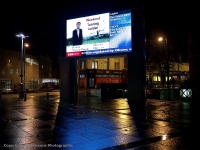 at night,
not all lights but it can be a nuisance. This condition improves as the
aperture is closed towards f8 but never really goes away. It is not my
UV filter as it remains without it - others on the Internet have
experienced/reported the same problem. at night,
not all lights but it can be a nuisance. This condition improves as the
aperture is closed towards f8 but never really goes away. It is not my
UV filter as it remains without it - others on the Internet have
experienced/reported the same problem.
It is by no means a deal breaker
(for me) as the lens more than makes up for this short fall with so many
other great images. You can see this in this image it is called 'Festival Square' and you can see the flare on
the lamp posts to the right and left of the picture.
The 'Festival Square' like all my night images was shot
hand held and similarly I have taken a lot
more 'night' shots where this problem does not appear.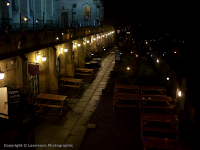
This 20mm lens night shot of the 'Peace and Rescue Centre' was taken
'hand held' at ISO:400, aperture f1.7 and shutter at 1/40th second.
There are a lot of lights but I don't see any coma in them.
The following shot was taken of a bus at a stop and right in front of it
was a red traffic light which reflected back along the side of the bus.
The 20mm handled the shot very well and I captured the image 'hand held'
at ISO:400, aperture f1.7 and shutter at 1/30th second.
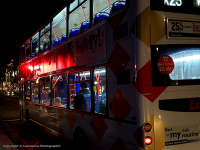 I
think the depth of field is amazing for f1.7 and the bus and the
passengers display a very reasonable resolution and image quality. I
think the depth of field is amazing for f1.7 and the bus and the
passengers display a very reasonable resolution and image quality.
I shoot 'RAW' files and to obtain the maximum image quality, I process
them in Adobe Lightroom Version 3. I am not keen on PP but if you want
the maximum out of this little camera's RAW files then post processing
is important.
Just like any other lens at 20mm there is a limit to what it will
resolve - especially with very distant subjects. This is usually an
issue when the digital display or final print is OVER enlarged and the
distant areas of the image can become water coloured in effect as
opposed to a clear resolution.
GF1 +
20mm f1.7 Lens -
Ease of Use
GF1 -
Menu + Control Dial Settings Window
The Panasonic
GF1 Digital Camera, the Panasonic
DMW-LVF1E
'External Live' Viewfinder and
the Panasonic 20mm f1.7 Autofocus Lens provide an
excellent combination for capturing 'everyday' images. Although I tend
to find myself using the LCD more and more with this lens as it is so
easy to use. I have become accustomed to the LCD and I have learned to
manual focus (tweak) the AF lens when required but the external
viewfinder is a great backup.
This GF1
kit is not that compact, it is 'never the less' the neatest solution
that I have used (so far) that provides excellent image quality. I set-up the
GF1 similar to a small rangefinder camera and fitted a small wrist strap
to it. It is very discreet and smaller than a Leica M Series Camera. I
cannot fault the GF1 - the combo delivers a 'great buzz' when taking
pictures and the image quality is 'top end' between ISO:100-400 and
remains excellent at ISO:800. I do not see it as a replacement for my heavier Canon DSLR
equipment but it is an excellent addition.
________________________________________________________________________
Why Use a
Nikon 50mm f1.4 AI-s Lens?
I
have the Panasonic 20mm f1.7 Autofocus Lens (40mm field of view) for
everyday use and it produces excellent image quality. I thought that
perhaps a 50mm Prime Lens would be a nice addition? The question I have to
ask myself.........is there any benefit in using a 50mm (100mm field of
view) manual lens with a GF1 2x crop sensor camera?
I have
listed my reasons below:-
-
I
already have the lens (A second hand 'mint' one costs about £240)
-
It has excellent image quality
-
Its a
manual
focus lens with fixed aperture settings on the
barrel
-
Its excellent for bokeh images
(f2.8 - f8)
-
It has a reasonable 'field of
view' for portraits (no need to crop the image)
-
Its good for isolating and
pulling in images (e.g. people in crowds and distant scenes)
-
Its lightweight and relatively small
-
I love the handling of the lens
Voigtlander
(Nikon F to Micro 4/3rds) Adapter
This is a
black metal adapter which snaps into the GF1 camera lens mount (same as
the Panasonic Micro 4/3rds Lenses are fitted into the GF1 Camera) and
the Nikon F 50mm f1.4 AI-s Lens snaps into the front of the adaptor
(same as if it were being fitted onto a Nikon Camera). The adapter has a
small side ridged chrome lever (instead of a button) to press to
release the Nikon Lens. The adapter section which is visible (once
fitted to GF1 and with Nikon lens fitted) is 27mm or 1.06 inches.
The main visible part is black and 25mm in size plus a small visible
chrome part (nearest the lens back) about 2mm.
The
Voigtlander adapter is fitted clockwise into the GF1 lens mount and the
Nikon F lens is fitted counterclockwise into the Voigtlander adapter
(reverse procedure for removal).
The
Voigtlander F Adaptor performed flawlessly and reached all my
expectations.
GF1+Nikon 50mm Lens - Ease of Use
GF1 -
Menu + Control Dial Settings Window
The Panasonic
GF1 Digital Camera, the Panasonic
DMW-LVF1E
'External Live' Viewfinder, the Voigtlander Adapter and
the Nikon 50mm f1.4 AI-s Manual Lens provide an
excellent combination for capturing (100mm field of view) images. I
set-up the GF1 similar to a small rangefinder camera. The
only downside with the adapter, the lens and a UV filter is the overall
size, which is 75mm or 2.95" from the front edge of the UV filter
(lens focus retracted) to the
camera body. When the lens is focused for close up subjects the
additional maximum increase is 8mm - never the less, the combo is
excellent.
When I was using the
LCD screen, I found the GF1 very difficult to hold steady and to
manually focus my Nikon lens, especially when I was increasing the focus
magnification. I found that using the Panasonic
DMW-LVF1E 'External Live' Viewfinder was a better option.
I
initially experienced an Infinity
Focus Malfunction with the
Nikon 50mm f1.4 AI-s Lens but finally after many tests, I tracked down
the causes.
-
The Nikon 50mm Lens with the Voigtlander
Adapter and the GF1 Camera at aperture f1.4
does not reach infinity focus at the hard stop on the lens barrel -
it is actually an almost 'immeasurable distance' just before the
hard stop and when placed in the hard stop position the lens is
'very slightly' out of focus. This does not occur with the other
aperture settings as the 'depth of field' increases whereby the hard
stop is at infinity focus.
-
When using a B+W '2 stop' graduated (screw
circular) 52mm filter on the naked lens - the lens is thrown
seriously out of focus in the final captured image. This is even
after 'manually focusing' the lens/graduated filter and reaching a
fine focus using the 'magnification function' of the camera and the
LCD - a heavy tripod was also used.
I have
checked with my GF1 supplier who has confirmed the 'same error' when
using an ND Filter on the GF1 with his own manual lenses. My B+W 2
stop gray grad filter on the Panasonic 20mm f1.7 Lens does not
produce any focus problems in the captured image (at any distance).
If
there is any Golden Rule - it is to always
'manually focus' the lens - even with shots that are thought to be an
infinity hard stop setting.
Initial
tests revealed that for 'manually focused' infinity shots -
the GF1 with the Voigtlander Adapter and the Nikon 50mm f1.4 AI-s Lens
delivers reasonable image quality at f2, excellent at f2.8 to f4,
optimum at f5.6 and f8, excellent at f11 and reasonable at f16. At f1.4
the lens produces a slight dreamy effect but also a
reasonable image quality.
CA is apparent between f1.4 and f4 - I think it properly disappears
at f5.6 and is gone through to f16. The f5.6 and f8 apertures seem to be
the sweet spots for resolution and a sizeable depth of field. I also
compared tests with the naked lens and the lens fitted with an B+W UV
filter - I could not measure any difference in image quality.
After
using the 14-45mm zoom lens, I really started to wonder why I was
prepared to use my Nikon 50mm f1.4 manual focus lens and MFT adapter when
both the 20mm and the 14-45mm made my casual photography so easy - even
using the GF1 like a rangefinder (in single area AF mode) both
lenses were a sheer pleasure to use over the manual focus of the
Nikon 50mm Lens. Also the image quality of the 14-45mm lens at 90mm
field of view was very close to the Nikon.
I
debated that the wide f1.4 aperture of the Nikon was a reason for
taking the manual focus lens route but then the Nikon lens is difficult to use 'hand held' in very low light due to the
100mm field of view and the required shutter speed to capture an
image
- this was vastly outweighed by the flexibility of the Panasonic
20mm f1.7 Lens in low light, even in night conditions. I could use
my feet to close the gap between Panasonic's 40mm and Nikon's 100mm
field of view or use my Lumix 14-45mm OIS Zoom Lens which also
offered excellent image quality.
Nikon 135mm f2.8 AI-S Manual Focus Lens
In August 2010, I purchased a
'second hand' Nikon 135mm f2.8 AI-s manual focus
lens, for my Nikon FM3a 'Film' SLR Camera which I also intended to use
with the GF1.
This second hand 'mint' Nikon 135mm lens is as small as it gets with a
52mm filter size.
It
completed my 3 lens set-up for the Nikon FM3a with it's native 135mm
focal range and offered the GF1 a
compact 'prime' telephoto lens with a 270mm field of view for hand held photography.
It ticked all the boxes, small size, light
weight, optically 'near' perfect with its own 'sliding out' metal hood.
When the lens is fitted to my Voigtlander MFT/Nikon F Adapter and is
fixed to the camera, it measures 4.5" from the front of the GF1 to the front of the lens
which also has a 52mm B+W MRC UV filter
fitted, 5.25" fully extended for close ups and 5.75" fully extended for
close-ups with the hood slipped out.
I was looking forward to using the Nikon 135mm with the GF1 but initial
tests capturing 'hand held' shots with the combo were very
unsatisfactory. I was able to focus, even with the GF1 magnification but
the shutter speed had to be in excess of 1/500th second to capture even
a static image without camera shake. To guarantee every shot and
especially at f2.8, I would realistically have to be at a minimum of
1/1000th second.
At f2.8 the depth of field with close ups was 'paper thin' and
realistically I had to shoot an aperture of f5.6 to achieve a quality
image with a reasonable depth of field and still retain a good 'bokeh'
background. I found that with the weather in Scotland, I was up at
ISO:400-800 to maintain the shutter speed at apertures of f5.6 and f8.
The lens was excellent in very 'bright and sunny days' when I could get
the ISO down to 200 and even 100. In the long run, it made no sense for
the GF1 and I would have been better with the Panasonic 14-140mm or the
45-200mm OIS Lenses.
The Nikon 135mm f2.8 Lens was purchased primarily for my Nikon FM3a
'Film' SLR Camera and thankfully at it's native 135mm it is a good
match. I will not be using it on the GF1.
________________________________________________________________________
Leica
M Lenses + Manual Focus + Legacy Lenses
I had thought
that the GF1 could be an alternative solution to the 'Full Frame' 35mm Sensor Leica M9 - even although
I had known that Leica M Lenses on the GF1 would be seriously
compromised in fulfilling their focal length design and aperture depth
of field, due to the x2 crop of the GF1 sensor. I cannot see me using
Leica lenses below 35mm (70mm field of view) and without 'image
stabilization' M Lenses above 50mm in the 75mm or 90mm focal length would be difficult
to hand hold and manually focus on the EVF of the GF1
at an aperture of f2. Certainly they would be a very expensive
indulgence with the compromised handling - a small/light monopod would
be a pre-requisite.
Having said all of
that, there is part of me that wishes the GF1 had a larger and built in
viewfinder with the body of the camera slightly larger for handling - it
should have built in image stabilization that could be switched on/off
and then I would seriously consider buying and using the Leica 75mm APO
M Lens (especially for black and white photography).
________________________________________________________________________
Panasonic 14-45mm f3.5 - f5.6 OIS Lens
The Panasonic 14-45mm
f3.5 - f5.6 OIS Lens has arrived and I fitted a new B+W 52mm MRC UV
Filter on the front. The lens thread is plastic but the metal B+W filter
fitted without any problem and seems very snug. The lens hood is very
well made and fits very easily on the special groove on the lens - you
can also reverse the hood and fit it backwards on the lens for carrying.
Unfortunately when you leave it fitted backwards and also attempt to use
the lens on the camera the hood blocks your fingers getting to the zoom
ring. This is not a deal breaker for me as I will use it properly fitted
on the front of the lens - the set-up still remains relatively compact
and very light.
I am very impressed
with the compact size and weight of the 14-45mm lens, the build quality
is excellent and the zoom is very smooth in operation - all in all it
seems excellent value for the money. The rig is so light in my hand that
I will continue with my wrist strap as opposed to using the supplied GF1
neck strap.
I am looking forward
to testing this lens and I hope that it will 'cut the mustard' and offer
excellent handling and great image quality - time will tell.
Panasonic GF1 +
14-45mm Lens V Canon 5D + 24-105L Lens
My initial tests confirm that the 14-45mm lens is indeed terrific value
for the money. I tried it out alongside my Canon 5D which was mounted
with my Canon 24-105mm f4 L Lens and was pleasantly surprised to find
that at ISO:100 the Panasonic 14-45mm resolution and image quality, was
'very near' equal to the Canon 5D combo.
 It also was 'very near' equal for IQ at 45mm (90mm field of view) with the adapted Nikon
50mm f1.4 'Prime' Lens on the GF1. It also was 'very near' equal for IQ at 45mm (90mm field of view) with the adapted Nikon
50mm f1.4 'Prime' Lens on the GF1.
The downside is that the 'dynamic
range' of the GF1 cannot match my Canon DSLRs but having stated that the
DR can be dramatically improved by capturing 'RAW' files and using 'RAW'
file conversion post processing software such as Adobe Lightroom 3 or
SilkyPix which is bundled with the GF1.
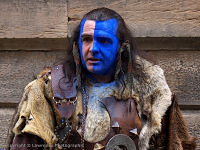
This image of 'Braveheart at the Royal Mile' was shot using the 14-45mm
lens, at 45mm (90mm
field of view) and ISO:100, Aperture f5.6 and shutter 1/80th second.
The GF1 with the 14-45mm zoom lens and it's
sibling 'prime' the 20mm f1.7 Lens make a very nice match for everyday use and low light photography.
It offers a superior solution than a digital compact camera.
Panasonic 14-45mm f3.5 - f5.6 OIS Lens
- Optimum Image Quality
In my opinion the GF-1 and the Lumix 14-45mm f3.5 - f5.6 OIS Lens
will deliver 'optimum' image quality at the following focal lengths and aperture settings
-
14mm (28mm FOV) - f4 Optimum f3.5/f5.6/f8 Excellent
f11 Reasonable f16/f22 Poor
18mm (36mm FOV) -
f3.9/f4/f5.6 Optimum f8 Excellent
f11 Reasonable f16/f22 Poor
25mm (50mm FOV) -
f4.9/f5.6 Optimum f8 Excellent f11/f16/f22 Poor
35mm (70mm FOV) -
f5.5/f5.6 Optimum f8 Fair f11/f16/f22 Poor
45mm (90mm FOV) - f5.6 Optimum f8 Fair f11/f16/f22 Poor
For image
samples from my GF1 camera -
GF1+14-45mm Stills Video
"NEW"
I captured this image of 'The
Bosphorus' in Istanbul
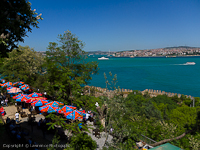 at 14mm (28mm field of view) with ISO:100,
aperture f5.6 and shutter 1/1250th second. The resolution at 14mm of the
14-45mm Lens held
up very well both in the foreground and in the distance. at 14mm (28mm field of view) with ISO:100,
aperture f5.6 and shutter 1/1250th second. The resolution at 14mm of the
14-45mm Lens held
up very well both in the foreground and in the distance.
The Bosphorus image was developed in Adobe Lightroom 3 with very little contrast
and saturation applied. I applied extra sharpness using Canon's DPP
Software.
This church a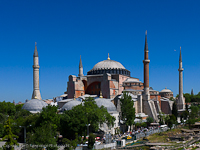 nd at one time a mosque in Istabul,
Turkey which I called 'The Ayasofa Church in the Sunlight' was taken at
20mm (40mm field of view) with the 14-45mm lens at ISO:100, aperture
f5.6 and shutter at 1/1600th second. nd at one time a mosque in Istabul,
Turkey which I called 'The Ayasofa Church in the Sunlight' was taken at
20mm (40mm field of view) with the 14-45mm lens at ISO:100, aperture
f5.6 and shutter at 1/1600th second.
It was developed in Adobe Lightroom 3 with very little contrast and
saturation applied.
I took the shot using 23 area auto focusing and the zoom was a sheer
pleasure to use. All the 14-45mm shots were taken with the lens hood
fitted but this did not pose any problem and the compactness of the kit
remained very good and very light to handle and carry in my hand.
Initial tests are
revealing that for every day casual shots,
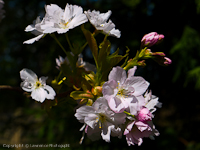 at 14mm (28mm field of view) the lens
is best left at aperture f4 and as it zooms in towards 45mm (90mm field
of view)
it automatically rises to f5.6 (closes down the aperture) which
maintains the optimum image quality throughout the zoom. I captured the
'flower' shot at 45mm (90mm field of view). The other settings were
ISO:100, aperture f8 and the shutter at 1/800th second. The depth of
field is excellent and the 'out of focus' is very attractive. at 14mm (28mm field of view) the lens
is best left at aperture f4 and as it zooms in towards 45mm (90mm field
of view)
it automatically rises to f5.6 (closes down the aperture) which
maintains the optimum image quality throughout the zoom. I captured the
'flower' shot at 45mm (90mm field of view). The other settings were
ISO:100, aperture f8 and the shutter at 1/800th second. The depth of
field is excellent and the 'out of focus' is very attractive.
I normally use the 14-45mm set at f4 for the wider '14mm' end of the
zoom and I prefer f5.6 for the long '45mm' end of the zoom (when I can).
For maximum depth of field at 14mm (28mm field of view) to 25mm (50mm
field of view) with a
good balance of image quality - I use aperture f8. The lens is
weak at f11 towards f22 but I doubt very much that Print
Sizes up to 8" x 6" would display any of the diffraction weaknesses of
this zoom lens.
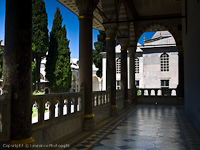
This
image of the women walking in the grounds of the Topkapi Palace,
Istanbul was taken at full 45mm zoom (90mm field of view) ISO:100, aperture f5.6 and shutter at 1/1600th
second.
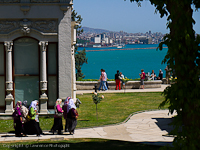 The image was processed in Adobe Lightroom 3 with very little
applied, some contrast and more colour saturation. It provides a good
indication of the resolving power of the lens as both the foreground and
the distant buildings have decent image quality. The image was processed in Adobe Lightroom 3 with very little
applied, some contrast and more colour saturation. It provides a good
indication of the resolving power of the lens as both the foreground and
the distant buildings have decent image quality.
LR3 is great for
'flash' gallery webs but I also
sharpened this image some more using Canon's DPP Software. It is
probably over sharpened but at least it lets you see what the GF1 with
the 14-45mm zoom lens can deliver.
Where
the 14-45mm must be
treated with respect is in it's ability at 14mm
(28mm field of view) to resolve distant subjects (far
horizons) - this may impose 'limitations on the final size' of digital
display and print capabilities, as the image quality of those distant
subjects may deteriorate to a water colour effect if OVER enlarged.
Panasonic seems to
have achieved the impossible and produced a zoom lens in a 'kit offering'
that is level with lenses from other manufacturers which cost
considerably more money.
GF1 and 14-45mm Lens-
Ease of Use
GF1 -
Menu + Control Dial Settings Window
The Panasonic
GF1 Digital Camera, the Panasonic
DMW-LVF1E
'External Live' Viewfinder and
the Panasonic 14-45mm f3.5/f5.6 OIS Autofocus Lens provide an
excellent combination for capturing 'everyday' images.
 This
image was captured in Istanbul at the waterfront with the 14-45mm set
to 23 area autofocus and zoomed to 36mm (72mm field of view). The other
settings were ISO:100, aperture f5.6 and shutter 1/2000th second. I tend
to find myself using the LCD more and more with this lens as it is so
easy to use and I have become accustomed to manually focusing (tweak) the AF lens when required.
The external
viewfinder is a great backup for when the sun blots out the LCD but the EVF is far from perfect. This
image was captured in Istanbul at the waterfront with the 14-45mm set
to 23 area autofocus and zoomed to 36mm (72mm field of view). The other
settings were ISO:100, aperture f5.6 and shutter 1/2000th second. I tend
to find myself using the LCD more and more with this lens as it is so
easy to use and I have become accustomed to manually focusing (tweak) the AF lens when required.
The external
viewfinder is a great backup for when the sun blots out the LCD but the EVF is far from perfect.
I tend to use my
Panasonic 14-45mm f3.5/f5.6 OIS Autofocus Lens very similar to my 20mm
f1.7 Lens (see the section on the 20mm lens above) and only ever
change the 1 area (spot) to 23 area autofocus on the odd occasion. I
find the 1 area (spot) is very accurate.
I cannot fault the GF1 and the Panasonic 14-45mm f3.5/f5.6 OIS Autofocus
Lens - the combo delivers a 'great buzz' when taking pictures and the
image quality is 'top end' between ISO:100-400 and remains excellent at
ISO:800. I do not see it as a replacement for my heavier Canon DSLR
equipment but it is an excellent addition.
________________________________________________________________________
Panasonic 100-300mm f4 - 5.6 OIS Zoom Lens
I ordered this lens on the 23rd March 2011. I
wanted a 'lightweight' and compact zoom lens to use for casual use at
the zoo, for nature reserves and hill walking.
I could have chosen a suitable 300mm zoom lens for my Canon 450D DSLR as
I had also been considering the Canon 70-300L and the Tamron 70-300mm VC
USD Lenses
but I wanted an 'overall' lightweight/compact system solution with two
other lenses in a small/medium sized shoulder bag.
Having given it considerable consideration,
I had to ask myself, what did I really want from a new 'lightweight'
300mm zoom lens -
-
The
300mm zoom lens had to be lightweight and compact but also
'light in overall combination' when fitted in a medium sized shoulder bag with other
'lightweight' lenses (at the very least one other 'prime' lens)
-
I must
be able to carry the 300mm zoom lens and camera combo around all day, either in my
hand or on a shoulder strap, without straining my old neck injury.
-
The
image quality has to be reasonable for 'hand held' shots as I have
decided that I do not want to carry a monopod or a tripod.
-
The
lens was not being purchased for 'niche' high end image quality photographic projects.
The Panasonic 100-300mm
f4 - f5.6 OIS Lens has arrived and I fitted a new B+W 67mm MRC UV
Filter on the front. The lens thread is plastic but the metal B+W filter
fitted without any problem and seems very snug. The lens hood is very
well made and fits very easily on the special groove on the lens - you
can also reverse the hood and fit it backwards on the lens for carrying.
When you leave it fitted backwards you can still work the zoom ring.
I am very impressed
with the compact size and weight of the 100-300mm lens, the high grade
plastic build quality
is excellent and the 'compound rubber' covered zoom ring is very smooth in operation - all in all it
seems excellent value for the money. The rig is so light in my hand that
I will continue with my wrist strap as opposed to using the supplied GF1
neck strap.
I am looking forward
to testing this lens and I hope that it will 'cut the mustard' and offer
excellent handling and great image quality - time will tell.
Panasonic 100-300mm f4 - f5.6 OIS Lens
- Optimum Image Quality
After I first tried out this lens, I was
quite prepared to send it back. It appeared soft, even blurred, especially at
300mm and displayed a great deal of noise in the images, even at
ISO:100. I was sure it was the lens that was 'flawed' especially as the
GF1 performed so well with my other two lenses.
What a mistaka to make, I was well and truly 'caught out' as I
was used to clean images from my Canon DSLR and also my other Lumix
lenses. I always shoot in 'RAW' file format for post processing to tiff and
jpeg using Lightroom software. The camera 'RAWS' were just that, very
RAW but Lightroom correctly applied, soon sorted them out!
The Lumix 100-300mm lens produces 'RAW' files with the GF1 camera which
have enormous latitude for development and 'noise reduction' plays a
very important part in the process; it is virtually conditional to
obtain the best results from the lens and camera. You would expect noise
reduction to ruin the 'optimum' image quality but strangely it does the
exact opposite. Having stated that, I must ensure that the noise and
colour reduction is applied sparingly and in some cases for exceptional
sharpness, I use Canon DPP Software (bundled with my Canon gear) to fine
tune and bring up the clarity. I created Lightroom noise reduction presets
with a GF1 profile for the range
of the zoom, 100mm, 200mm and 300mm to use as 'base' starting points. I
suspect that for those people who use camera jpegs, the camera
processing is applying the same techniques. Lightroom software gives me
more advantage as I can fine tweak. One point of worthy note - with
subjects which have a firm bright 3D outline against a dark background I
have to watch that 'over sharpening' does not create a jagged or to firm
an outline.
For image
samples from my GF1 camera -
GF1+100-300mm Stills Video
"NEW"
I have not conducted any tests for 'in camera' jpegs - all my tests were
conducted with 'RAW' files processed in Adobe Lightroom Software and
finally sharpened with Canon DPP Software. I don't have any professional
sharpening software.
In my opinion my GF-1 and Lumix 100-300mm f4 - f5.6 OIS Lens
will deliver 'optimum' image quality at the following focal lengths and aperture settings
-
100mm (200mm FOV) -
f5.6 Optimum f8 Excellent
f4 Reasonable f11/f16/f22 Poor
200mm (400mm FOV) -
f8 Optimum f11 Excellent
f5.6 Reasonable f4.9/f16/f22 Poor
300mm (600mm FOV) - f8
Optimum f11/f16 Excellent
f5.6 Reasonable f22 Poor
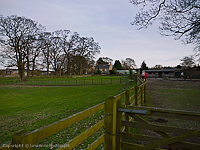
The above tests results were concluded from images of a local farm house that was
accurately measured out at 450 ft, 150 yards, 137 metres distance. A heavy
tripod was used with the camera self timer (image stabilisation was left on) and 'hand held' shots
were also taken. I also visited the Edinburgh Zoo and made extensive
tests with 'hand held' shots..............see
the Farm House, Extreme Distance, ISO:1600 and Zoo image samples below.
SilkyPix versus
Lightroom - 'RAW' File Post Processing
I have not used SilkyPix Software (bundled with the camera) with this
100-300mm lens but I have with my other lenses and the GF1 camera.
It
works similar to the camera engine for producing jpeg files and will
automatically reduce any noise and apply sharpening to a RAW image. With
SilkyPix, similar to Lightroom, I can 'tweak' the images even more. I am
sure that SilkyPix will work very efficiently with the 100-300mm lens.
100-300mm -
Resolving Limit - Taking the 'Hand
Held' Shot
Make no mistake, the Lumix 100-300mm lens is not
my Canon 300mm f2.8 IS L
Lens and it does not have the greater resolving distance of the Canon.
The Canon can resolve 'tack sharp' images in very low light at f2.8, it
is awesomely fast on the correct Canon DSLR, its tracking is inspiring
and its ability to separate a fast moving subject from the background at
distance is just incredible.
I
would not expect a Panasonic lens costing around £480 to match a £3.6K lens.
However, the Lumix 100-300mm is seriously impressive, it is lightweight
when coupled with my GF1, easy to carry around in one hand all day, a
joy to use, great for social occasions as it does not get in the way and produces awesome image
quality as long as you watch the limit and don't stretch it out to far.
I suspect with the new Panasonic GH2 camera, it will be even better!
My Golden Rule
- If the centre (spot focus) is moving around in the viewfinder on the
'primary' subject of focus, I try and steady my arm on a tree, fence or
any other object. If this helps but the focus spot is still not 'dead'
and I mean DEAD steady, I will raise the shutter speed well above the
minimums, I have specified below.
I tend to now operate at the
following minimum shutter speeds to maintain my image 'keeper' rate -
-
'Hand Held' at
100mm (200mm Field of View) - Minimum 1/200secs
-
'Hand Held' at
200mm (400mm Field of View) - Minimum 1/400secs
-
'Hand Held' at
300mm (600mm Field of View) - Minimum 1/650secs
I know that the GF1
and the 100-300mm lens can operate at lower shutter speeds on certain
subjects as the image stabilisation is excellent, especially when
shooting LARGE in the viewfinder stationery subjects.
Wildlife + Birding
(for fast 'catch' hand held shots) -
-
'Hand Held' at
300mm (600mm Depth of Field) - Minimum 1/1250secs
This lens (for me)
will be used to catch shots at the zoo and at nature reserves which will
be moving or could move - small birds seem to vibrate as they eat
because they are always nervous of predators. -
I will be using the 'smallest' centre
(spot) focus adjustment on the GF1 and endeavoring to keep the subject
as large in the viewfinder as possible at 300mm and the shutter at
1/1250secs or above (keeps the keeper rate up). I have tried the centre
'spot focus' on the GF1 in normal and 'reduced size' mode - both work
exceptionally well. I use the multiple weighted exposure metering mode.
The Limits of the
100-300mm Zoom Lens
I am prepared to stick my neck out and state that the 'optimum'
resolving power of the lens at 100mm, 200mm and 300mm is stretching to
the limit at 150 Metres for prints around 20" x 15". Thereafter the
part of the image 'in focus' gradually starts to dissolve into a water colour effect as I reach beyond that limit. You will never notice this
in 'everyday' average prints but it will be visible in larger prints.
The ISO rating plays an important part but I have successfully taken
300mm (600 FOV) images at ISO:800 which are very good at 137 Metres and
that was in average light!
If I stretch the 300mm limit out in warm days, I find the heat haze,
warps and waves my images rendering them useless but sometimes
interesting as an art form.
There is another limit which depends on the lighting available and that
is the ISO limit. With the GF1 and the 100-300mm lens I have obtained
excellent image quality at ISO:1600 in good daylight but the resolving
limit is dramatically reduced in poor light with dark areas and shadows.
Noise reduction has to be more heavily applied and if the distance is to
great then the image dissolves into water colour that much faster and
all the sharpening in the world cannot restore the quality - although
the effect on some images can be quite pleasing. I have included one
such image at ISO:1600 in my samples (picture of the rowing boat).
Please note for average family size prints this is a non issue, it is
more relative to larger print sizes!
Farm House Images (GF1+LCD+100-300mm
Lens - Heavy Tripod + Self
Timer)
I shot this 14mm (28mm FOV) image as a reference to compare against the
focal range of the Lumix 100-300mm OIS Lens. It was captured with the GF1+14-45mm Lens -
unfortunately it was taken at near dusk, so it is not that great. This
14mm image was captured a few days AFTER the images of the farm house
below, they were taken in good light. All the images were shot from the
same position.
GF1+14-45mm Lens - 28 Field of View Reference Image
These
images were taken using the GF1 LCD and the 100-300mm lens on a heavy duty
tripod and using the self timer. The distance for all three was exactly
450 feet (150 yards, 137 metres) - I know because I used a measuring
tape to measure it from the tripod to the front of the farm house wall.
This first image was taken with the lens set at 100mm (200mm field of
view), image
 stabilisation
set to ON and with the camera set to ISO:100, aperture f5.6 and the
shutter at 1/320secs. I used the normal size centre (spot) focus. stabilisation
set to ON and with the camera set to ISO:100, aperture f5.6 and the
shutter at 1/320secs. I used the normal size centre (spot) focus.
The image was processed in Lightroom using a GF1 camera calibration
profile with minor adjustments to saturation, brightness and noise
reduction. It was then sharpened for effect in Canon DPP Software.
This (f5.6) is the optimum image quality aperture at 100mm for the GF1 +
100-300mm lens combo (my copy).
This second image was taken with the lens set at 197mm (394mm field of
view), image
 stabilisation set to ON and with the camera
set to ISO:100, aperture f8 and the shutter
at 1/125secs. I used the normal size centre (spot) focus. stabilisation set to ON and with the camera
set to ISO:100, aperture f8 and the shutter
at 1/125secs. I used the normal size centre (spot) focus.
The image was processed in Lightroom using a GF1 camera calibration
profile with minor adjustments to saturation, brightness and noise
reduction. It was then sharpened for effect in Canon DPP Software.
This (f8) is the optimum image quality aperture at 197mm for the GF1 +
100-300mm lens combo (my copy).
This third image was taken with the lens set at 300mm (600mm field of
view), image
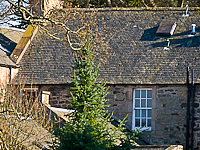 stabilisation
set to ON and with the camera set to ISO:100, aperture f8 and the
shutter at 1/100secs. I used the normal size centre (spot) focus. stabilisation
set to ON and with the camera set to ISO:100, aperture f8 and the
shutter at 1/100secs. I used the normal size centre (spot) focus.
The image was processed in Lightroom using a GF1 camera calibration
profile with minor adjustments to saturation, brightness and noise
reduction. It was then sharpened for effect in Canon DPP Software.
This (f8) is the optimum image quality aperture at 300mm for the GF1 +
100-300mm lens combo (my copy).
Farm House Images (GF1+EVF+100-300mm
Lens - Hand
Held)
This image
of the farm house was taken from the same distance as the tripod 300mm
image, with the GF1+EVF and the lens set at 300mm (600mm field
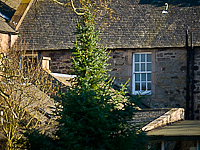 of
view), image stabilisation
set to ON and with the camera set to ISO:400, aperture f5.6 and the
shutter at 1/800secs. I used the normal size centre (spot) focus and the
combo was 'hand held'. of
view), image stabilisation
set to ON and with the camera set to ISO:400, aperture f5.6 and the
shutter at 1/800secs. I used the normal size centre (spot) focus and the
combo was 'hand held'.
In the 1,000 pixel re-sized example the image holds it's quality and
there is no sign of a 'water colour effect' in it.
The image was processed in Lightroom using a GF1 camera calibration
profile with minor adjustments to saturation, brightness and noise
reduction. It was then sharpened for effect in Canon DPP Software.
Although on my lens, f8 is the optimum image quality aperture at 300mm for the GF1 +
100-300mm lens combo, this f5.6 aperture delivery at ISO:400 is excellent.
This image
of the person in front of the farm house was taken from the
same distance as the tripod 300mm image, with the GF1+EVF and the lens
set at 300mm (600mm field of
view), image stabilisation
set to ON and with the camera set to ISO:800, aperture f5.6 a nd the
shutter at 1/1000secs. I used the normal size centre (spot) focus and
the combo was 'hand held'. nd the
shutter at 1/1000secs. I used the normal size centre (spot) focus and
the combo was 'hand held'.
In the 1,000 pixel re-sized example the image holds it's quality and
there is no sign of a 'water colour effect' in it.
The image was processed in Lightroom using a GF1 camera calibration
profile with minor adjustments to saturation, brightness and noise
reduction. It was then sharpened for effect in Canon DPP Software.
Although on my lens, f8 is the optimum image quality aperture at 300mm for the GF1 +
100-300mm lens combo, this f5.6 aperture delivery at ISO:800 is excellent.
You can even read the 'Karcher' text on the box behind the window.
Extreme Distance Images (GF1+EVF+100-300mm
Lens - Hand Held)
I went down to the
beach near Port Seton and tried the GF1+EVF+100-300mm Lens combo (hand held)
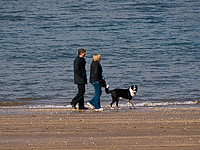 at 300mm for 'long distance' people shots. The two images in this
section
are
heavily cropped and the subjects show signs of the 'water colour effect creeping in. It is obvious in the backgrounds but the
subjects hold up reasonable well. at 300mm for 'long distance' people shots. The two images in this
section
are
heavily cropped and the subjects show signs of the 'water colour effect creeping in. It is obvious in the backgrounds but the
subjects hold up reasonable well.
This first image was taken with the lens set at 300mm (600mm field
of
view), image stabilisation
set to ON and with the camera set to ISO:200, aperture f8 and the
shutter at 1/1000secs. I used the smaller centre (spot) focus on the
woman's body and the combo was 'hand held'.
In the 1,000 pixel re-sized example it shows the 'water colour effect'
in the subjects, especially the man's head. This is more apparent in
larger print sizes.
The figures in the image are just over a 1/3rd of the height of the
image but in the 'non cropped' original they are about a quarter of the image in
height.
The image was processed in Lightroom using a GF1 camera calibration
profile with minor adjustments to saturation, brightness and noise
reduction. It was then sharpened for effect in Canon DPP Software.
This second
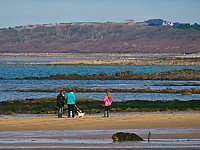 image was taken with the lens set at 300mm (600mm field of
view), image stabilisation
set to ON and with the camera set to ISO:200, aperture f8 and the
shutter at 1/1000secs. I used the smaller centre (spot) focus on the
centre figure and the combo was 'hand held'. image was taken with the lens set at 300mm (600mm field of
view), image stabilisation
set to ON and with the camera set to ISO:200, aperture f8 and the
shutter at 1/1000secs. I used the smaller centre (spot) focus on the
centre figure and the combo was 'hand held'.
The figures in the image are just over a 1/5th of the height of the
image but in the 'non cropped' original they are about a 1/7th of the image in
height.
In the 1,000 pixel re-sized example it just shows the 'water colour effect' in the
figures but it is more apparent in larger print sizes.
The image was processed in Lightroom using a GF1 camera calibration
profile with minor adjustments to saturation, brightness and noise
reduction. It was then sharpened for effect in Canon DPP Software.
ISO:1600 Images (GF1+EVF+100-300mm
Lens - Hand
Held)
These
two images are at different ends of the light spectrum. The boat was
shot in very dark shaded conditions whilst the seal was basking in the
sun.
This
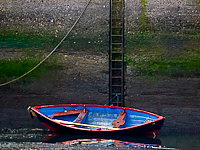 image
of the boat was taken with the lens set at 300mm (600mm field of
view), image stabilisation
set to ON and with the camera set to ISO:1600, aperture f8 and the
shutter at 1/1250secs. I used the smaller centre (spot) focus on the
centre of the boat and the combo was 'hand held'. I could have lowered
the ISO rating and the shutter speed but I wanted to test ISO:1600. In
fact in the 'RAW' file the dark shadows under the boat were starting to
break up so quite a bit of noise reduction was required to smooth them
out. image
of the boat was taken with the lens set at 300mm (600mm field of
view), image stabilisation
set to ON and with the camera set to ISO:1600, aperture f8 and the
shutter at 1/1250secs. I used the smaller centre (spot) focus on the
centre of the boat and the combo was 'hand held'. I could have lowered
the ISO rating and the shutter speed but I wanted to test ISO:1600. In
fact in the 'RAW' file the dark shadows under the boat were starting to
break up so quite a bit of noise reduction was required to smooth them
out.
In the 1,000 pixel re-sized example it starts to show 'water colour effect' in the
boat, the mud and the wall, but it is more apparent in larger print
sizes - I quite like it!
The image was processed in Lightroom using a GF1 camera calibration
profile with minor adjustments to saturation, brightness and noise
reduction. It was then sharpened for effect in Canon DPP Software.
This (f8) is the optimum image quality aperture at 300mm for the GF1 +
100-300mm lens combo (my copy).
This image
of the seal was taken with the lens set at 300mm (600mm field of
view),
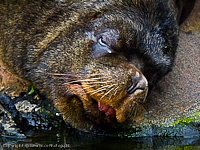 image stabilisation
set to ON and with the camera set to ISO:1600, aperture f5.6 and the
shutter at 1/640secs. I used the normal size centre (spot) focus on the
eye and the combo was 'hand held'. image stabilisation
set to ON and with the camera set to ISO:1600, aperture f5.6 and the
shutter at 1/640secs. I used the normal size centre (spot) focus on the
eye and the combo was 'hand held'.
In the 1,000 pixel re-sized example this image holds up very well for an
ISO:1600 shot.
The image was processed in Lightroom using a GF1 camera calibration
profile with minor adjustments to saturation, brightness and noise
reduction. It was then sharpened for effect in Canon DPP Software.
Although on my lens, f8 is the optimum image quality aperture at 300mm for the GF1 +
100-300mm lens combo, this f5.6 aperture delivery at ISO:1600 is excellent.
You can even see the roughness of the big guys tongue.
Some Image Samples
(Hand Held)
These are samples of 'everyday' shots at the local zoo. They were
all taken with the GF1+EVF+100-300mm Lens combo 'hand held' with the exception of the seagull which was taken
with the camera and 100-300mm lens using the LCD on a lightweight monopod. I soon got
fed up with that...............the lens was purchased for carrying around
on the GF1 and the monopod was just an inconvenience that my girlfriend
and I did not want..............I was carrying the camera in one hand
and the monopod in the other! I had made up my mind,
if the lens at 300mm (600mm field of view) could not be used 'hand held.
it was going back to the dealer.
I am cutting back on the text in this section so all the shooting information is on the
1,000 pixel size plates. All the images were processed in Lightroom using a GF1 camera calibration
profile with minor adjustments to saturation, brightness and noise
reduction. They were then sharpened for effect in Canon DPP Software.
The full GF1+100-300mm Zoo Collection is in my Stock Section
under
Edinburgh Zoo - check the captions for the GF1 images.
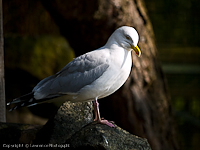
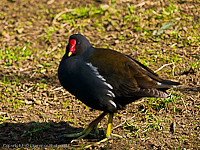
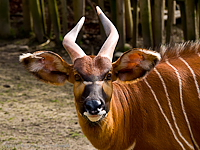
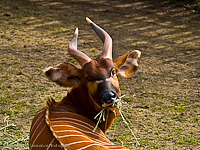

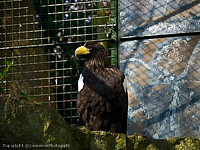
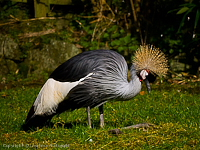
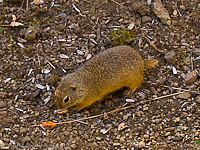
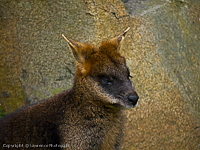
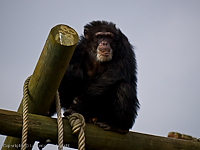
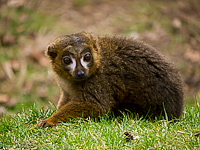
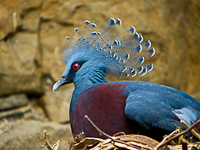
These are samples taken at my home at
Hermiston. They were taken with the GF1+EVF+100-300mm Lens combo 'hand
held' and with the B+W MRC UV filter and hood fitted.
The image of the 'Ringneck' doves has been slightly cropped. The
image of the small black dog 'Tasha' at the side of the green hut was
shot with the dog running towards the camera - she was chasing rabbits
and running around the hut at full speed.
More information + additional image samples -
Lumix 100-300mm Lens
(Jump Window)
Waterproof Shoulder Bag - Lowepro Nova 140AW -
Small to Medium Sized!
I have now progressed to a Lowepro
Nova 140AW shoulder bag which carries the
GF1 with it's external viewfinder clipped on and mounted with either my
Lumix 20mm f1.7 lens or the 14-45mm zoom lens with the spare lens placed
under the combo. The 100-300mm zoom lens sits on its own in the other
compartment. The
front zip pouch carries my filters and accessories. There are net
pouches at each (outside) end of the bag for carrying other accessories
or a water bottle.
This bag is very 'snug' with all the kit and is probably as small as I
can get.........it also has a 'pull out' waterproof cover!
NOTE: Although the bag can take the GF1+EVF+100-300mm combo,
placed in the bag, lens downwards, it is a snug fit against the lid and
the bottom of the bag is forced down into a slight bulge which could be
damaging if the bag is dropped or placed on a work surface to hard.
The Nova 140AW is probably short in depth by
about 1". (140AW inside dimensions - 6.7" x 3.9" x 6.7" and weighing in
at 440g). I have checked virtually all the bag manufacturers and the
jump to a shoulder bag that can take the
GF1+EVF+100-300mm combo 'safely' is quite large.
GF1+100-300mm Lens-
Ease of Use
GF1 -
Menu + Control Dial Settings Window
The Panasonic
GF1 Digital Camera, the Panasonic
DMW-LVF1E
'External Live' Viewfinder and
the Panasonic 100-300mm f4/f5.6 OIS Autofocus Lens provide an
excellent 'balanced' combination for capturing images. I tried the LCD
for composing but for hand held shots, it is to difficult for me to hold
the rig steady enough and zoom at the same time - okay for planned shots
with time for preparation or for using on a tripod.
I tend to use my
Panasonic 100-300mm f4/f5.6 OIS Autofocus Lens very similar to my 20mm
f1.7 Lens (see the section on the 20mm lens above) and find the 1 area (spot) is very accurate.
For smaller subjects and subjects within tree branches, I change the centre focus point from normal to a
'reduced' size.
I cannot fault the GF1 and the Panasonic 100-300mm f4/f5.6 OIS Autofocus
Lens - the combo delivers a 'great buzz' when taking pictures and the
image quality is 'top end' even up to ISO:1600, providing I watch my
subject size, distance limitations and shutter speed. I do not see it as a replacement for my heavier Canon
300mm lens but it is an excellent addition for lightweight ease of
use............a real pleasure to cup the combo in my hand with my wrist
strap on the GF1.
GF1+100-300mm Lens Combo - Carrying Concern!
The 100-300mm
lens has a 'very slight' play in the outer lens tube to the inner lens
tube and when I am carrying it, I can feel a slight movement/vibration
in my hand. This is not uncommon with zoom lenses of this type. I have
checked on the forums and this 'play' is a normal part of the 'manufacture' and not a fault.
The GF1
because of it's size and the way I carry the combo (the lens always
cupped in my right hand with the lens horizontal) probably makes the
play/vibration more noticeably when I am walking over rough ground. From
now on I will carry the lens 'off' the horizontal as I do not want to
subject the 'tube buffers' to any unnecessary stress.
When
using the combo there is no problem and the lens is great fun. In fact
the 100-300mm is one of the most enjoyable lenses, I have ever
purchased.
________________________________________________________________________
Conclusions
Current Use
Since November 2009, I have come a long way with the little GF1 and its
two lenses.
When correctly used and especially shooting 'RAW' images, the GF1 + 20mm
f1.7 lens combo is
outstanding. Its handling, weight and the IQ it delivers is superb. It is
not compact and it is not going to fit easily into a jacket pocket. When
I first purchased the combo, I used a Lowepro 60AW (shoulder/belt) bag
with mine.........that was the neatest bag I could get my hands on but
it was in no way small. I was forced to purchase the external viewfinder
as the LCD outdoors was often very faint in the light. This increased
the size of the combo and because I wanted to leave the EVF fitted for
ease of use, this added size to the top of the camera and it was not
much smaller overall than a Panasonic GH2.
I liked
the GF1 so much, I bought the Lumix 14-45mm Lens and ended up with a
slightly larger bag - all still very neat, lightweight but certainly not
a small size. The downside - it has grown large on me (literally) and I
often found
myself asking - is it really that much more compact than my Canon 450D
kit.......although it is much lighter in weight.
I
have tried compact digital cameras a few times but I have never been
happy with them. The GF1 for me is still the best 'CURRENT' small
option and if I did not have a large investment in Canon kit, I
would be more than content to JUST use the GF1 with it's 20mm f1.7 lens
and 14-45mm zoom lens in a small bag with all the accessories, very
lightweight and compact.
I recently used (October 2010) the GF1 + Lumix 20mm f1.7 Lens for a
project at the National Museum of Scotland which consisted of 'hand
held' indoor shots at mainly ISO:400. The subsequent article - 'The GF1
in the Museum' - can be found on my articles page. It was great to use
the GF1 in it's RAW state, without the external viewfinder..........a
real pleasure!
The Panasonic 20mm f1.7
and the 14-45mm f3.5 - f5.6 OIS lenses are a perfect match for the GF1 - both are small,
compact, light weight and very easy to 'autofocus' for my choice of 23 area or single area
AF. These lenses encourage me to use the LCD and when the light blocks it
out, the external viewfinder offers the ability to capture those
difficult shots - although
the EVF is far from being an ideal solution.........sadly, I have grown
to dislike it.
The GF1 is an
excellent small camera for street photography. I find myself using the
exposure AE lock button for most of my shots with the LCD (default
mode LCD setting) and using the external viewfinder only when I have
to. I use the GF1 like a small
rangefinder with the 20mm f1.7 lens for
'precise' subject focus using centre area autofocus or in hyper focal
mode for pre-determined areas of focus. Also, with either the 20mm f1.7
or the 14-45mm zoom lens I can use it just like a small DSLR with 23
area focus for fast snap shots. The kit is very flexible with its LCD
and/or the external 'swivel' viewfinder for discreet 'candid' shots.
For travel, I
normally take my Canon 5D DSLR + Canon 24-105mm IS L Lens but in 2010, I opted to try out the GF1 + 20mm f1.7 Lens and 14-45mm f3.5 - f5.6 OIS
Zoom Lens for a May holiday in Turkey. Overall the GF1 kit behaved very
well and I managed to get a few 'standard' holiday images in the first
few days but then I caught a stomach bug and that sadly, put paid to my
photography. I developed the RAWs in Adobe Lightroom - you can jump to
the Istanbul Image Gallery at the top of this page or further down.
Manual focus lenses
and legacy lens adapted for the GF1 are not for me - at least not on
this current GF1 model. Originally I thought
this was a great idea but
it is very easy to lose
sight of why I purchased a GF1 digital camera and it's AF lenses in the
first place.
I now accept that this incredible 'small' digital camera is purchased
for what it is - and not - for what I wish it could be. It was to be an
alternative to a digital compact and coupled with the Panasonic 20mm
f1.7 AF Lens, to deliver optimum image quality in a good 40mm field of
view, within a controllable depth of field and especially in low light.
It delivers all of that and some.
My additional purchase of the 'very neat'
Panasonic 14-45mm f3.5/f5.6 OIS AF Lens has taken the GF1 a step further
than the idea of a compact camera but never the less the focal range
(28mm-90mm field of view) and the image quality that the GF1 delivers,
makes it well worth carrying the GF1 plus the 20mm and the 14-45mm
lenses.
I have often
stated that I would never increase my GF1 kit but I wanted an 'everyday'
solution for 'casual and social use' which included visits to the zoo,
where I am a member and also for nature reserve rambling with friends
and hill walking with the dog. I decided on the 'lightweight' GF1 route,
purely for the 28mm-600mm field of view I required.
On the 23rd
March 2011, I purchased a Panasonic Lumix 100-300mm f4-5.6 OIS Zoom Lens
to add to my MFT System and for casual use at the zoo, nature reserves
and for hill walking.
I cannot fault the GF1 and the Panasonic 100-300mm f4/f5.6 OIS Autofocus
Lens - the combo delivers a 'great buzz' when taking pictures and the
image quality is 'top end' even up to ISO:1600, providing I watch my
subject size, distance limitations and shutter speed. I do not see it as a replacement for my heavier Canon
300mm L lens but it is an excellent addition for lightweight ease of
use............a real pleasure to cup the combo in my hand with my wrist
strap on the GF1.
Dynamic
Range Problems
The GF1
is no different to other digital compact cameras. Any small compact that
produces RAW and/or Jpeg images can experience
just as much
difficulty with dynamic range........blown highlights, dark foregrounds
and difficulty in exposing 'very unevenly' lit scenes........even DSLR
cameras suffer from DR 'handling' problems. To achieve
optimum performance, I always shoot 'RAW' image files and post process
them to tiff or jpeg using SilkyPix or Adobe Lightroom 3 Software for
the best results.
In
difficult and 'very uneven' light conditions,
I use a B+W '2 stop' gray graduated filter with my AF lenses on the GF1
to open up the dynamic range. I also shoot
bracketed shots and select the optimum one for best exposure.
Adobe Lightroom 3 - Web
'HTML' Galleries
I now
use Adobe Lightroom
for all my post processing. Simon Young
emailed me a GF1.dcp camera calibration profile and now Lightroom 3 is my
software 'RAW' processor of choice. I use Lightroom for resolving images that are heavily
distorted and for all my night 'RAW' image
conversions. I can easily create a Lightroom 'HTML' re-sized jpeg web
from a mixture of RAW, Tiff and Jpeg
files with it's own index.html file for loading and place the Lightroom
Web anywhere in my main web. LR Web examples of GF1 images -
Istanbul Lightroom Web
and
National Museum of Scotland
Gallery
My Own Plate Web Galleries
I also create my own plates for my Main
'Plate' Gallery Webs and I can still use Lightroom 3 to develop my RAW,
Tiff
and Jpeg files to create web ready and resized jpeg images
stamped with metadata as well as permanently stamp a copyright
directly onto the image. The only provision is that the conversion must
be saved in sRGB format to display the correct colours on my internet
web. I have also found a quirk in that if I apply sharpening with any
other (non Adobe) software package to a Lightroom 3 image, I have to
ensure that the new jpeg file is inserted into my web with the .jpg in
lowercase as opposed to .JPG which will display on my home PC web but
not on my internet web version?
I have some image examples which demonstrate some of the power of Lightroom in my 'Thoughts
on Post Processing' article.
Finally
There is no doubt
that Panasonic has re-defined the 'methodology' for obtaining top
quality images from a micro four thirds digital camera and it's small AF lenses.
The GF1 is an interesting addition to my
photographic equipment.
There is room for improvement with the GF1 but I can only list two areas
that really niggle me. One is that I would prefer a viewfinder like the
G2 or the new GH2 built into the body of the camera.........sure the
camera height would probably have to be raised slightly, but this
actually might be a benefit for handling as the rear controls could be
spread out more. Two, I would like the GH2 sensor as I believe the extra
'noise' stop and the extra 'cropping' room with the 16 Mega Pixels
Sensor would benefit my final images.
The
DOWNSIDE OF MY EXPERIENCE
with the GF1 system is not the equipment itself...........it is the
stark realisation that I will never be happy with anything
smaller.......... the GF1 (for me) is as small as it can get and I could
argue that it should be slightly larger to accommodate a built in
viewfinder and to spread the controls.
I have now progressed to a Lowepro Nova 140AW shoulder bag which carries the
GF1 with it's external viewfinder clipped on and mounted with either my
Lumix 20mm f1.7 lens or the 14-45mm zoom lens with the spare lens placed
under the combo. The 100-300mm zoom lens sits on its own in the other
compartment. The
front zip pouch carries my filters and accessories. There are net
pouches at each (outside) end of the bag for carrying other accessories
or a water bottle. This bag is very 'snug' with all the kit and is
probably as small as I can get.........it also has a 'pull out'
waterproof cover!
Also see my article on using the GF1 and the Lumix 20mm f1.7 Lens for
taking indoors shots at the museum -
The GF1 in the Museum.
24th January 2014
- I continue to use my GF1 camera but I have now also purchased a
Panasonic G6 Compact System Camera
which I use with the same Micro 4/3rds lenses. That ongoing 2014 review
can now be accessed using the blue link.
If you have enjoyed this article - please donate
to my Charity of Choice -
The Sick Kids
Richard
Lawrence
Scotland
United Kingdom
Back to Articles Page |