|
Software Post
Processing! |
Last Updated -
14th
February 2014
With the
advent of the digital age, the post processing of photographic digital
images has increased dramatically. The debate of photography
without post processing versus photography with post processing is alive
and kicking...........I suppose it matters just how much PP is applied
before it becomes an art form or simply a disaster?
I have to hold up my hand and admit that when I first started this article
back in 2010, I
was very cynical regarding digital post processing. I felt that images
should reflect the actual scene as captured by the photographer through
the camera and without any post processing...........any image that did
not come up to that standard, should be rejected and binned. After
spending some more time investigating various professional websites and
a great deal of forum discussion, I changed my opinion
(to some degree) deleted parts of the original writing and started
again.
Taste is a funny old thing,
take Marmite, you like it or
loathe it but in a strange
way and with the passing of
time, Marmite can become
very tasty but then again
what you like, you might
later loathe.
Photographic images are more
complex than Marmite, the
image that you post
processed and finally
rendered appears perfect,
then a year later, you
revisit it and the desire to
change it is strong,
especially if you have spent
a great deal of time
learning how to use your
post processing software.
Your experience sways your
opinion and now that
perfection is no longer
perfect. To make matters
worse, you may be swayed by
examples of other
photographer's images that
you have viewed on the
 internet
and then unease with your
post processing skills sets
in. internet
and then unease with your
post processing skills sets
in.
Sometimes, a photographer
will purchase new software
in an attempt to establish a
style, a rendering that can
be finally maintained and in
truth some photographers hit
the
sweet spot although this is
more down to perseverance
with
the software than actually
replacing it. Some
photographers abandon post
processing and return to a
more conventional method and
use a hardware colour filter
screwed or adapted onto the
front of their lens to
produce the effect they
desire, although it can
prove an expensive exercise
before you find the right
one.
Unfortunately rendering and
colour are not everything
and whether it is
accomplished in post
processing or through a
hardware filter, the subject
material has a great deal of
bearing on the taste of the
final image. I love the
The
Godfather
movie
(watch the trailer)
with it's 'classic 1930s'
colour rendering with that
deep burnished look, the
vignetting
and reduced dynamic range
in some scenes and the glow
in the lighting but if you
place modern day subjects
into the frame would that
look work? I suppose the
material for the scene has
to come first then the
choice of rendering, either
through the type of lens, a
hardware filter or perhaps
later in post processing a
'RAW' image file.
Recently, I sent an email to
Lee
Filters
asking them for advice on a
hardware filter that could
emulate that 'burnished
glow' seen in the Godfather
movie and they replied that
they were aware of a
resurgence in the 1930s
'classical colour look' and
expected to have perfected a
filter to emulate it by July
2014. At present their
existing filters were not
quite there and required
additional work in post
processing.
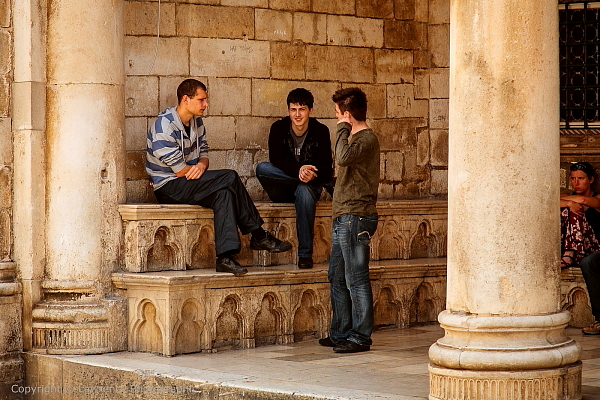
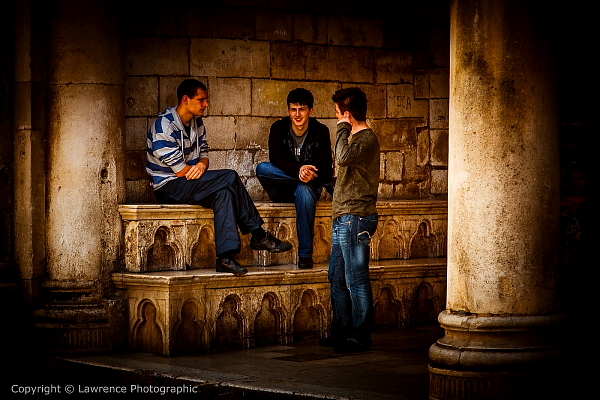
I am unable to emulate
(at present) the
'Godfather Look' in post
processing but here is a
Canon 5D MK I DSLR camera image with different
temperatures, different
tints and vignetting applied
in post processing -
|
Colour
Faithful
 |
|
Colour Faithful +
Antique Gold
 |
Colour Faithful +
Sepia
 |
Colour Faithful +
Marine Green
 |
|
Marine Green +
Light Contrast
 |
Reduced Colour +
Antique Gold
 |
Colour +
Light Contrast
 |
|
Colour
Standard -
Heavy Contrast and Vignetting
 |
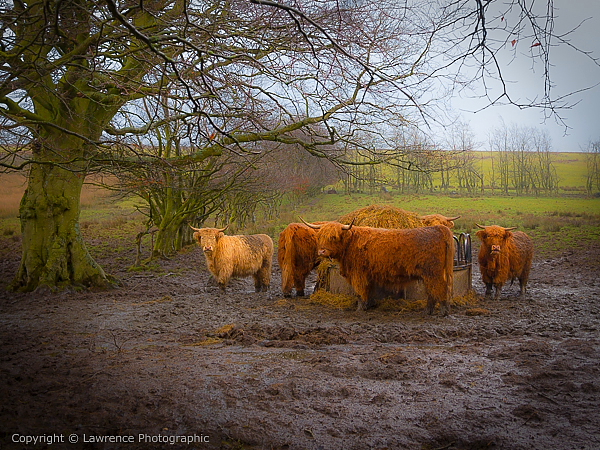
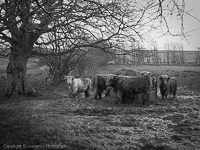
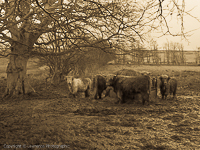
Weather changes fast in Scotland and this image of highland
cattle was shot using a Panasonic G6 compact system camera and a Lumix 20mm f1.7 ASPH
prime lens
on a very wet and rainy day. To add to this I was standing on the verge
of the road with heavy lorries passing feet from me and throwing up even
more spray. The combo held up well
despite all this and I was able to grab this image before the
cattle moved off on seeing me.
The 'RAW' image file was post processed and converted to various
styles of jpeg for the web using Adobe Lightroom software
and I have softened the
(larger image) PA version.
Please click on the images to open up 1300 pixel variants -
Types of
Camera Files
The majority
of serious amateur and professional photographers capture images which
are usually in 'RAW' or 'Jpeg' format. The RAW format is the digital equivalent of a 'film negative'
from film cameras.
 Software on a computer is used to edit (post process)
the RAW and/or Jpeg files to achieve the 'look' of the then converted
jpeg image required.
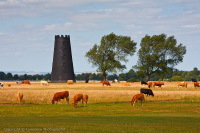
This image of the cows on the field near the Black Mill in The East
Riding of York is an example of this type of converted jpeg file.
Professionals tend to process part of their work in RAW files and then
convert them to 16bit tiff files where they are then used for printing. Software on a computer is used to edit (post process)
the RAW and/or Jpeg files to achieve the 'look' of the then converted
jpeg image required.
This image of the cows on the field near the Black Mill in The East
Riding of York is an example of this type of converted jpeg file.
Professionals tend to process part of their work in RAW files and then
convert them to 16bit tiff files where they are then used for printing.
Likewise a
'film' negative can now be scanned on a digital scanner to create a Tiff
and/or a Jpeg format digital file which can also be post processed using
software on a
computer. The Jpeg is a compressed file which has lost some of its
content with the scanning whilst the Tiff is a lossless file, which
retains the maximum content and is nearer to a RAW equivalent.
 Most
photographers will scan a film negative to a Tiff file format and from
there make any 'post processing' adjustments and convert to jpeg for
normal size prints and web images. Most
photographers will scan a film negative to a Tiff file format and from
there make any 'post processing' adjustments and convert to jpeg for
normal size prints and web images.
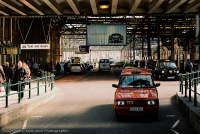
This 'film' image of the Waverley Station in Edinburgh and the taxi was
taken recently with a 40 year old Zenit-E Film 35mm SLR Camera using
Kodak Ektar 100 Colour Film. The negative was scanned to jpeg at a local
Jessop's Store and then edited by me using Canon's DPP Software. The
post processing was no more than trimming up around the scanned edges
and applying very slight saturation and sharpness. Film images are very
underrated in this digital age and the end results in the conversion
from a film negative to a digital tiff/jpeg file can be substantial and
very rewarding.
Most digital
photographers will produce RAW and Jpeg files from their cameras,
whereby they have the 'maximum flexibility' for their post processing.
Likewise they always scan film negatives to Tiff files, which also offer
the maximum in PP.
Arguments
for Post Processing v Against
The
arguments for PP versus no PP, rage across the internet and at
photographic club meetings. Some almost regard it as 'Photographic
Heresy' to apply post processing to any image, never mind a digital one.
Usually the core of the arguments are centered around the 'great
photographers' of the earlier 20th Century who 'tweaked' their negatives
when they were being printed and this is the justification for 'digital'
post processing.
The
photographic camera equipment of today is much more sophisticated and
should be capable of 'capturing the moment' and producing a clean image?
However, just like the photographers of old the modern day digital
photographer still has to get his digital sensor ISO (similar to film
speed) correct, along with the correct aperture setting in relation
to the shutter and still has to take into consideration the light
conditions and the ability of the camera sensor and electronics to apply
the correct dynamic range to the final image. To obtain the optimum
dynamic range across an image the photographer invariable has to use
different types of filters but the favourite, is the '2 stop graduated
gray' filter which allows dark foregrounds to become more visible
against the bright sky and avoids the sky being 'blown' whereby the sky
section is lost and unrecoverable in the camera. The earlier 'film'
photographers all had similar problems and addressed them in similar
ways, either by careful calibration of the camera and it's additional
filters or by recovering/tweaking images in the darkroom during
printing.
Is the
modern argument 'for and against' post processing really an argument
about 'lazy photography' versus the professional photographic approach?
The problem with software digital post processing is that it encourages
a lazy approach to photography. The professionals do not approach it in
this way, they have to get their images correct, it is their business
and a money making concern but for many others, when you realise that you can clean up
that blown sky or open up the foreground and the dynamic range or even
completely change the image using digital tools on a
computer..........well what is the point of carrying around filters and
having to fit them on the camera? Worse, were the old 'film'
photographers just as lazy in their approach...........human nature does
not skip generations.
Digital
Cameras & Dynamic Range
There are
digital cameras that do have a problem with dynamic range and despite
all the best efforts the image eventually ends up in 'intensive care' post processing.
This 'blows away the myth' that a good photographer can capture a great
image no matter what camera he or she uses...........as long as they can
'PP the image' on a computer to get it right. I use a Nikon '35mm Film' SLR camera and it does produce images (even after scanning) straight
from the negative that clearly display a greater dynamic range than my
digital SLR cameras. As we move forward with digital photography, I am
sure that the problems associated with dynamic range will disappear,
even to the extent that a form of 'expanded dynamic range' will be
blended within the camera at the time of exposure and/or in the software
'RAW' post processing.
No matter how good the
photographer, the camera, the lens and the digital technology, there are
some scenes that just cannot be balanced..............where the foreground is
heavily shadowed and the skyline is excessively bright, the metering in
the camera just cannot deliver. With the best will in the world, even
using exposure adjustments the photographer will end up with an image
where the sky has lost part of its colour, is 'washed out' as he strives
to open up the shadows for some detail or the sky is correct but
the shadows are dark, without much detail and excessive noise has crept
in. Every digital camera suffers from this problem, even 'film' cameras.
Many photographers will take 3 'RAW' exposures (dark, normal, bright)
and blend them in HDR software to open up the dynamic range. Other
photographers will take their best shot and use Adobe Lightroom software
and attempt to recover the dark foreground or bring back the sky by
applying a 'software graduated filter' to the top of the image. Either
method can often produce an final image where the
viewer will immediately sense that there is a 'falseness' and this is usually
where the foreground appears unnatural to the eye. In the worse cases,
especially with HDR software, the entire image appears 'overcooked' and
it is obvious that it's structure has changed.
The 'best solution' is one that you can use, even if you are a
JPEG
shooter and
that is a 2 'stop' B+W
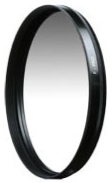 graduated filter screwed onto the front of your
lens. Now you can expose to the right, grab as much data in the image,
open up the foreground and retain the correct colour in the sky. I use
the following filter on the front of my 52mm Lumix 14-45mm zoom lens and
with a 46-52mm step up 'Tiffen' adapter on my Lumix 20mm f1.7 lens. graduated filter screwed onto the front of your
lens. Now you can expose to the right, grab as much data in the image,
open up the foreground and retain the correct colour in the sky. I use
the following filter on the front of my 52mm Lumix 14-45mm zoom lens and
with a 46-52mm step up 'Tiffen' adapter on my Lumix 20mm f1.7 lens.
The B+W 52mm 0.6/4x (502) Graduated Neutral Density Filter has a
transition from clear to 2x neutral density. The neutral grey half of
this filter transmits 25% of the incoming light, so that it darkens the
respective portion of the subject by two f-stops without altering its
colours. For example; when the sky is too bright in relation to the
landscape, the filter ensures good detail rendition in the clouds and
prevents the sky from being 'washed out' by over-exposure. The 502
filter is supplied in a rotating mount, similar to that of a polariser,
so that the angle of transition can be altered to suit the subject.
I (mark) stick a small piece of white plastic tape to the outer rim of my
filter (at the very top of the dark section) and in this way, I can rotate the filter and bring the dark part of the filter to the desired
area of the scene.
My
Conclusions on Post Processing
Having given this area a great deal of thought, I have broken post
processing down to a logical train of events which encompass amateur and
professional photographers along with their photographic methodologies.
Location, subject and (most important of all) light are the key
ingredients that provide the material for a photographic opportunity.
The actual capture of the image involves patience in some cases, such as
'landscape photography' to achieve the optimum light conditions. The
photographers ability to use the camera is all important, not only to
set it correctly but how to apply the proper accessories (such as light
filters, flash, remote shutter activation devices, etc) and when to use
a tripod to hold the camera and lens firmly for a steady shot. Lens or
camera image stabilisation technology is important as it aids the
photographer to capture 'hand held' lower shutter speed images and
especially from moving platforms, such as boats. So the image is
captured and to all accounts should be correctly exposed with the key
points in the scene, for example the foreground and the sky providing a
good balance of dynamic range.
At Stage 1, many photographers will simply use the jpeg image file that
the camera produces and have some prints made from the SD/CF card to the
standard wallet or picture frame size and invariably at that size it is
very satisfying work. Some may take it a stage further and gently tweak
their jpeg images in a software post processing package to lighten,
darken, sharpen or add just a little bit of more colour saturation
before it goes to the printer. Some may even post them on a social
website for their family and friends to view over the Internet.
Moving up to Stage 2, there are photographers who prefer to shoot in
'RAW' file image format and to post process it in a software package.
This provides them with a much greater flexibility to modify the image
to their taste and in certain cases to recover a bad image and modify it
to make it acceptable for print and display. The 'RAW' file is converted
to create a jpeg file image which is then used like Stage 1 for standard
prints and website displays. It is also preferable to use 'RAW' file
conversions to 16bit tiff files for additional editing and making
'large' prints.
Stage 3 is where the post processing starts to play a greater and more
important role in the development of 'RAW' file images. Even the
most skilled of digital photographers will encounter a scene which is
extremely difficult to capture whereby the lighting of the image is
accurate. Sometimes on such occasions, 'bracketed exposure shots' are used and the
best exposure shot is selected. Sometimes even this is not enough as the
digital camera cannot resolve the dynamic range (even using filters) and
the photographer is faced with binning the work or saving it by
blending the bracketed exposures together using software to create a
single 'overall exposure' image. The final effect can be substantial,
acceptable and natural BUT pushed to the limits, it can also look
false, even unatural.
Guilty of Lazy Photography
I can......at times......be guilty of 'lazy' photography but as I move forward, I
continually strive to take more time in my preparation and my appliance
in capturing the moment and to reduce my RAW conversion post processing
to the absolute minimum......... unfortunately, I do have the odd
lapses!
If you have enjoyed this article - please donate to my
Charity of Choice - The Sick Kids
Richard Lawrence
Scotland
United Kingdom
Back to Articles Page |