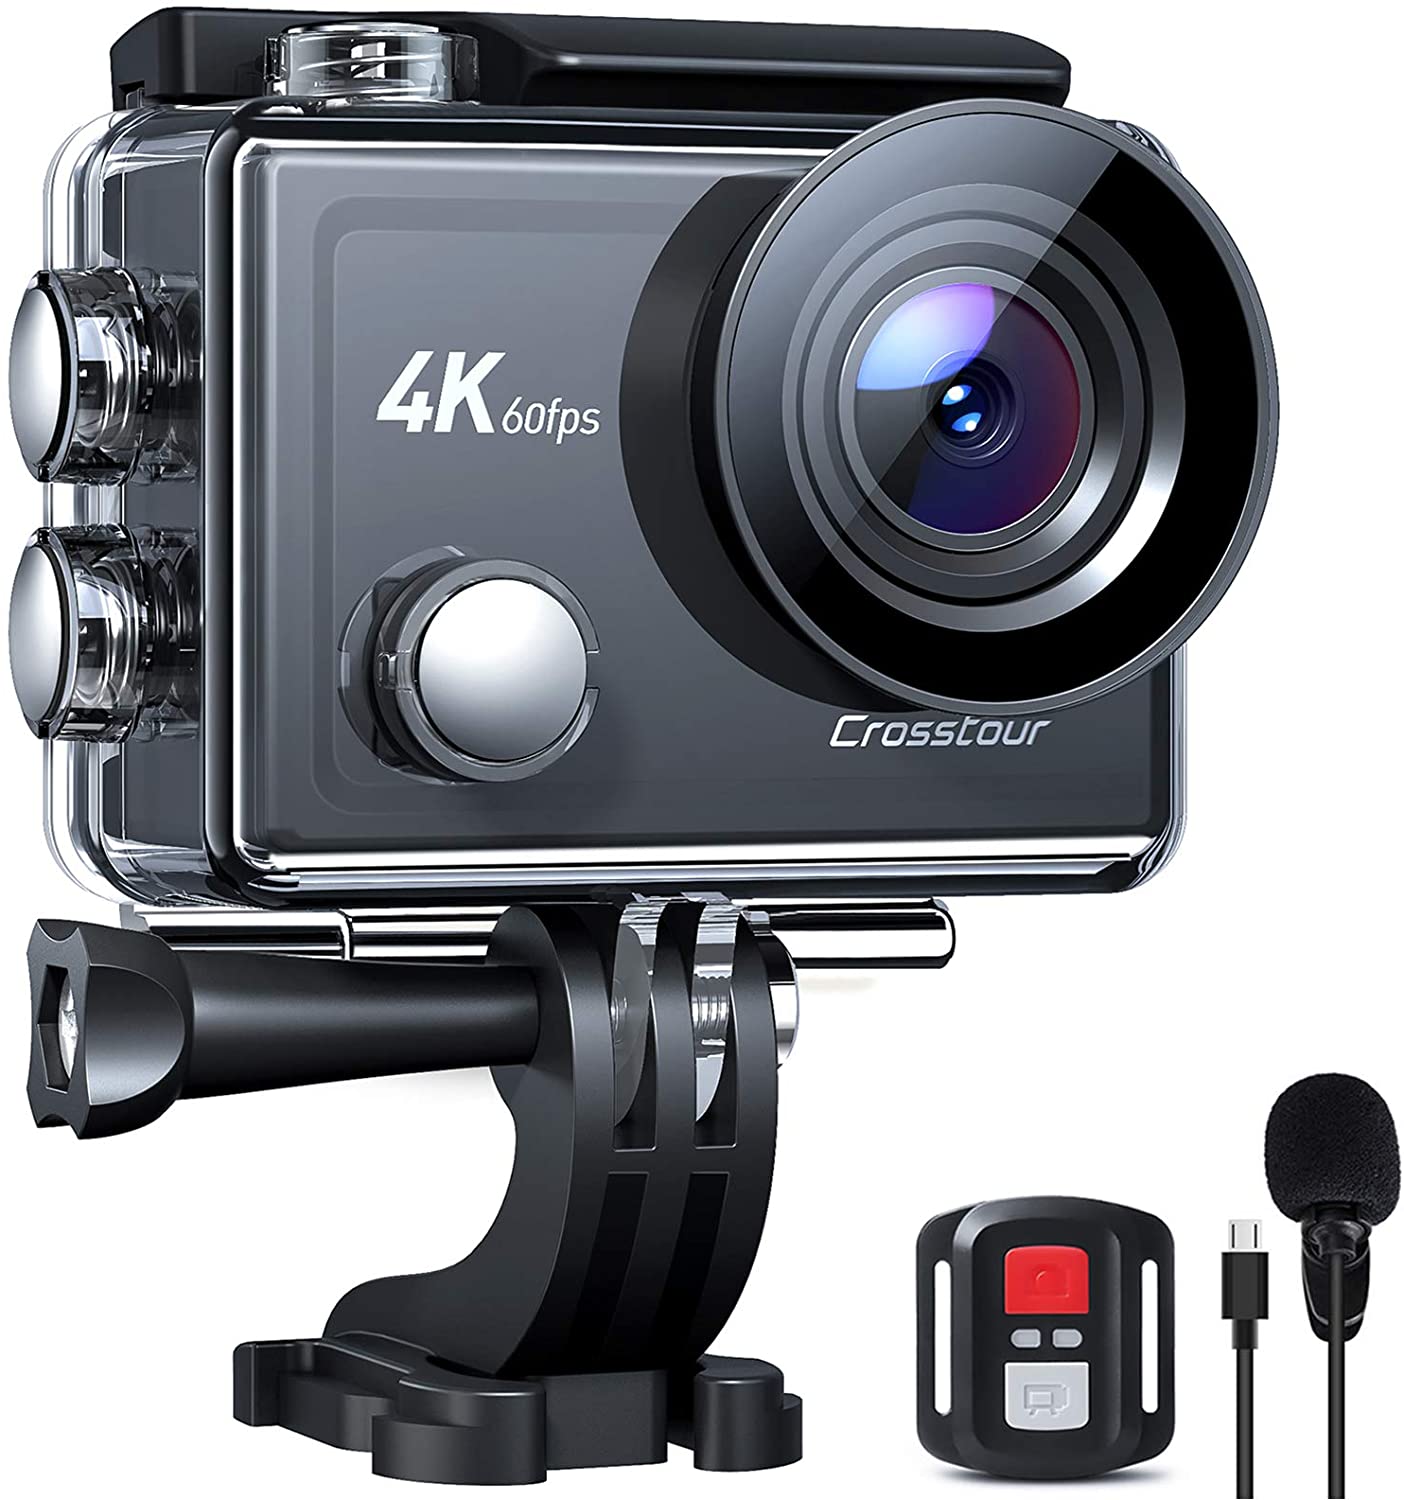
On the 9th December 2020, I purchased the
Crosstour CT9900 for £54.99
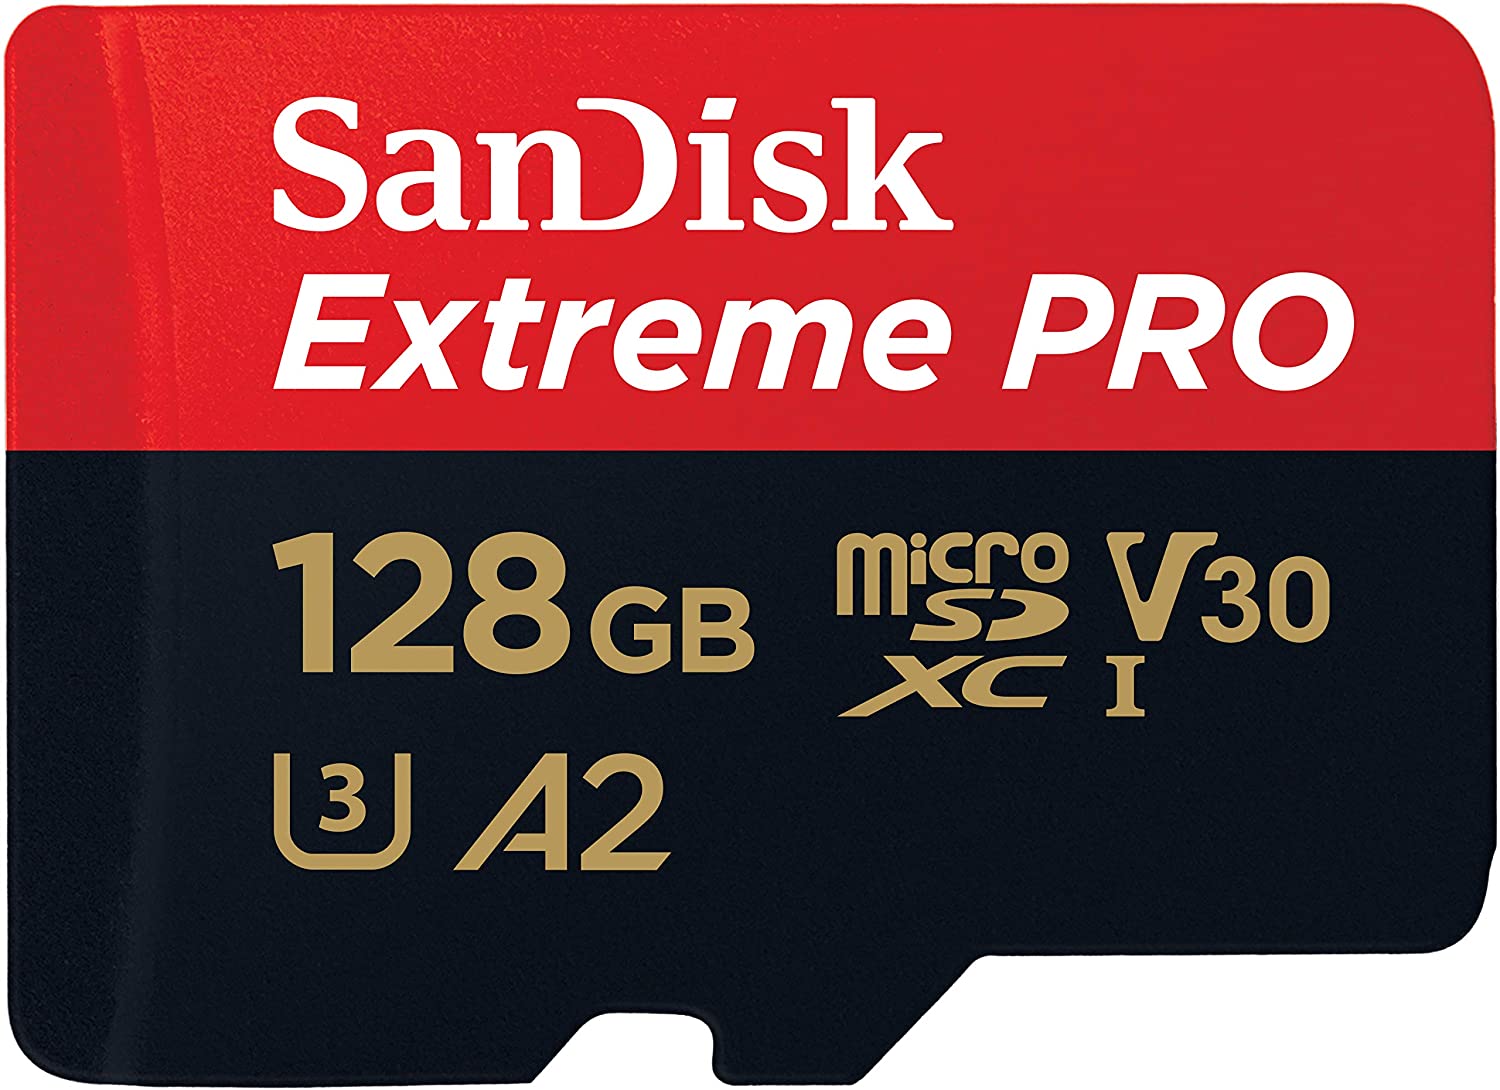
along with a Sandisk 128Gb Extreme Pro memory stick for £21.99
from Amazon.co.uk. I require to make a couple of action videos
so it seemed a reasonable cost effective investment - Check out
my overall Verdict.
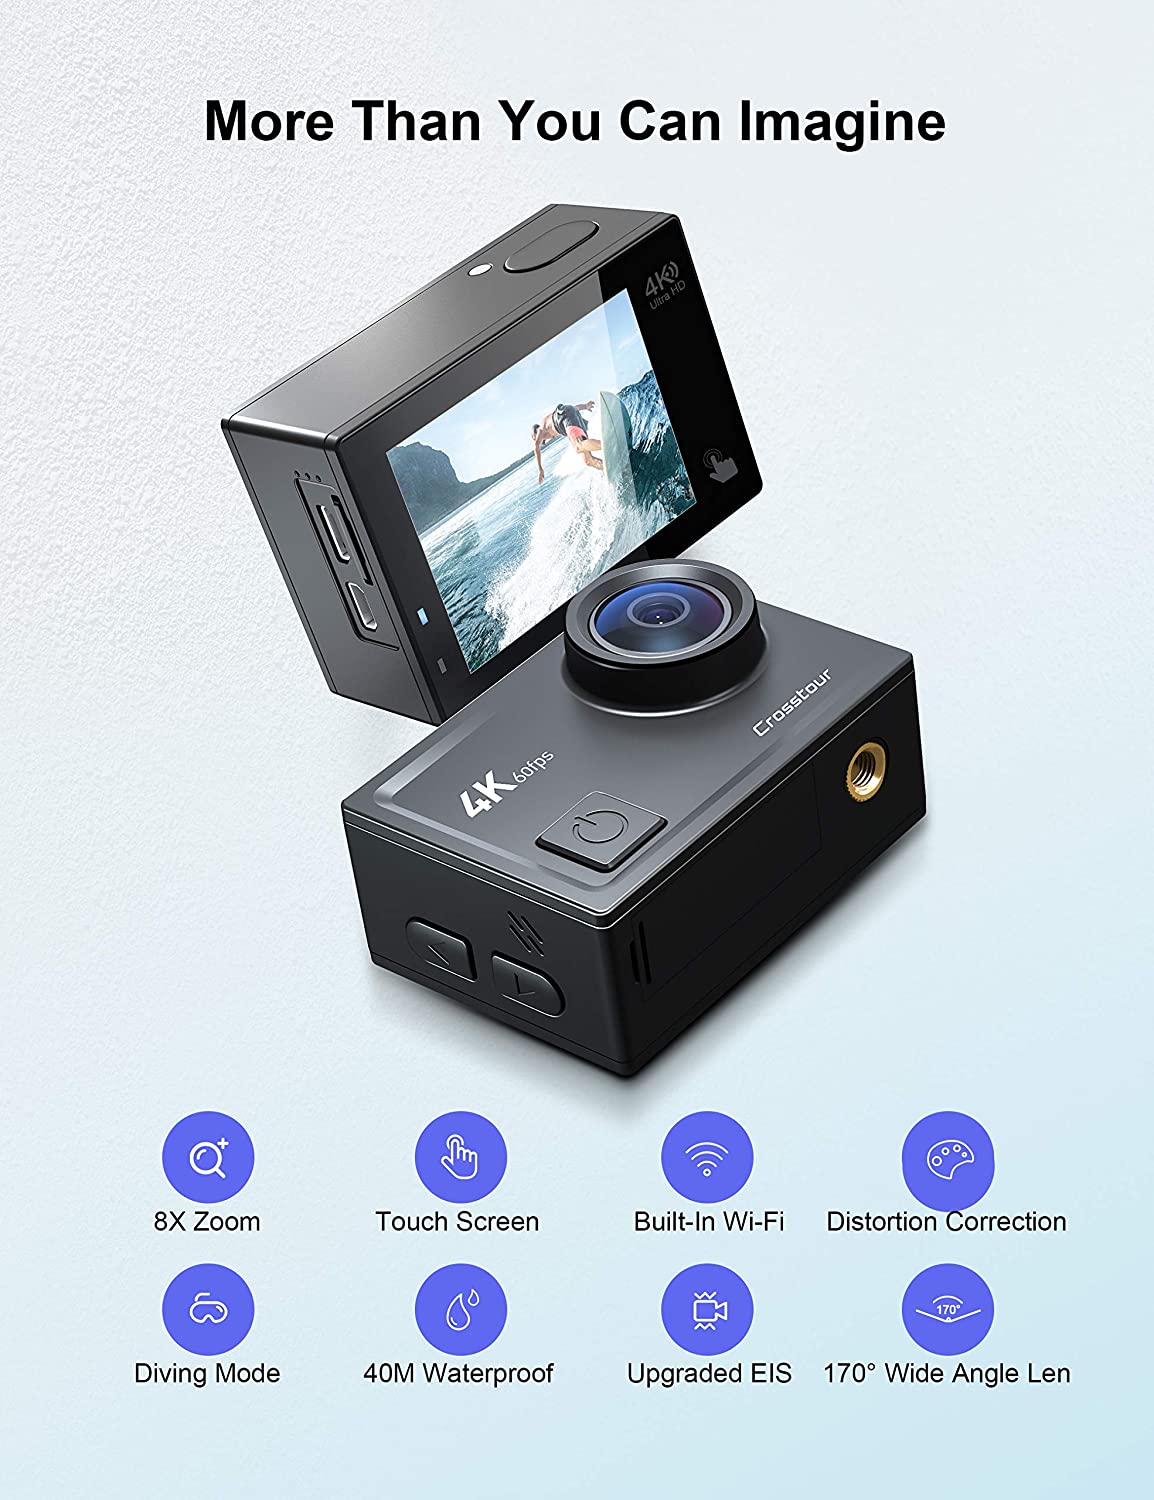
The CT9900 has a touch screen, WiFi, 20MPixel camera with a
170% lens angle, an 8 times telephoto
digital zoom,
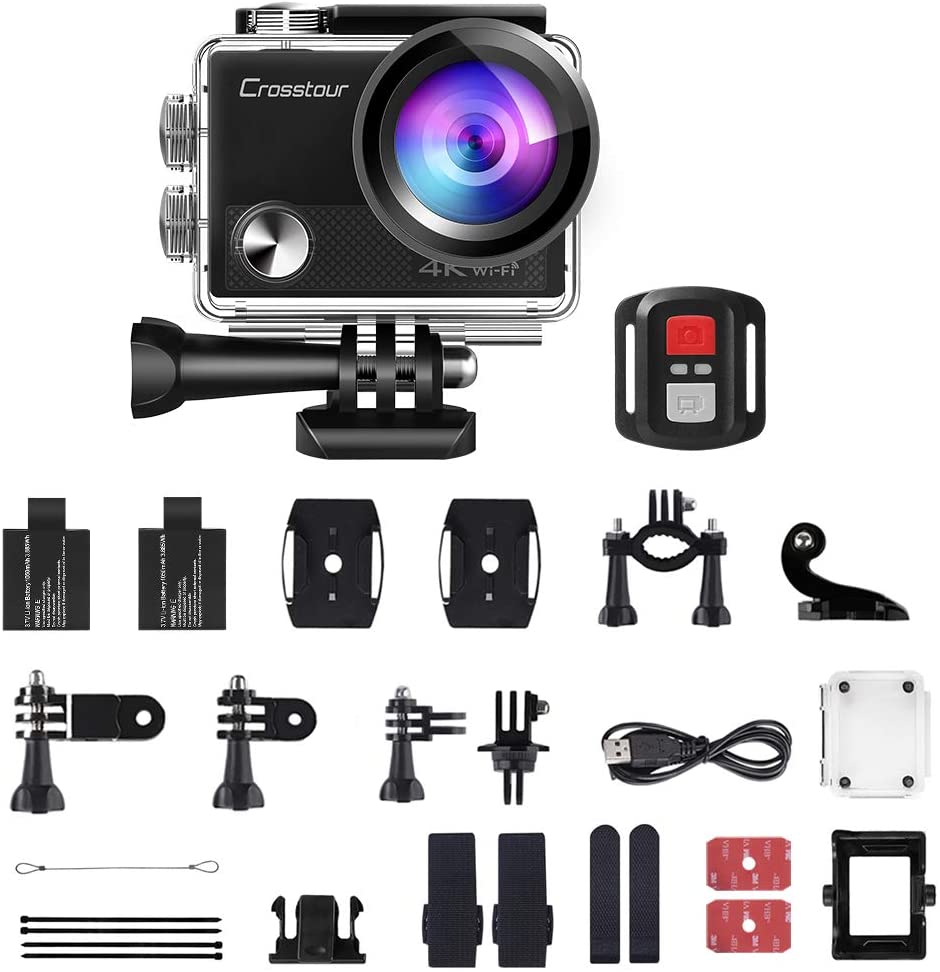
6 axis image stabilisation and 4K/60fps max video. It arrived
with a remote control, an open style case and a waterproof case for scuba diving, a
USB external microphone,
a bicycle mounting kit, a helmet mounting kit and 2 x 1350mAh
batteries which are charged individually within the camera via a
charging cable.
Camera Niggles
The battery cover is a clip
on lid that could get lost, especially if after repeated battery
swaps, the plastic clip wears and fails.
The sockets and the memory card slot are not
protected by a cover against dirt and grime.
The supplied waterproof case does not facilitate
the use of the USB microphone which is supplied and the case
blocks the internal mike. However, if you plan to video in the
pouring rain or you intend to go scuba diving, the waterproof
case is ideal.
The remote works well with the camera in the case
but the remote must not be used underwater or exposed to
dampness.
The lens actually protrudes beyond the lens cover
and could get scratched if the camera is laid on a hard surface,
lens facing down. Memory Card The
Crosstour CT9900 Manual leaves a lot to be desired as so much is left to
your own devices. I had never used a micro memory card before,
so I had to be very careful when inserting it
and like other memory cards it has a press spring release which
makes the card pop out. With the camera lying on its back the memory
card is inserted into the slot with the name/colour side facing
down and the metal groove section facing up and first into the slot. A
gently push with your finger nail, until it clips in and vice
versa for it to pop out. The manufacturer of the CT9900 camera
recommends that you use a fast memory card for 4K 60Hz video use
but I had to drop to 4K 50Hz using this memory card to achieve
decent video results.
Camera Test Results
When you switch on the camera, it always boots up in video mode.
If you change the battery, it will retain all your menu
settings.
I
discovered that the camera has 3 parts to the menu setup; Camera
Photos
- System - Camera Video and the camera photo settings and the video
settings, do
interlink in certain areas.
The EIS (image stabilisation) in the video menu is tied to the
Distortion
Calibration
in the system menu, if EIS is set to ON, then the Distortion
Calibration is not available in video or for camera photos. If
EIS is set to OFF in the video menu, then
the
Distortion
Calibration
can be set to ON and is available in video and for camera
photos.
I found the WB (white balance) set to AUTO for
normal daylight scenes, was best and offered better colour than
the daylight setting.
For all my tests, I set the METERING to multi-metering and the
camera photo resolution to 20MP.
Holding the camera without its case can prove awkward whereby
your left finger can slip over part of the top left of the lens.
I am used to much larger DSLR cameras so it took a bit of
getting used to.
When pressing the top shutter button in camera photo mode, you
must press quickly and immediately release your finger and then
the shutter will fire. If you press the shutter button down for
too long, the camera will go into the photo menu. The same
applies in video mode. It is important to keep the camera steady
until you hear the shutter fire in photo mode.
In both the
camera and video, the NATURAL choice in the SYSTEM menu EFFECT mode
delivers a more natural and clearer image/video. There is a
definite difference in the recording as there is less blue
in NATURAL compared to NORMAL. The strange thing is that in
video NATURAL mode the video icon on the front screen still
displays NORMAL 4K30.
I also found that the Video Resolution set to 4K 30FPS delivers
a sharper and cleaner video than 4K 60FPS and I set the Power
Frequency to 50Hz. I was using a fairly fast memory card but at
4K 60FPS the video quality was very jerky during panning and
there was the occasional frizzle interference.
The battery lid wearing, really did not concern me because I had
decided that for my limited use, I would just keep the battery
in the camera and recharge it when necessary - after all I
quickly discovered that the battery is good for at least 90 minutes (I
tested it with a video run at 4K 30FPS, EIS Image Stabilisation=On
and Wind Noise Reduction=ON and Screen Saver=ON).
I never lay the camera body on any surface, lens facing down. The
lens face actually protrudes beyond the lens cover and could get
scratched. If you are carrying the camera in your hand without
its case, be careful that you do not grease up the lens face
with your fingers and if the camera is switched on, it is very
easy to cusp the camera in your hand and accidentally touch the
screen, whereby the menu settings are activated and changed.
The CT9900 videos are created in American NTSC colour format
(not British PAL) and .MOV style files, so if you desire a PAL
colour format and an .MPEG-4 file, you will require additional
software to accomplish the conversion. I had no bother in
achieving this with Power Director video software but as mine is
an old version of Power Director, my video was limited to 1080p
HD. If I upload a video straight out of the camera without any
editing, the
American NTSC colour format delivers a 4K video to YouTube.
There are examples of both in the video section.
Using the supplied USB cable I can charge the camera directly
from my computer and I can access the image and video files as
the computer sees the camera as a hard disk. I can upload my
videos directly to the PC and then upload (unedited) to YouTube
in 4K format.
I was planning to make 30 minute videos but the CT9900 will stop
and restart another video segment, on average every 13-15
minutes. Not a great problem as I can edit all the best bits
from the segments and stitch them together using computer
software.
I could not get the WiFi file transfer to work, it connected no bother with my
Windows 10 laptop but I required an app to see and transfer
files for the camera. So far, I cannot find an app for Windows
10 and the CT9900 camera. Apparently it works great with an
Android smartphone and you can download an app from the apps
store (I don't use a smartphone).
The remote control is brilliant and can be fixed to your wrist
via the supplied buckle and strap. It has a start/stop button
RED for the camera and start/stop GREY button for the video. It
cannot be used in the rain or if scuba driving.
Video Image Quality
I
prefer to use the camera in video mode with the lens angle of
view wide open or zoomed to a mid telephoto range to obtain the best image quality.
In
video mode and camera mode the EIS (image stabilisation) in the
video menu is tied to the
Distortion
Calibration in the system menu.
So in action mode when there is a great deal of movement, I
prefer to use EIS and accept that I will lose the
Distortion
Calibration
to correct the video frame.
I
don't own a Android operating system smart phone, so I cannot
comment on how much more video information can be accessed or
controlled by connecting to the camera via WiFi.
Camera Photo Image Quality
The
image
quality is reduced as the zoom pulls in the scene but up to mid
zoom range the image quality if very good.
I prefer the colour of the image when the EFFECT mode is set to
NATURAL.
I can live with the frame distortion of an action video but the
Distortion Calibration in the system menu does not work when EIS
(image stabilisation) in the video menu is set to ON. I dislike
the distortion frame in a photo so I must always remember to
switch EIS to OFF in video and set the
Distortion Calibration
in system to ON.
The camera's lens
aperture seems to be fixed at f2.8 so the only way to further
open up or close down the lens for more or less light in the
scene is to use the EV in the menu (+ for more light or - for
less). The screen view of the scene will change to match the new
EV setting.
The camera in any ISO mode never displays the
aperture and shutter speed settings, even when you view an image
in the playback. You can view these settings in 3rd party
software or in Windows 10 viewer which can read the jpg file.
This is a problem if you want to use the ISO in manual mode. At
ISO:1600-3200 the camera image quality is well
blown out with huge amounts of noise.
I don't own a Android operating system smart phone, so I cannot
comment on how much more image information can be accessed or
controlled by connecting to the camera via WiFi.
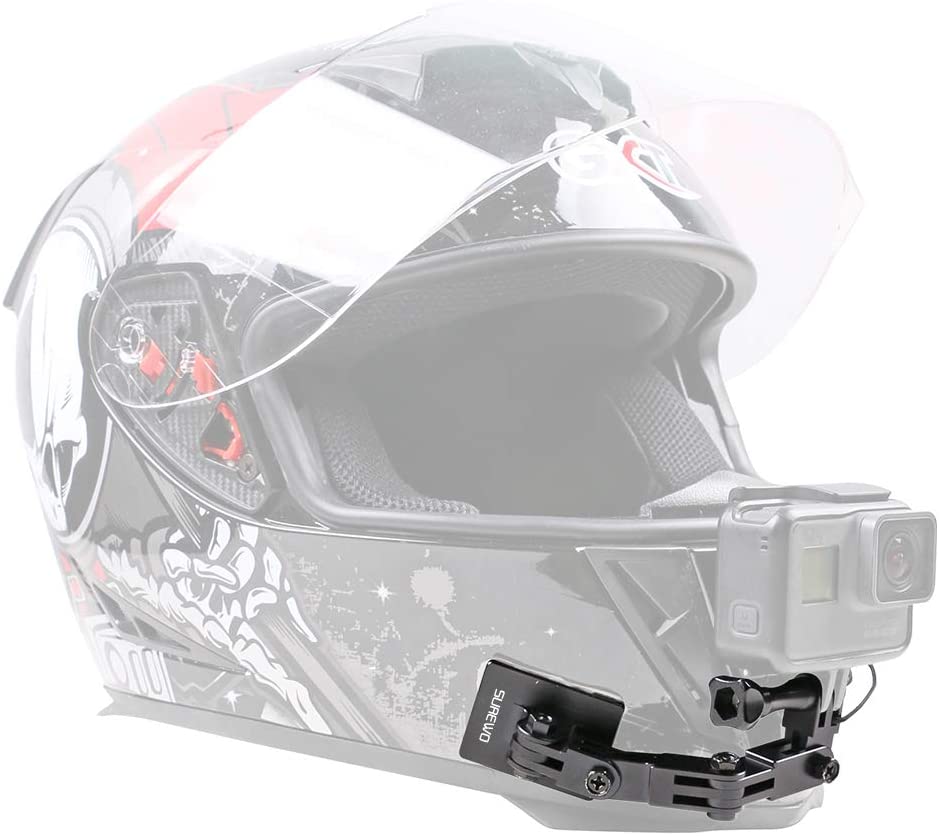
Accessories Supplied with Camera
The extenders are fine
and well built and likewise the helmet fixings, although the
stick on holders are not curved but flat.
The supplied open style case is excellent for clipping in the
camera and enabling you to use the built in or the external USB
mike. The waterproof case does not facilitate the use of the
external USB microphone and the case blocks the internal mike.
However, if you plan to video in the pouring rain or you intend
to go scuba diving, the waterproof case is ideal. The remote
works well with the camera in both cases and it can be strapped
to your wrist with the wrist belt but the remote must not be
used underwater or exposed to rainfall. The headset straps are
okay but not brilliant.
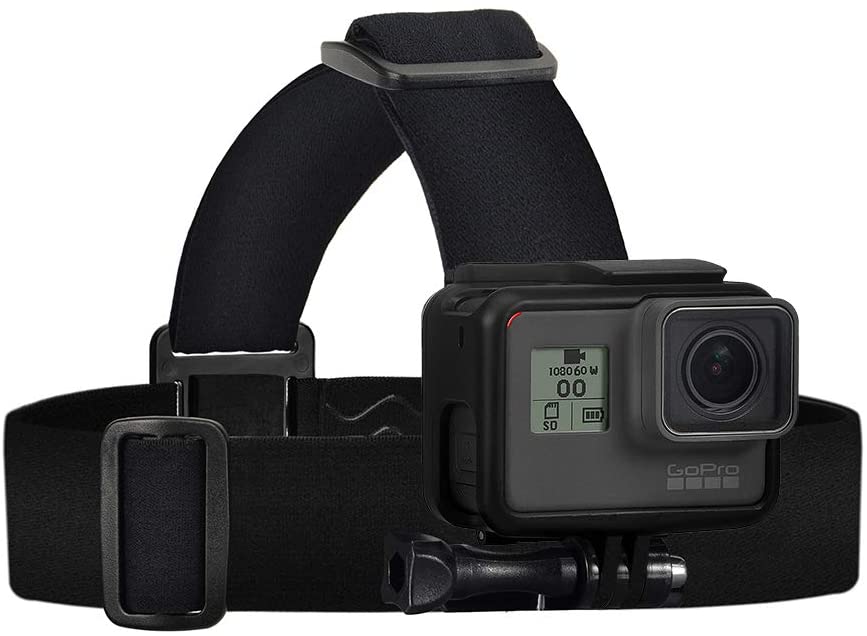
I was not impressed by the CT9900 head strap but fortunately
I also ordered a Wealpe Head Strap Camera Mount (image below) for using to
video wildlife which cost £7.99.
I have decided that I have no use for the optional Crosstour battery charger
(image below) which charges
2 x 1350 mAh batteries (batteries included) and costs
£12.54.
I
intend to purchase a dedicated SUREWO Aluminium Motorcycle
Helmet Chin Strap early next year when my bike is back on the
road.
The CT9900 is very neat and has some serious tech.
Well worth the budget 'crazy cheap' price but
best used in bright lit days for the optimum image quality for
photos and videos.
Its a pity that to engage Distortion Calibration in camera photo
mode to correct the photo frame distortion the EIS (image
stabilisation) has to be switched off in the video mode.
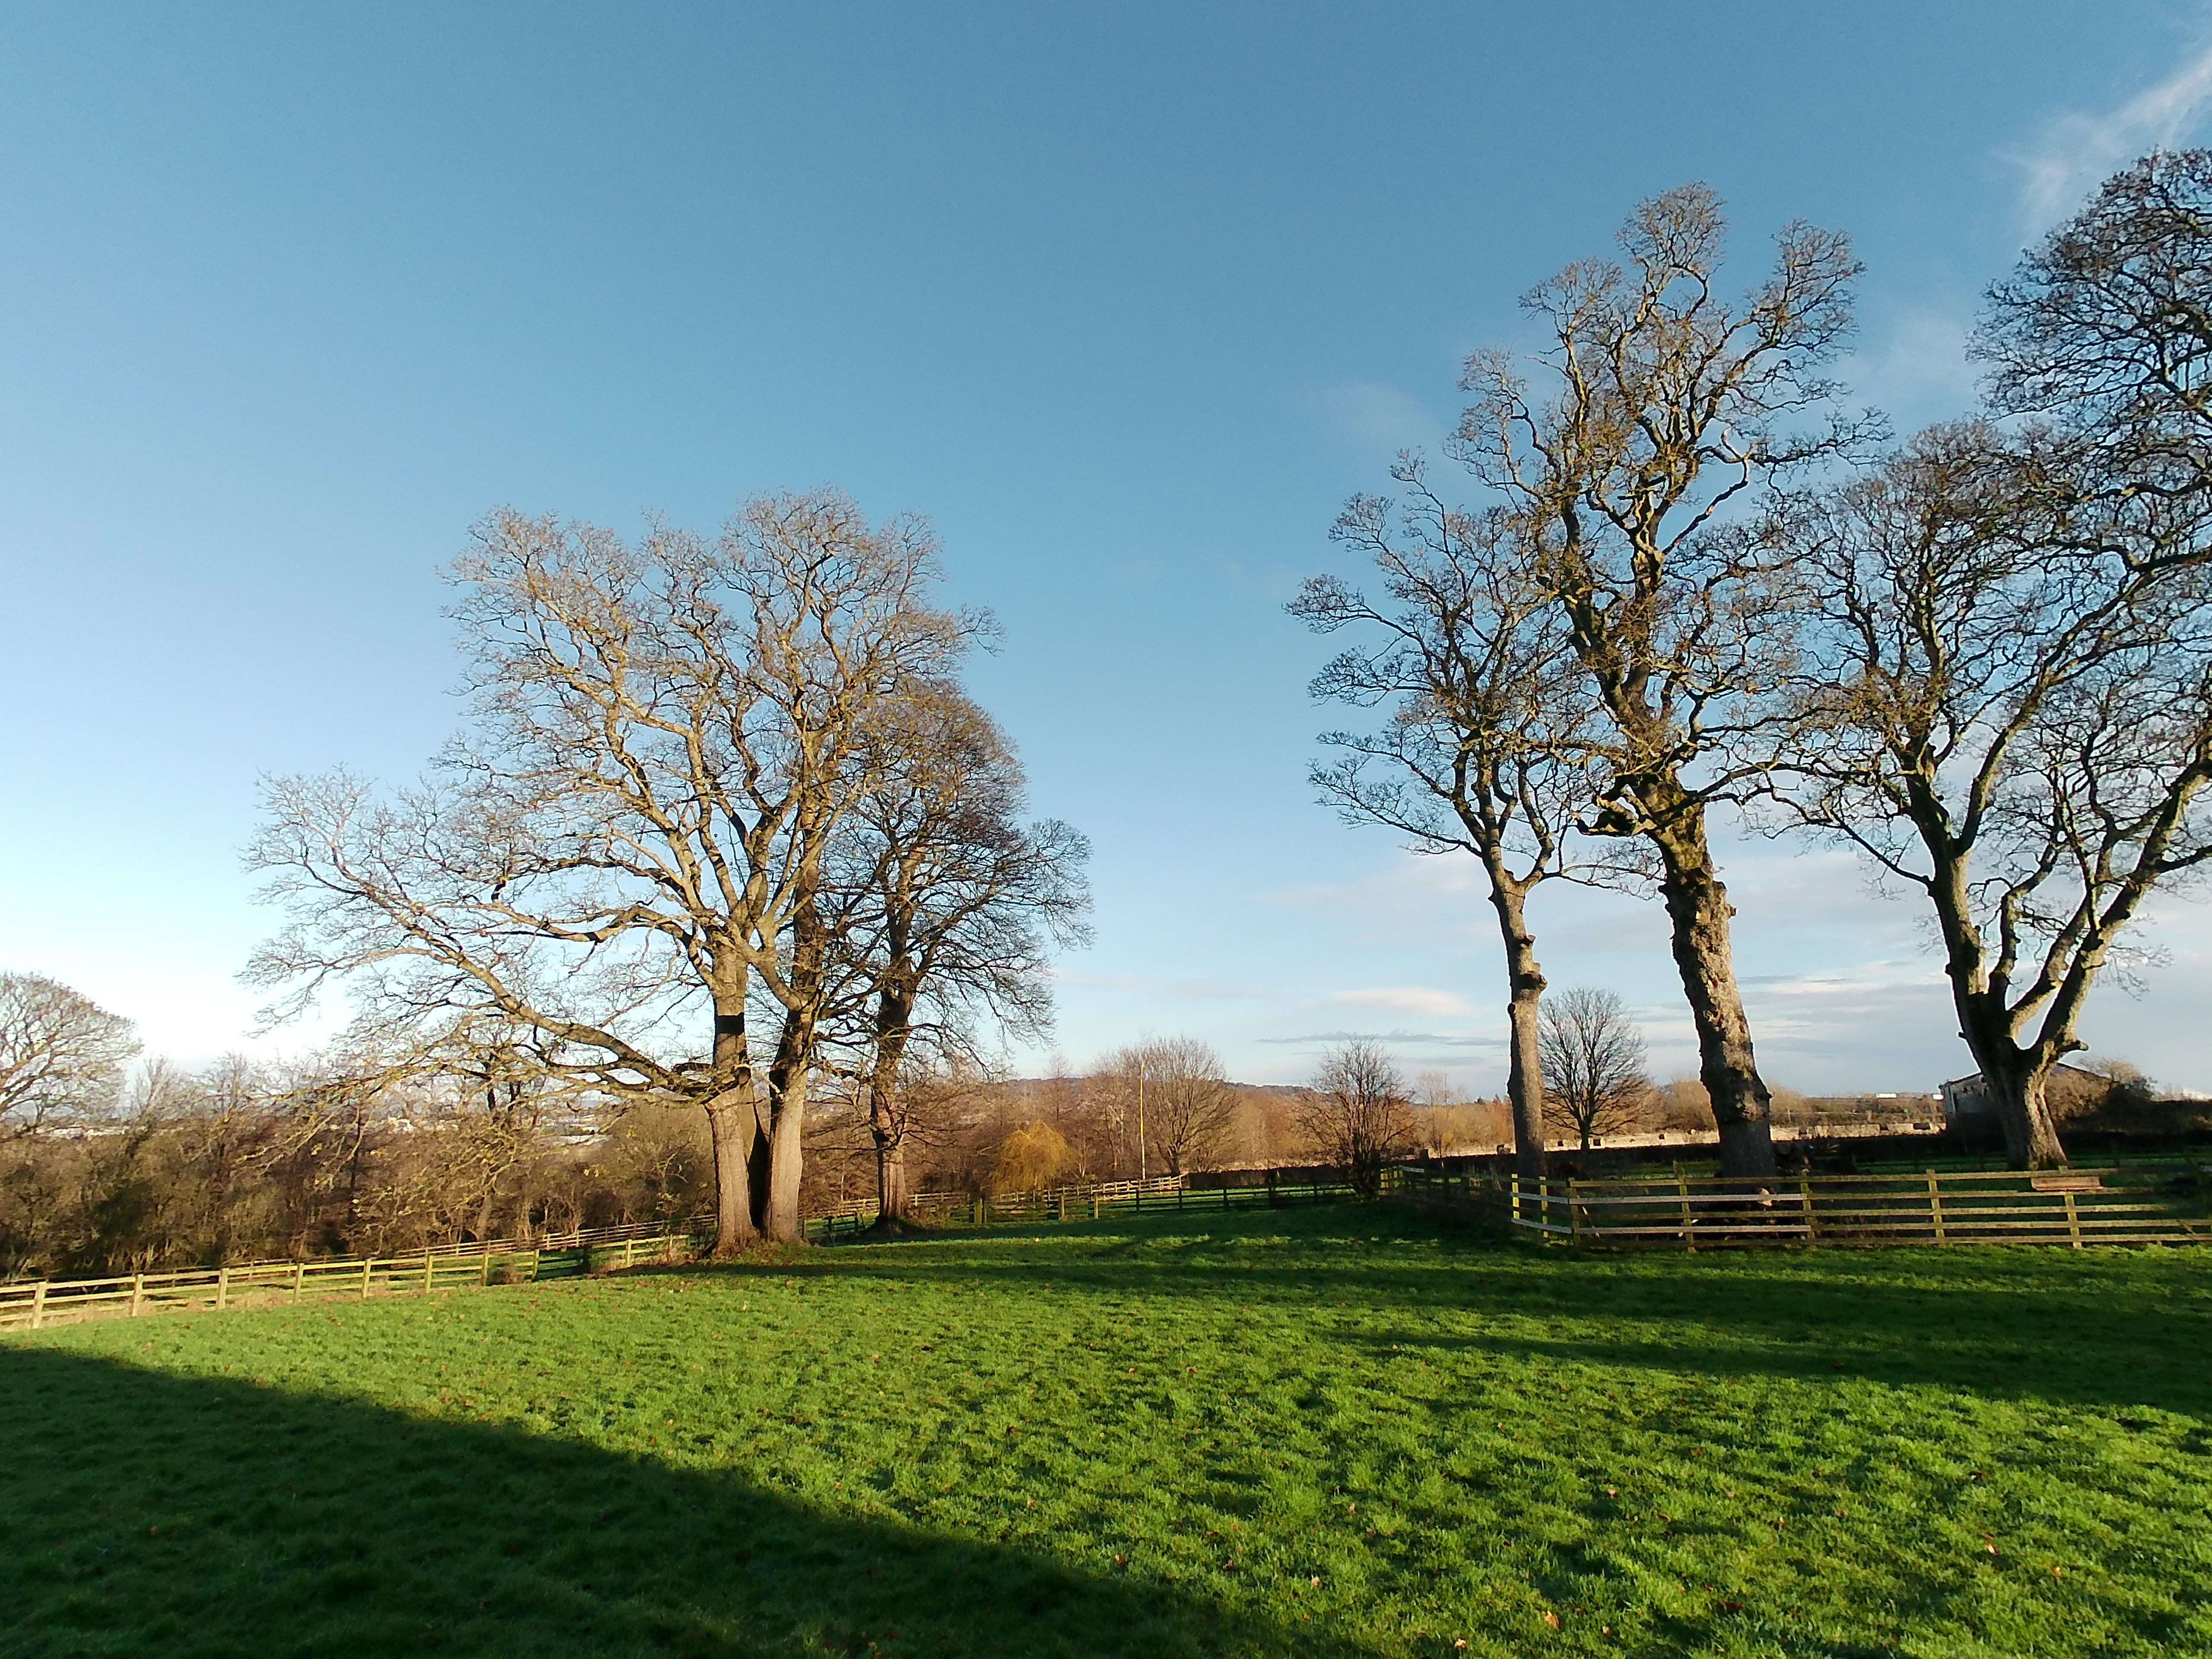
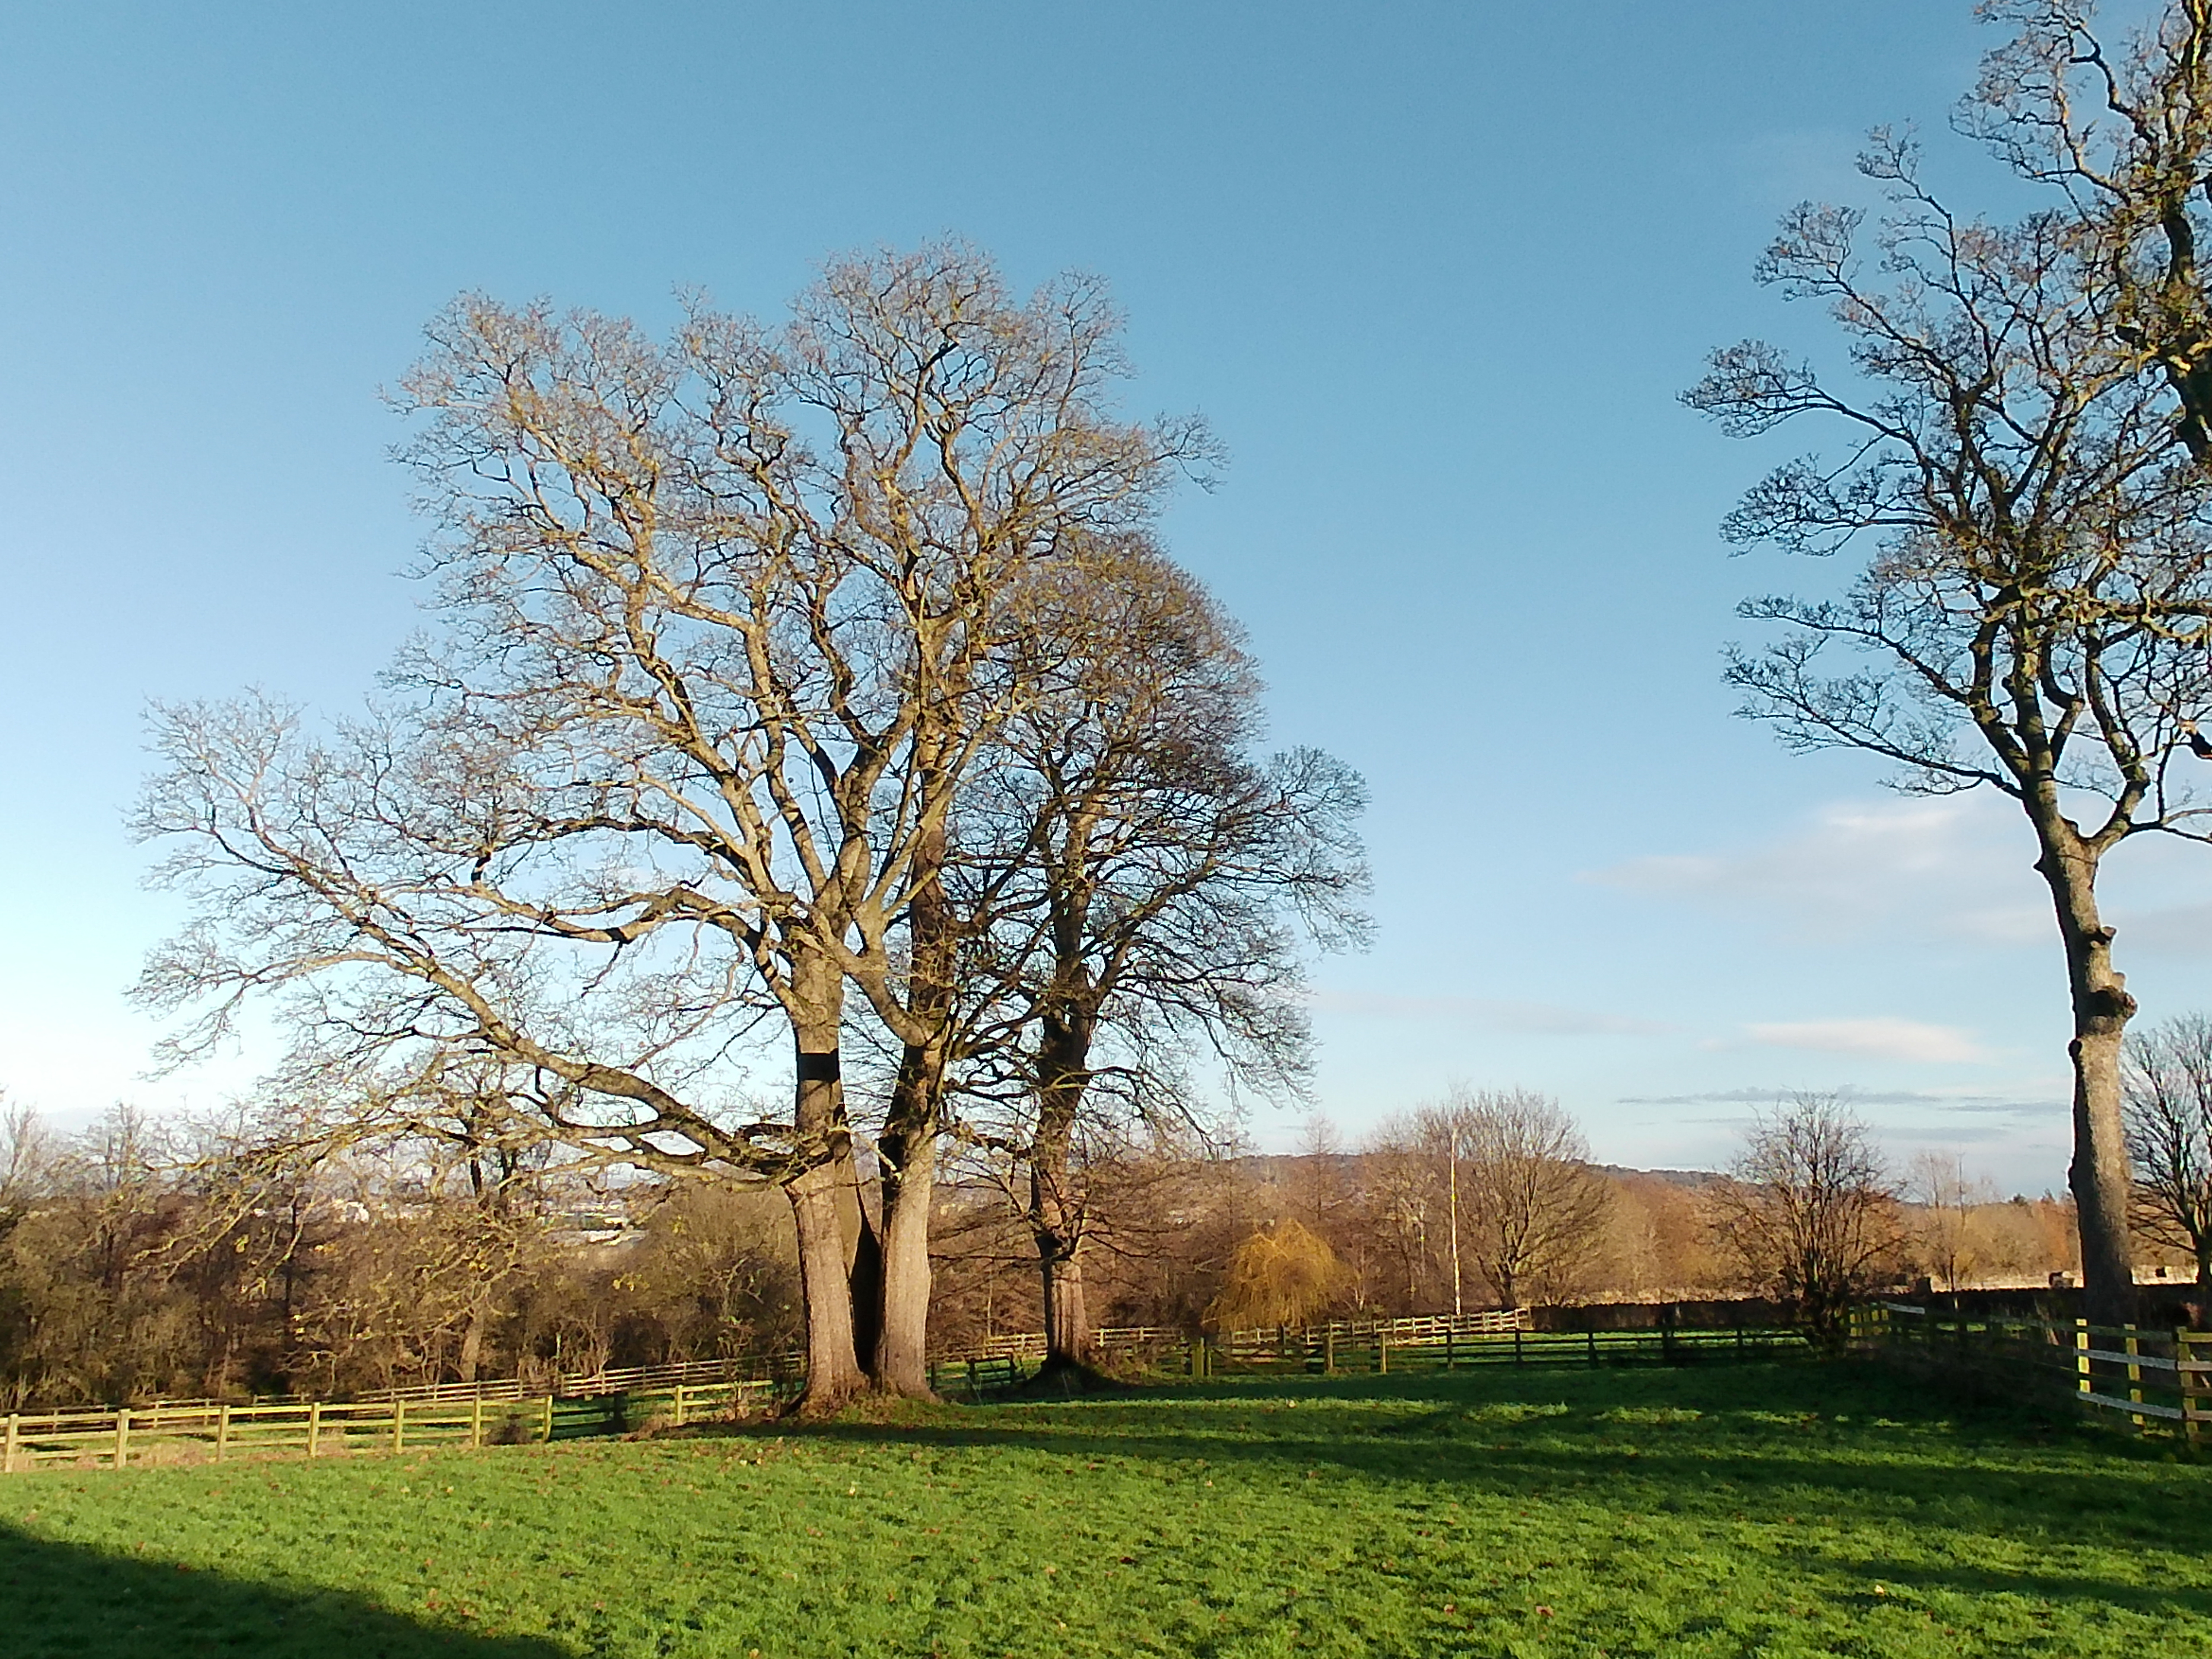
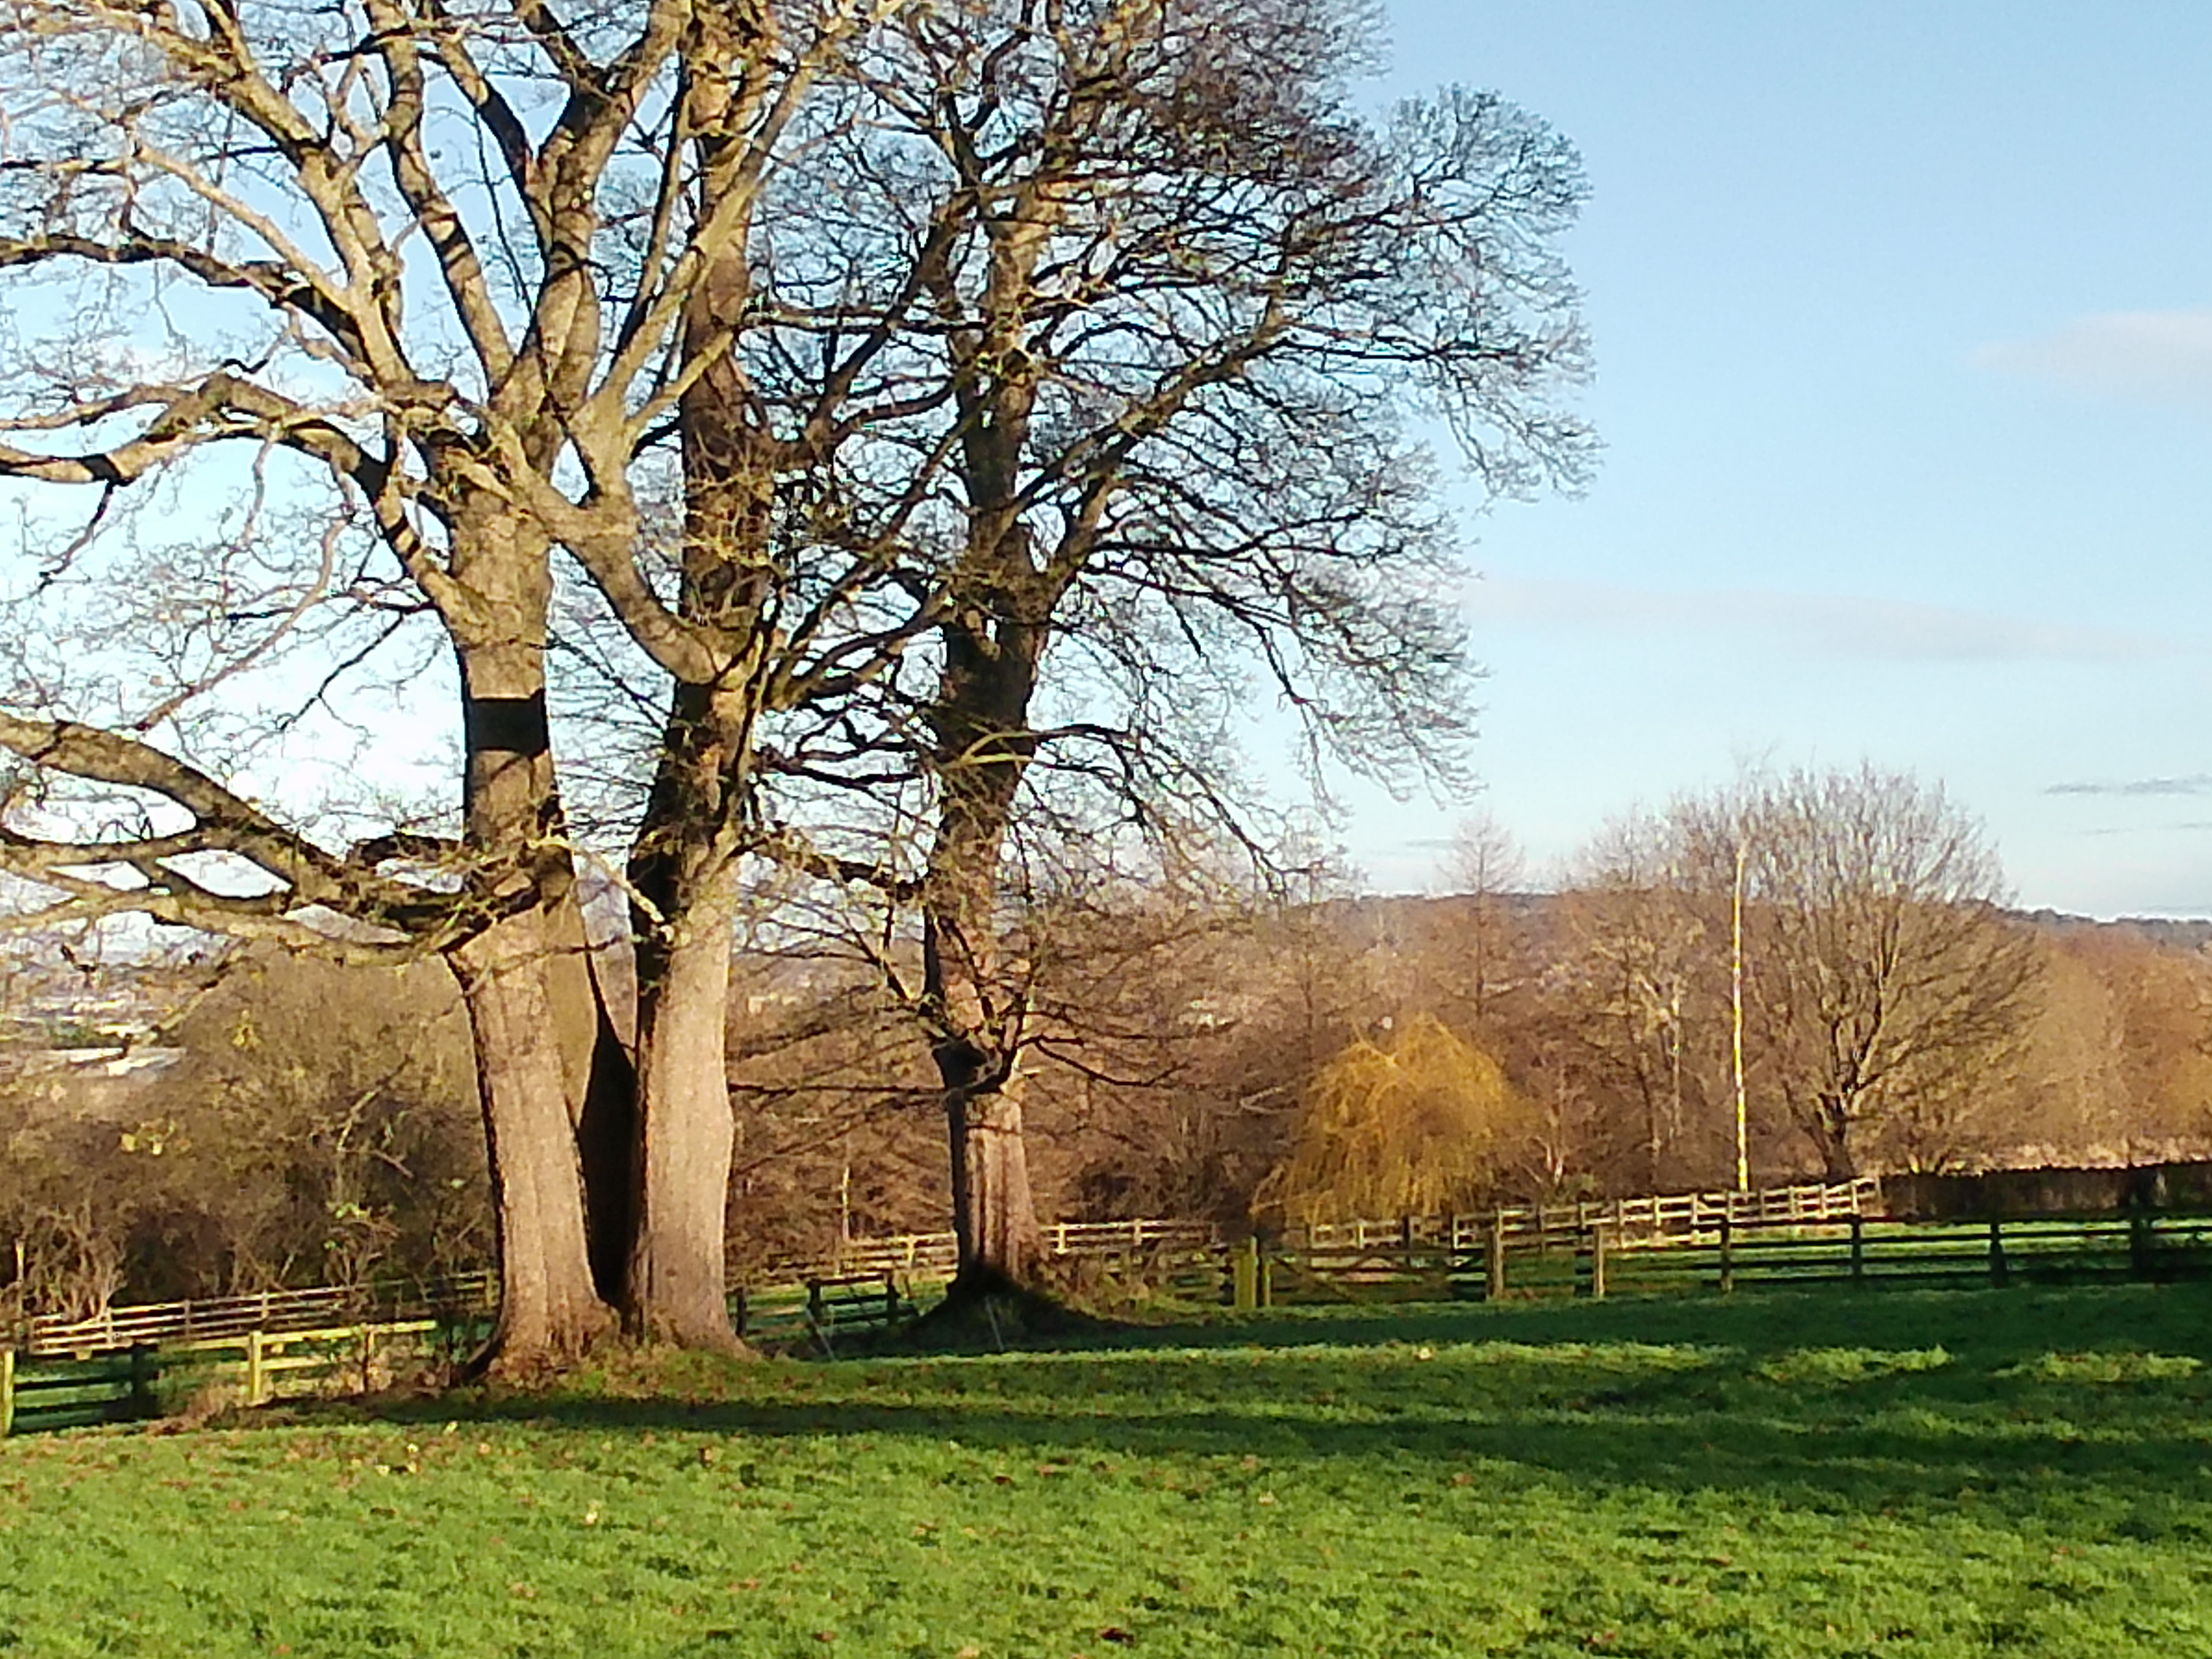
Field & Tree Photos Captured in Good Weather The photos in this section are all full size straight out of
the camera BUT there are limitations to the image quality
vs their viewing size. I have a 15" tablet screen and when
viewed at that size on my tablet the image quality is excellent.
I can push the image larger (CTRL + Mouse Centre Wheel Roll Up)
and the image quality still holds up. When viewed on my tablet
at full size, the image quality is well blown out.
I switched the EIS (image stabilisation) OFF and the Distortion
Calibration ON for these images. The first photo is a full wide
angle, the second a midrange angle and the last one a full
telephoto shot. The full wide angle shot still displays a slight
distortion as witnessed in the fencing posts at the edges of the
image.
Please click on images to open up to camera unedited full size -
20MP, Colour
EFFECT mode is set to NATURAL,
ISO set to AUTO which produced ISO:100, shutter 1/320sec
and aperture f2.8. White balance was set to AUTO and METERING
was set to Multi-Metering. The exposure compensation (EV)
was set to 0.
The file size is 7.2Mb -
20MP,
Colour
EFFECT mode is set to NATURAL,
ISO set to AUTO which produced ISO:100, shutter 1/320sec and
aperture f2.8. White balance was set to AUTO and METERING was
set to Multi-Metering. The exposure compensation (EV)
was set to 0.
The file size is 7.3Mb -
20MP,
Colour
EFFECT mode is set to NATURAL,
ISO set to AUTO which produced ISO:100, shutter 1/320sec and
aperture f2.8. White balance was set to AUTO and METERING was
set to Multi-Metering. The exposure compensation (EV)
was set to 0.
The file size is 6.1Mb -
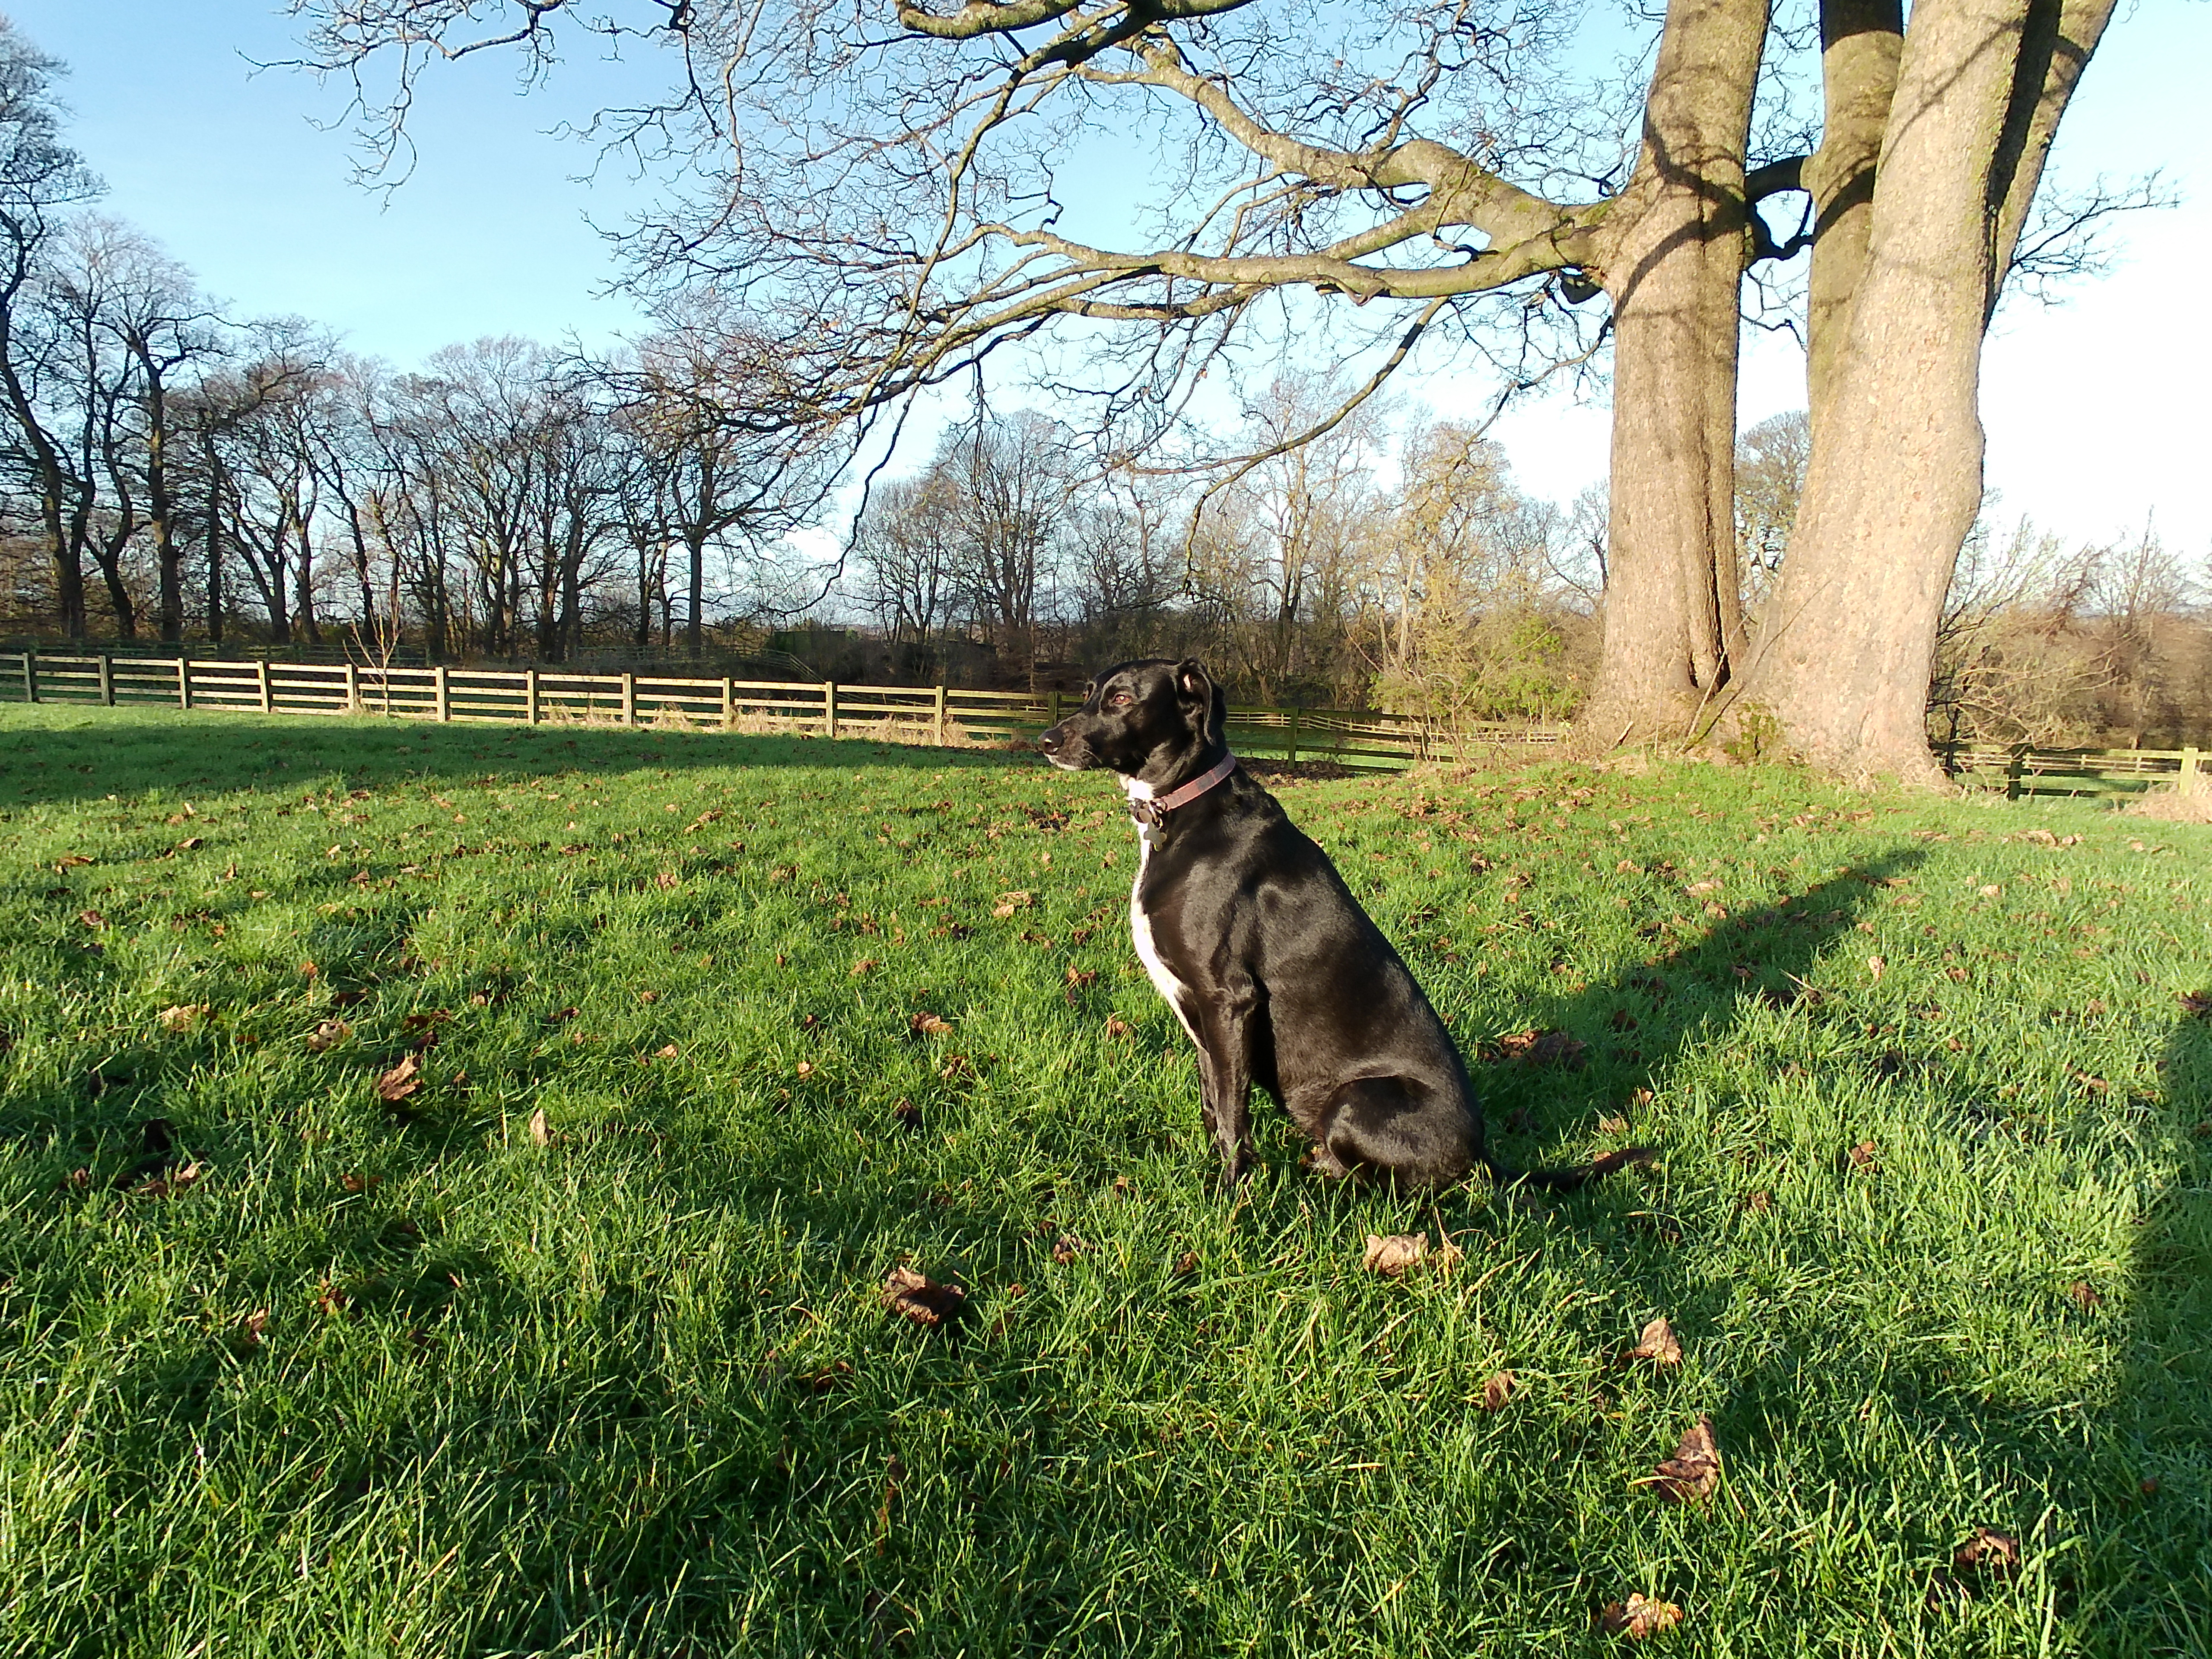
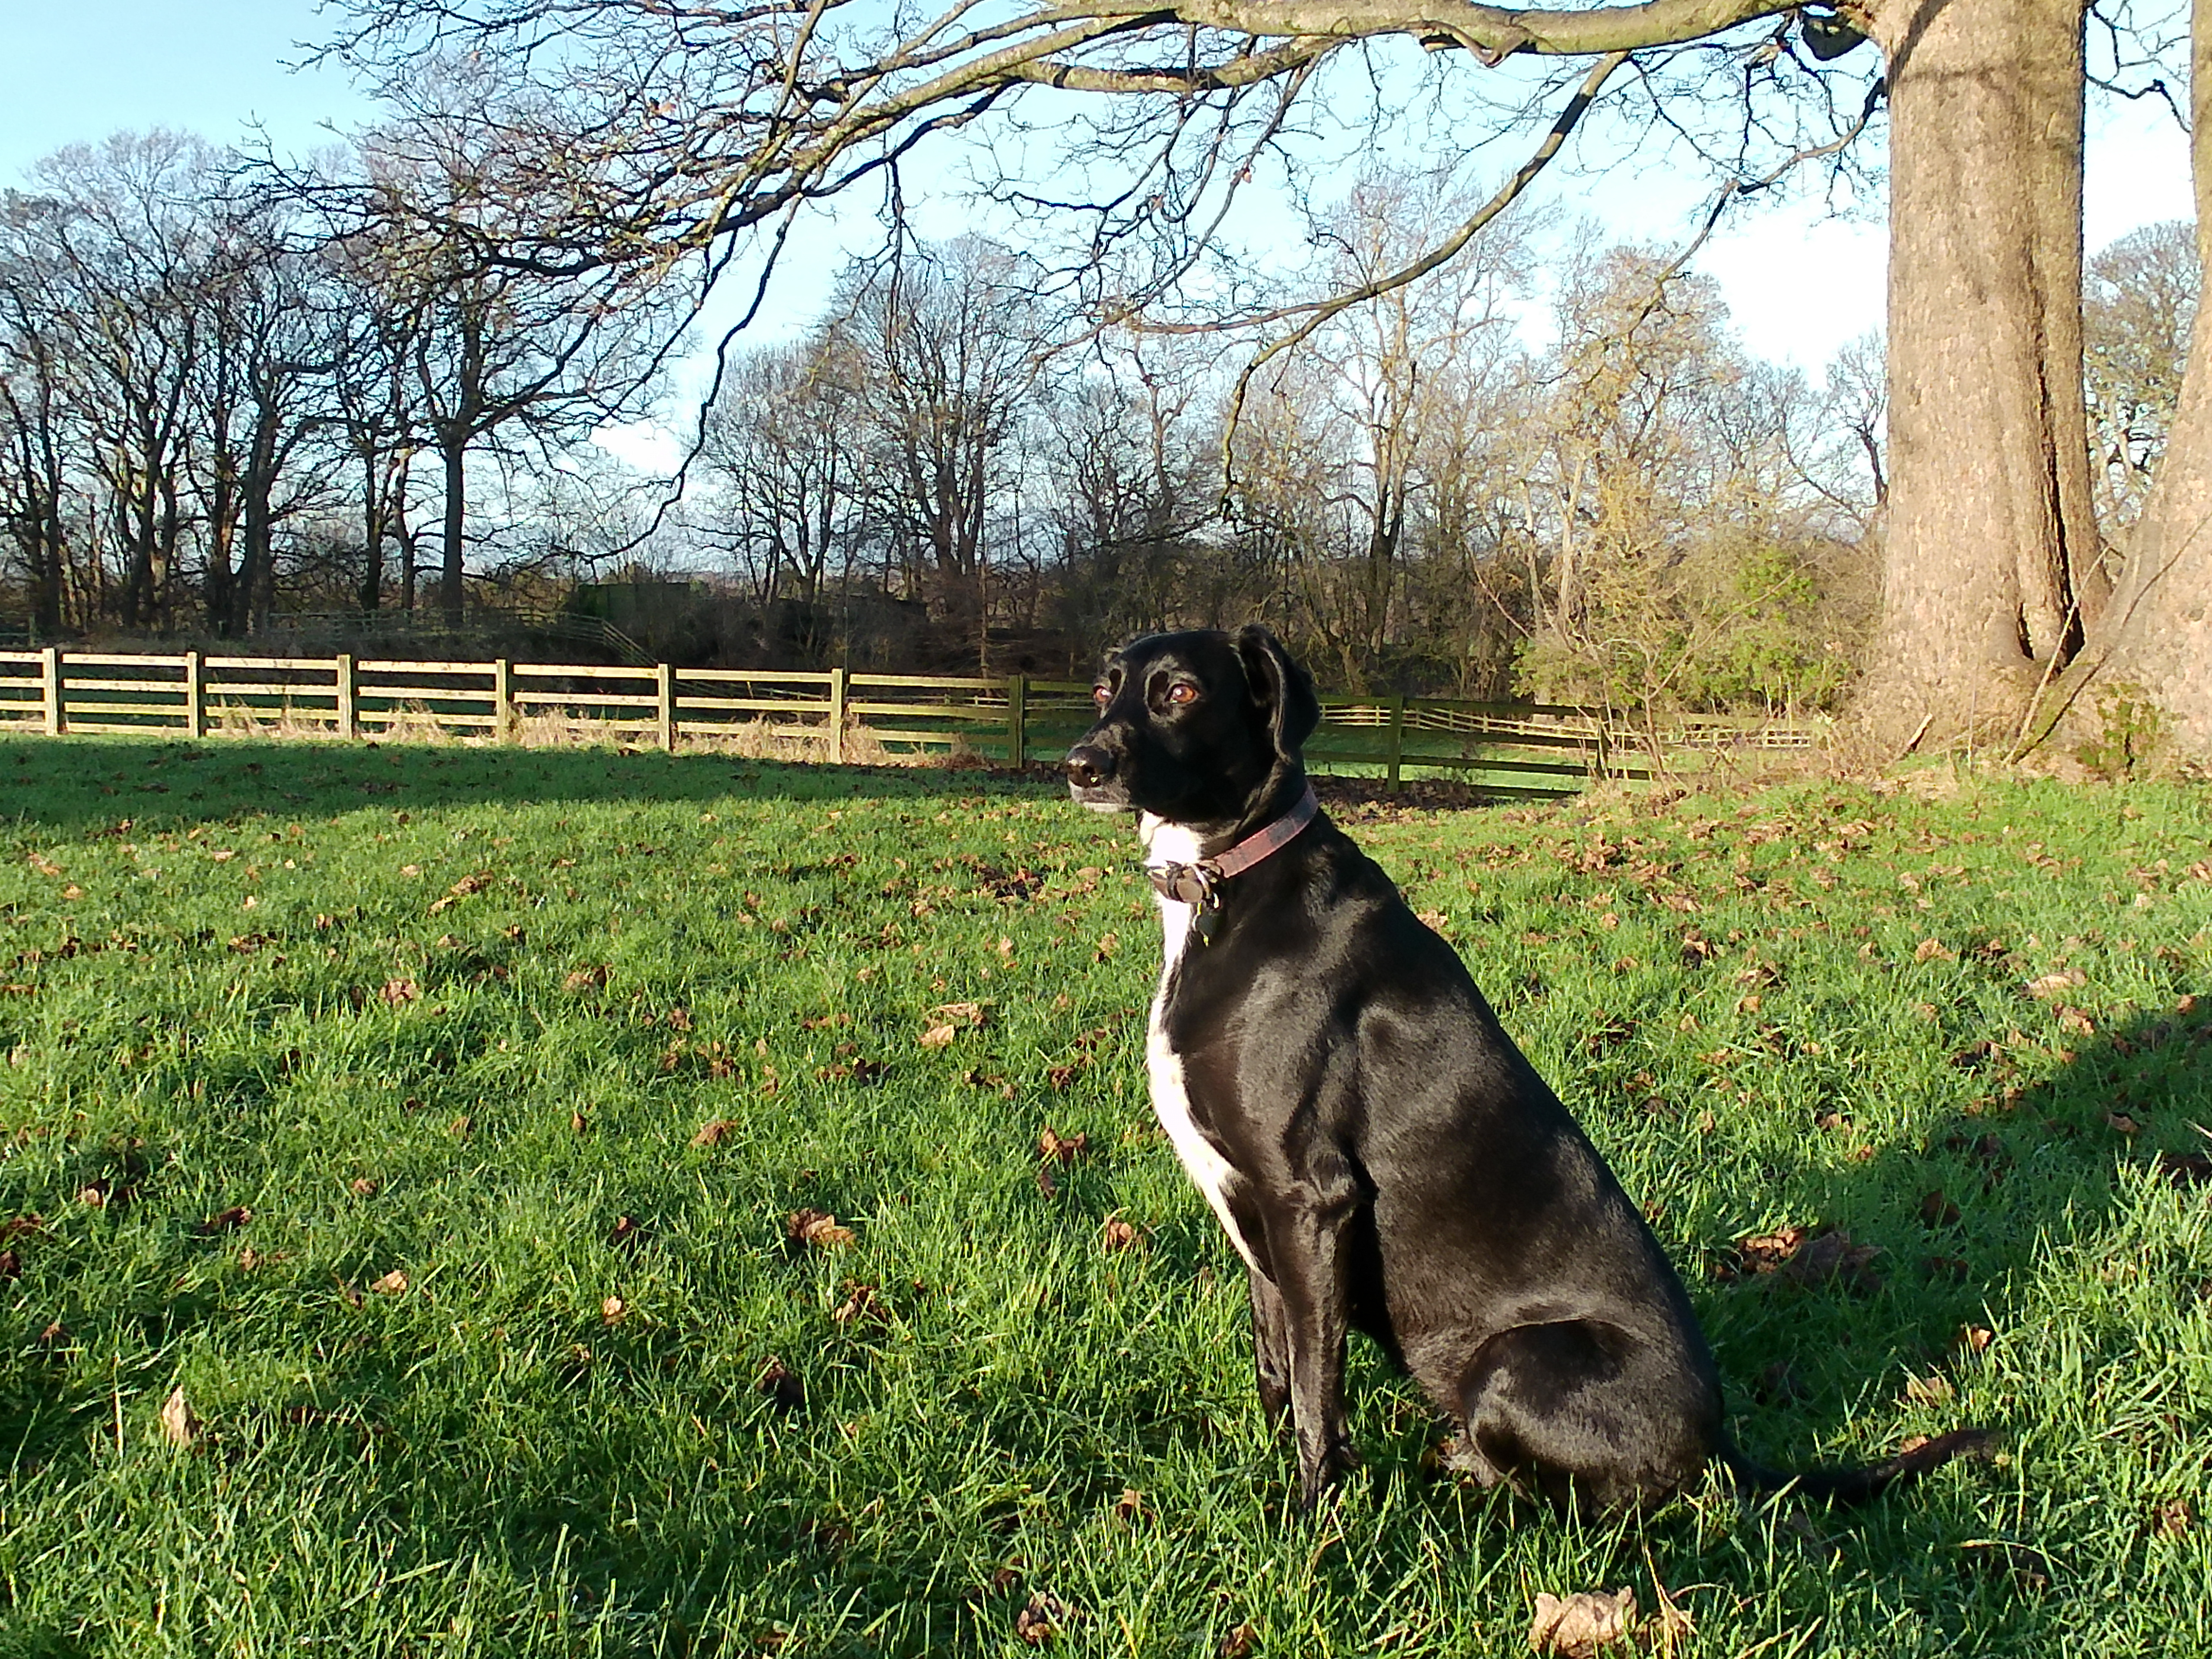
Dog Photos Captured in Good Weather
The photos in this section are all full size straight out of
the camera BUT there are limitations to the image quality
vs their viewing size. I have a 15" tablet screen and when
viewed at that size on my tablet the image quality is excellent.
I can push the image larger (CTRL + Mouse Centre Wheel Roll Up)
and the image quality still holds up. When viewed on my tablet
at full size, the image quality is well blown out.
I switched the EIS (image stabilisation) OFF and the Distortion
Calibration ON for these images.
The first image of the dog is a full wide angle and the second shot with a medium
zoom.
Please click on images to open up to camera unedited full size -
20MP,
Colour
EFFECT mode is set to NATURAL,
ISO set to AUTO which produced ISO:100, shutter 1/160sec and
aperture f2.8. White balance was set to AUTO and METERING was
set to Multi-Metering. The exposure compensation (EV)
was set to 0.
The file size is 7.5Mb -
20MP,
Colour
EFFECT mode is set to NATURAL,
ISO set to AUTO which produced ISO:100, shutter 1/200sec and
aperture f2.8. White balance was set to AUTO and METERING was
set to Multi-Metering. The exposure compensation (EV)
was set to 0.
The file size is 7.3Mb -
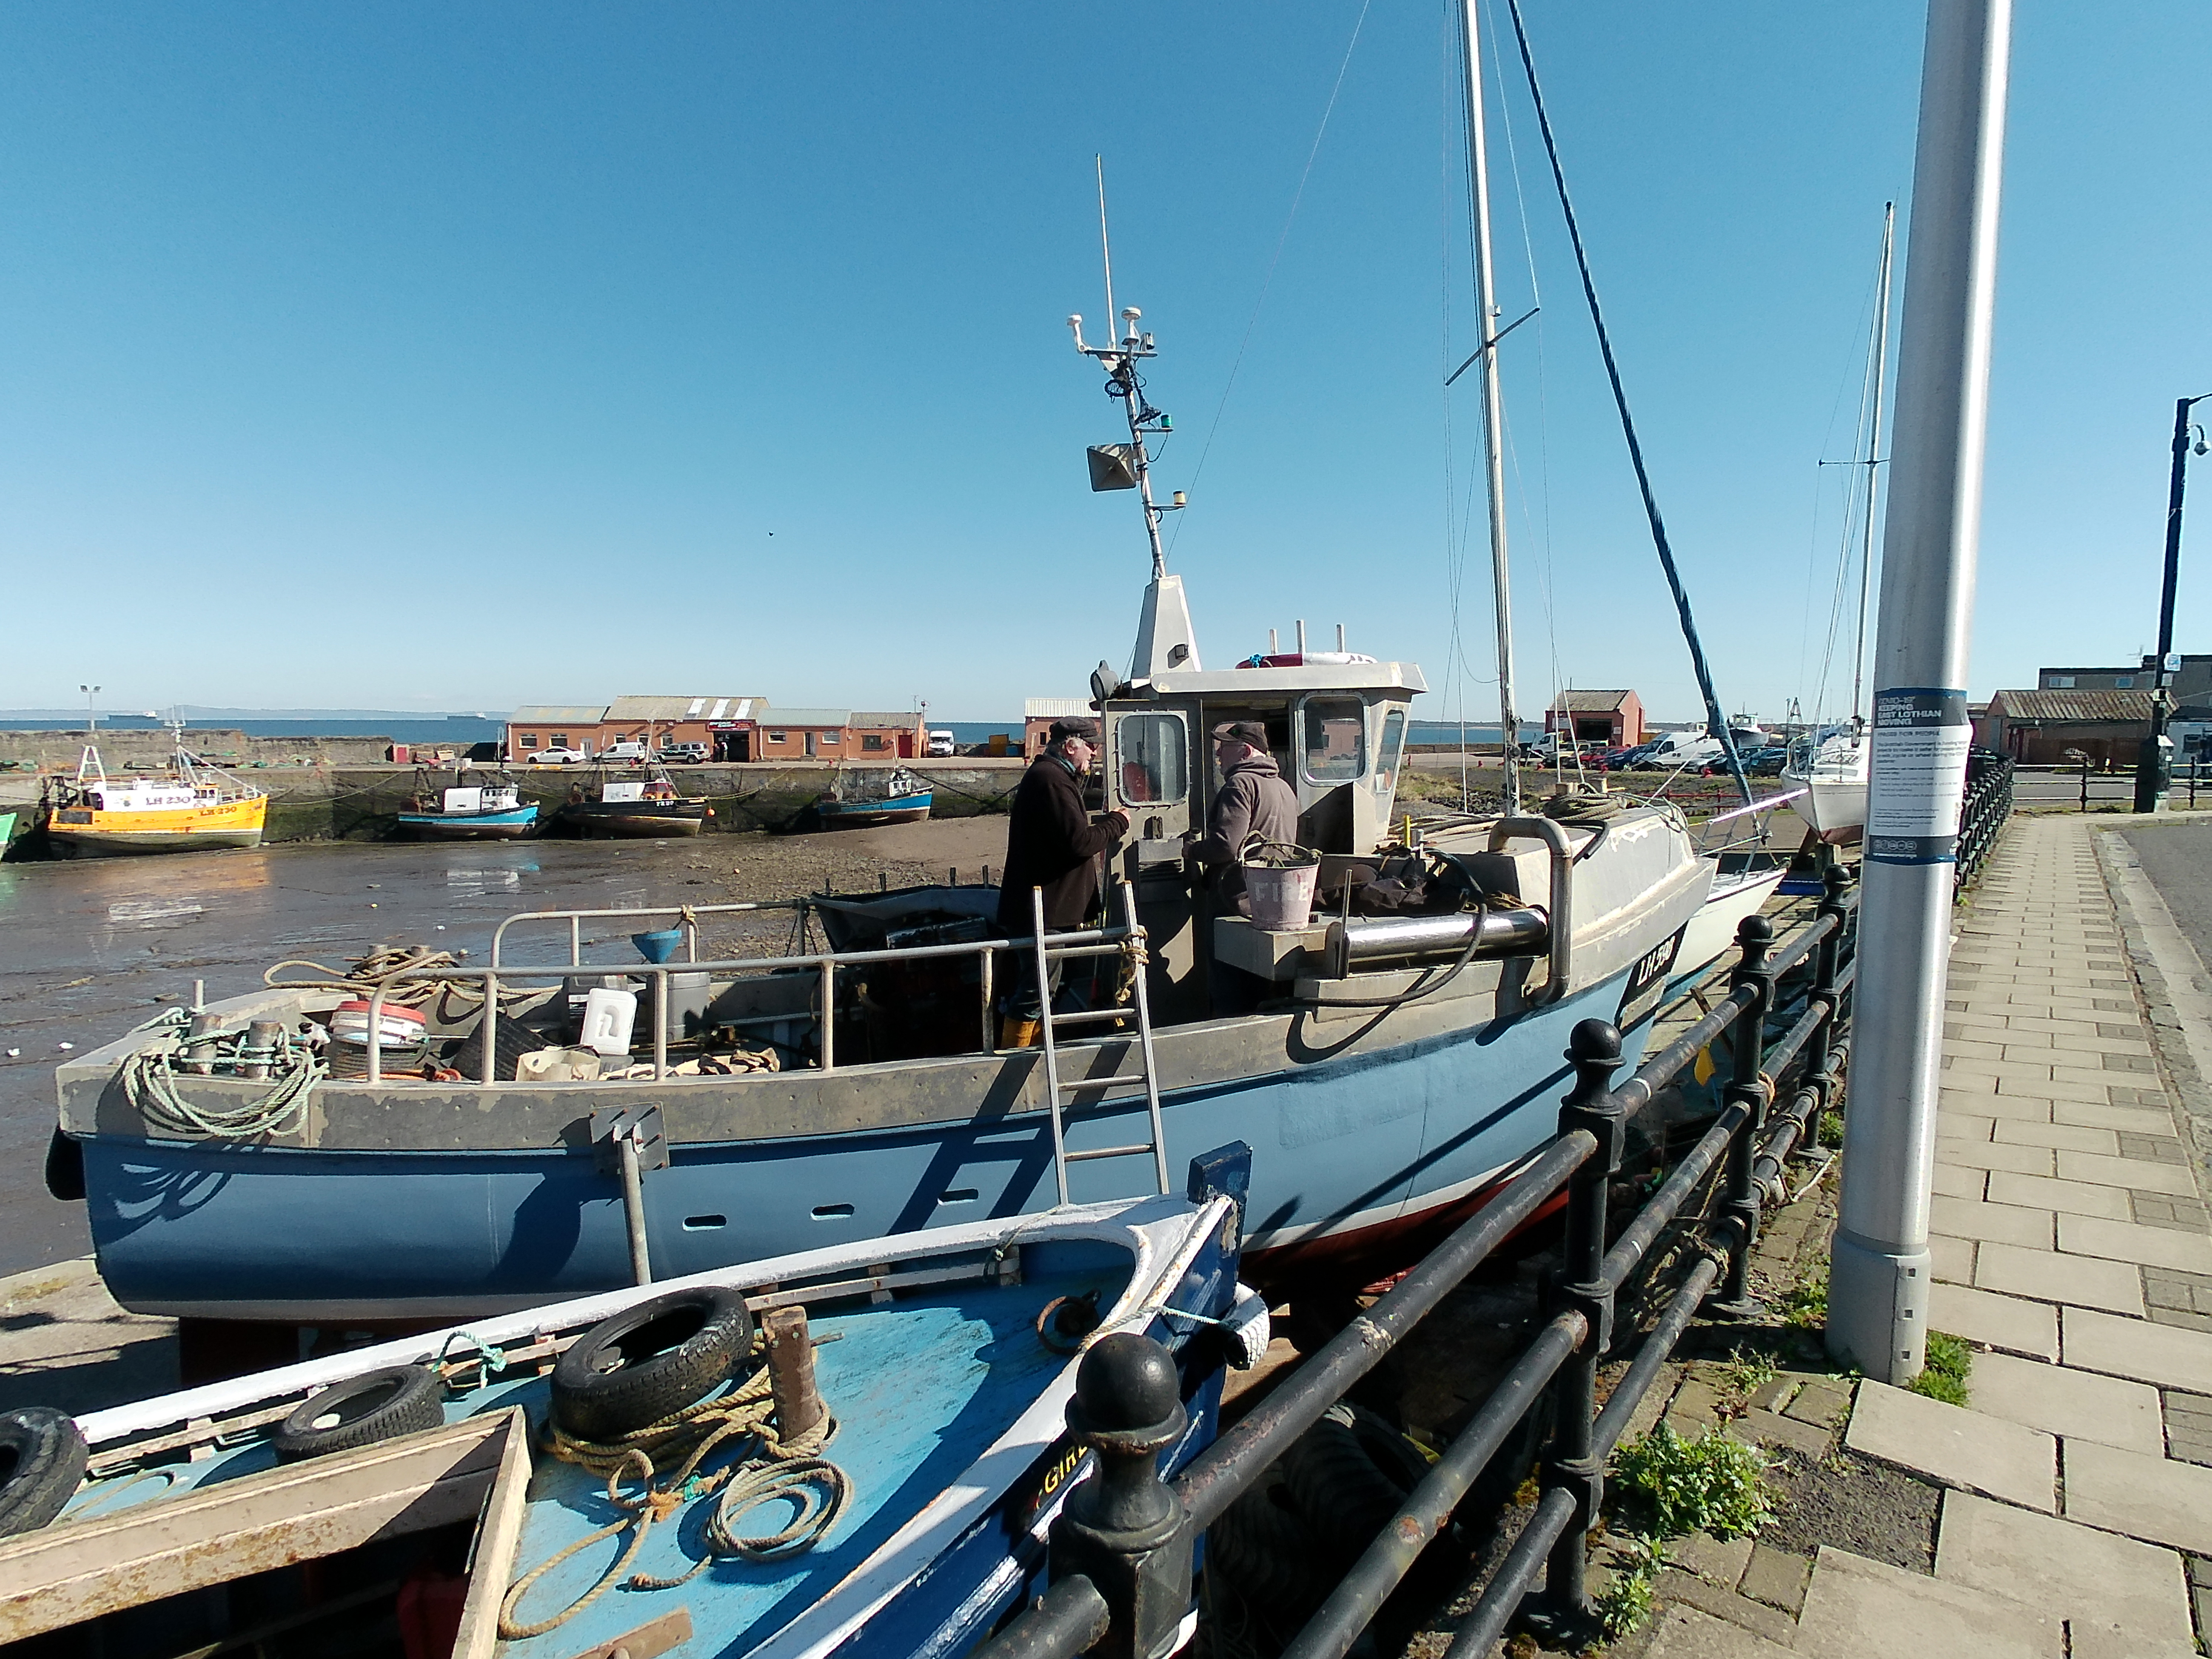
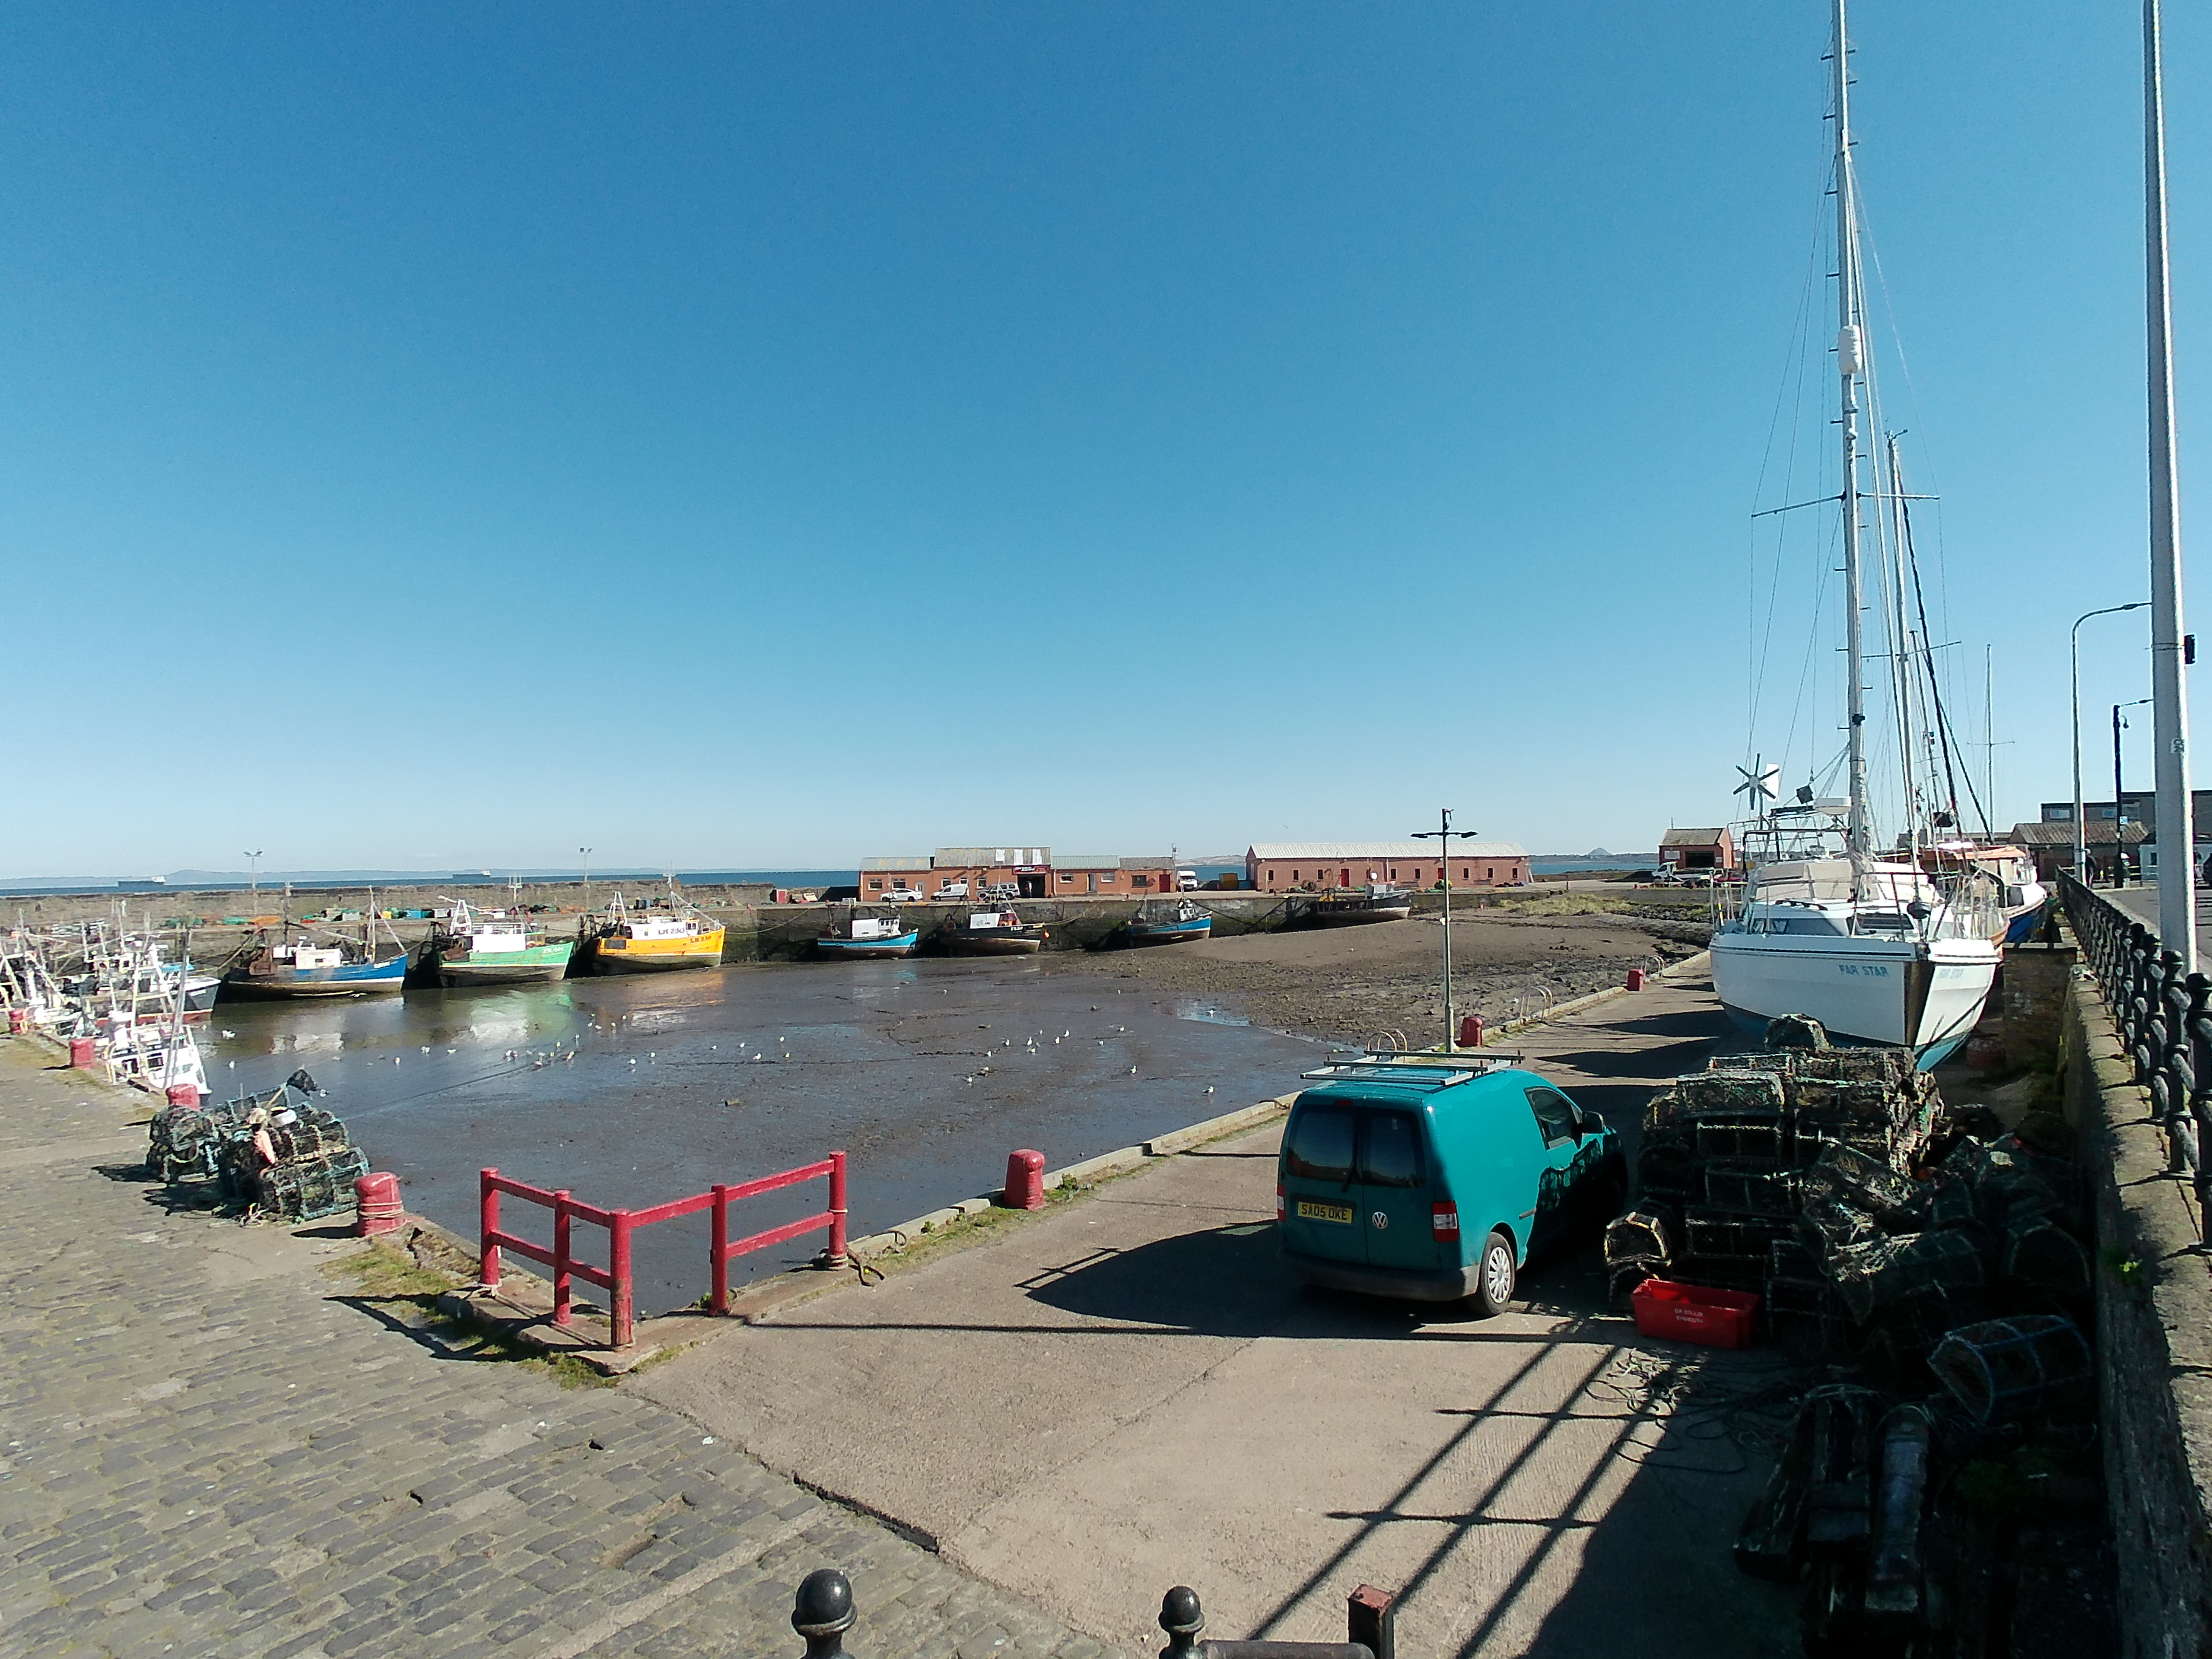
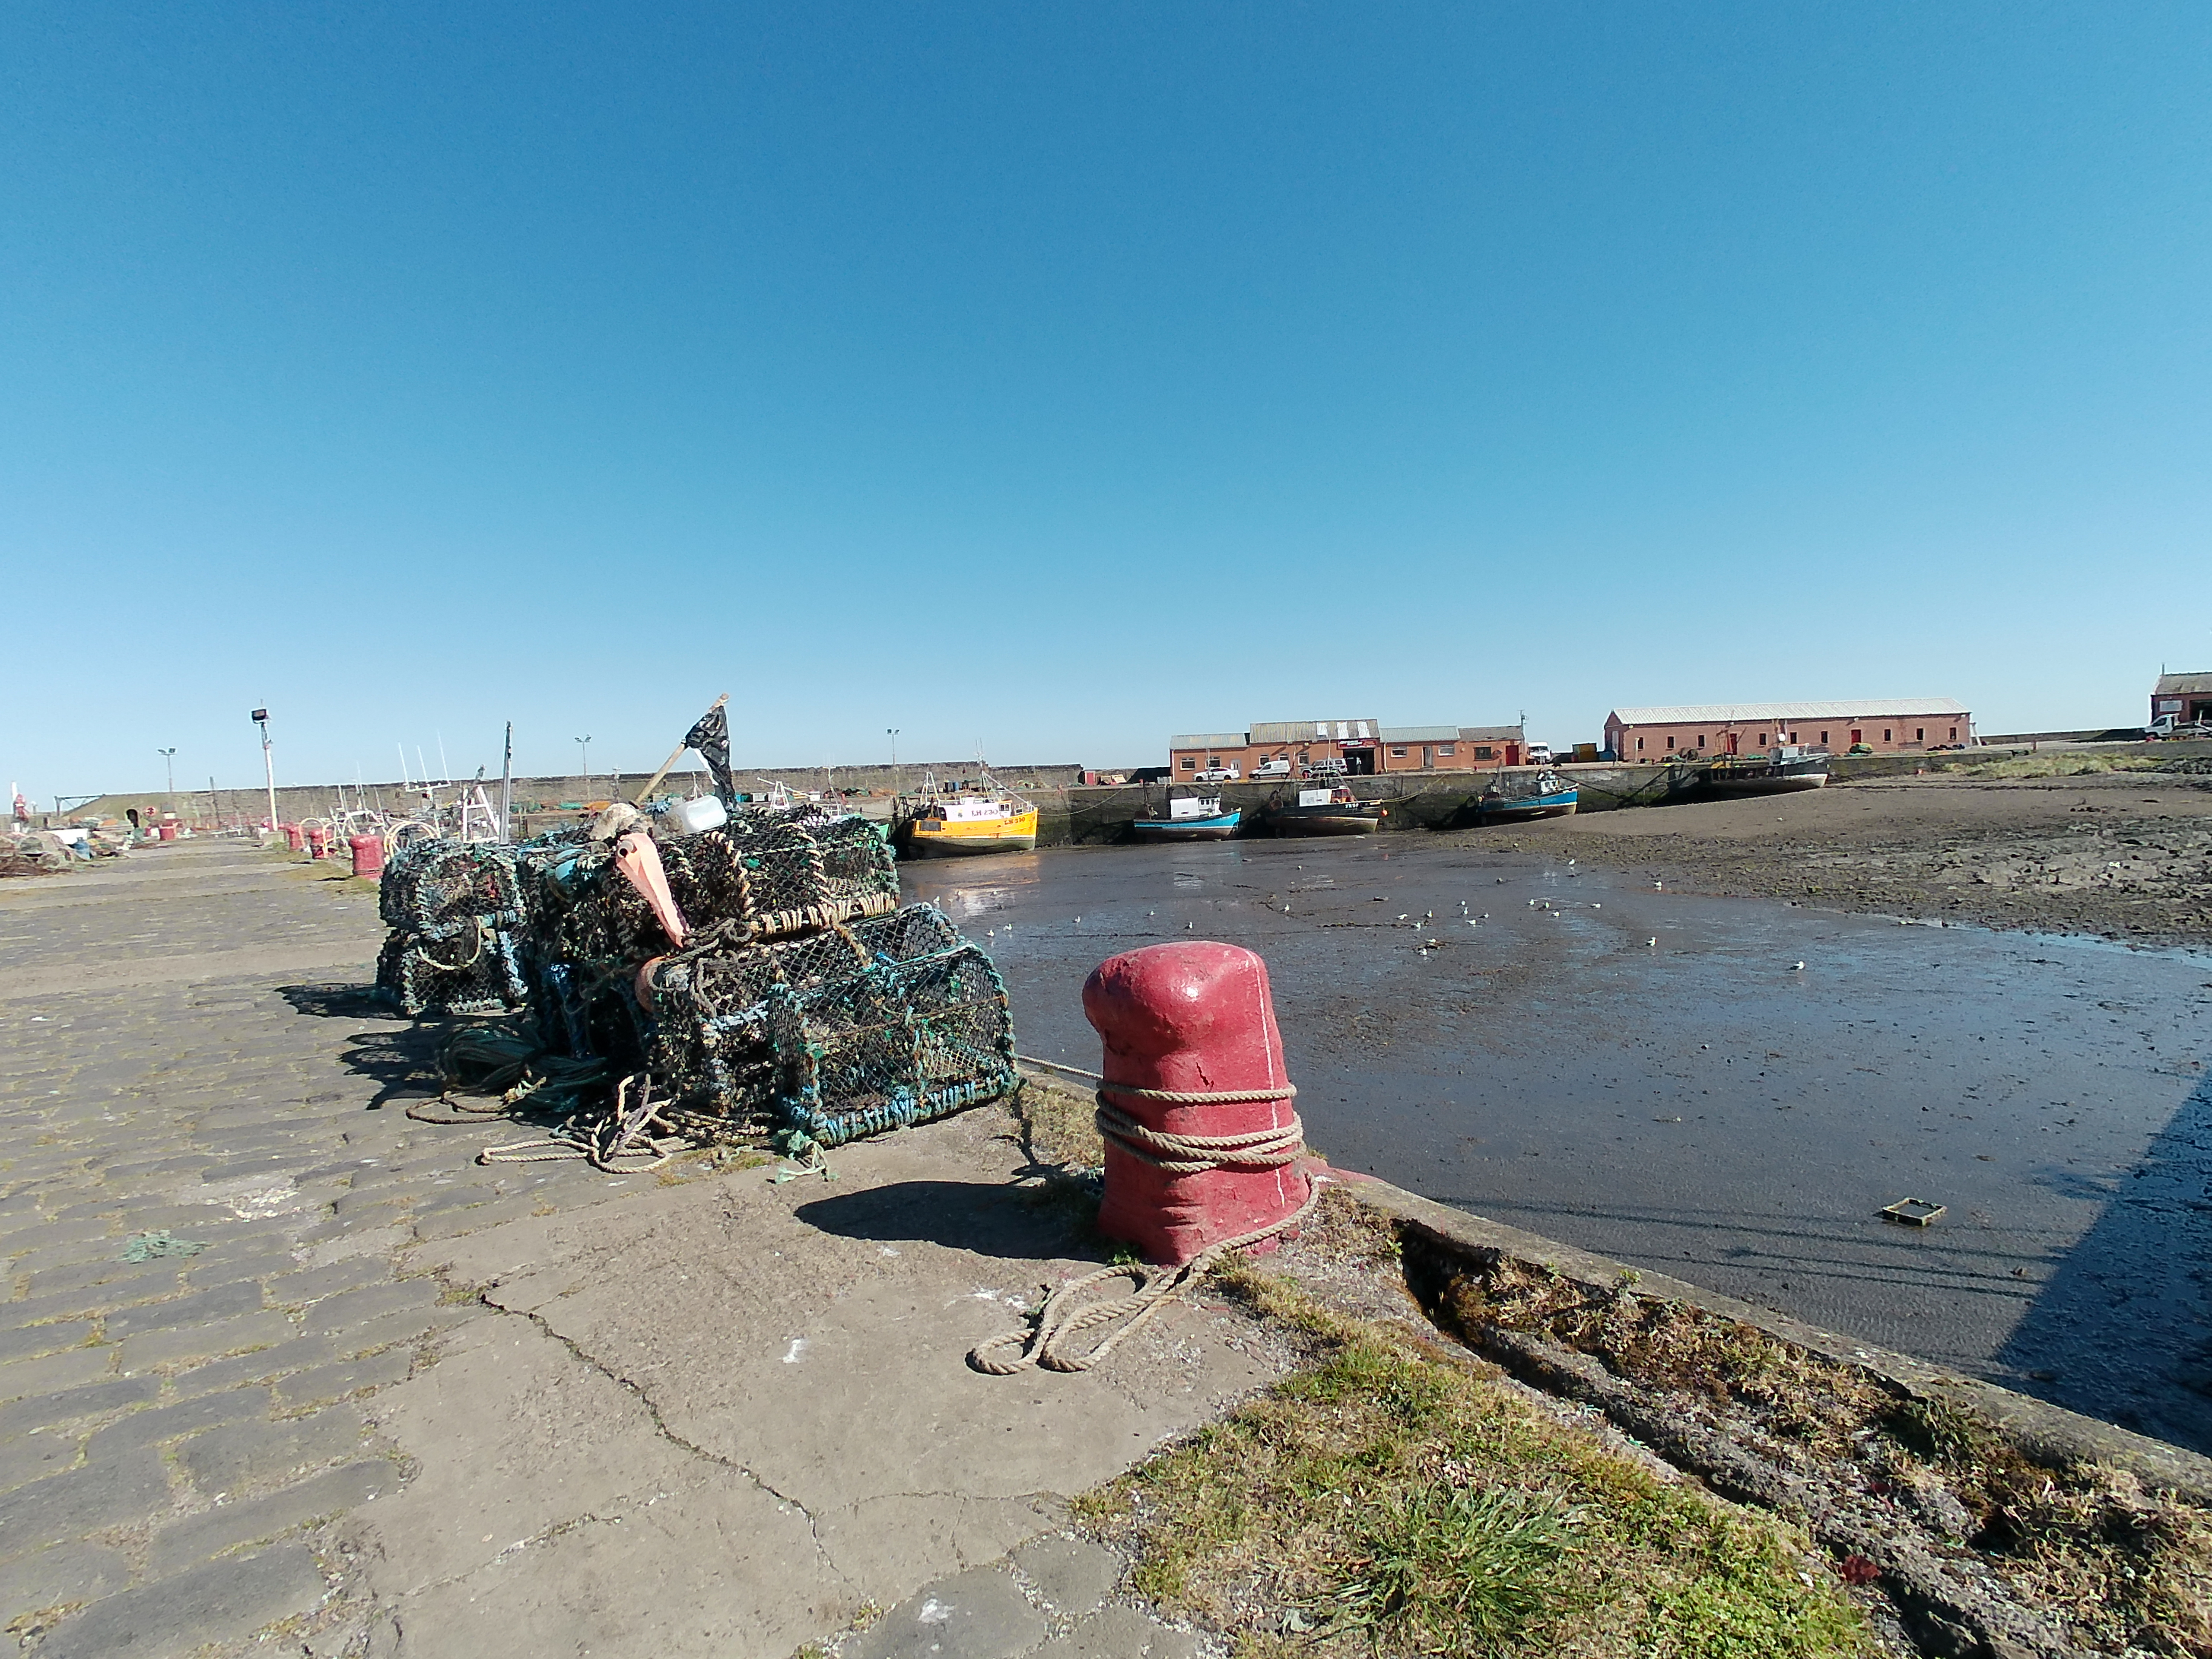
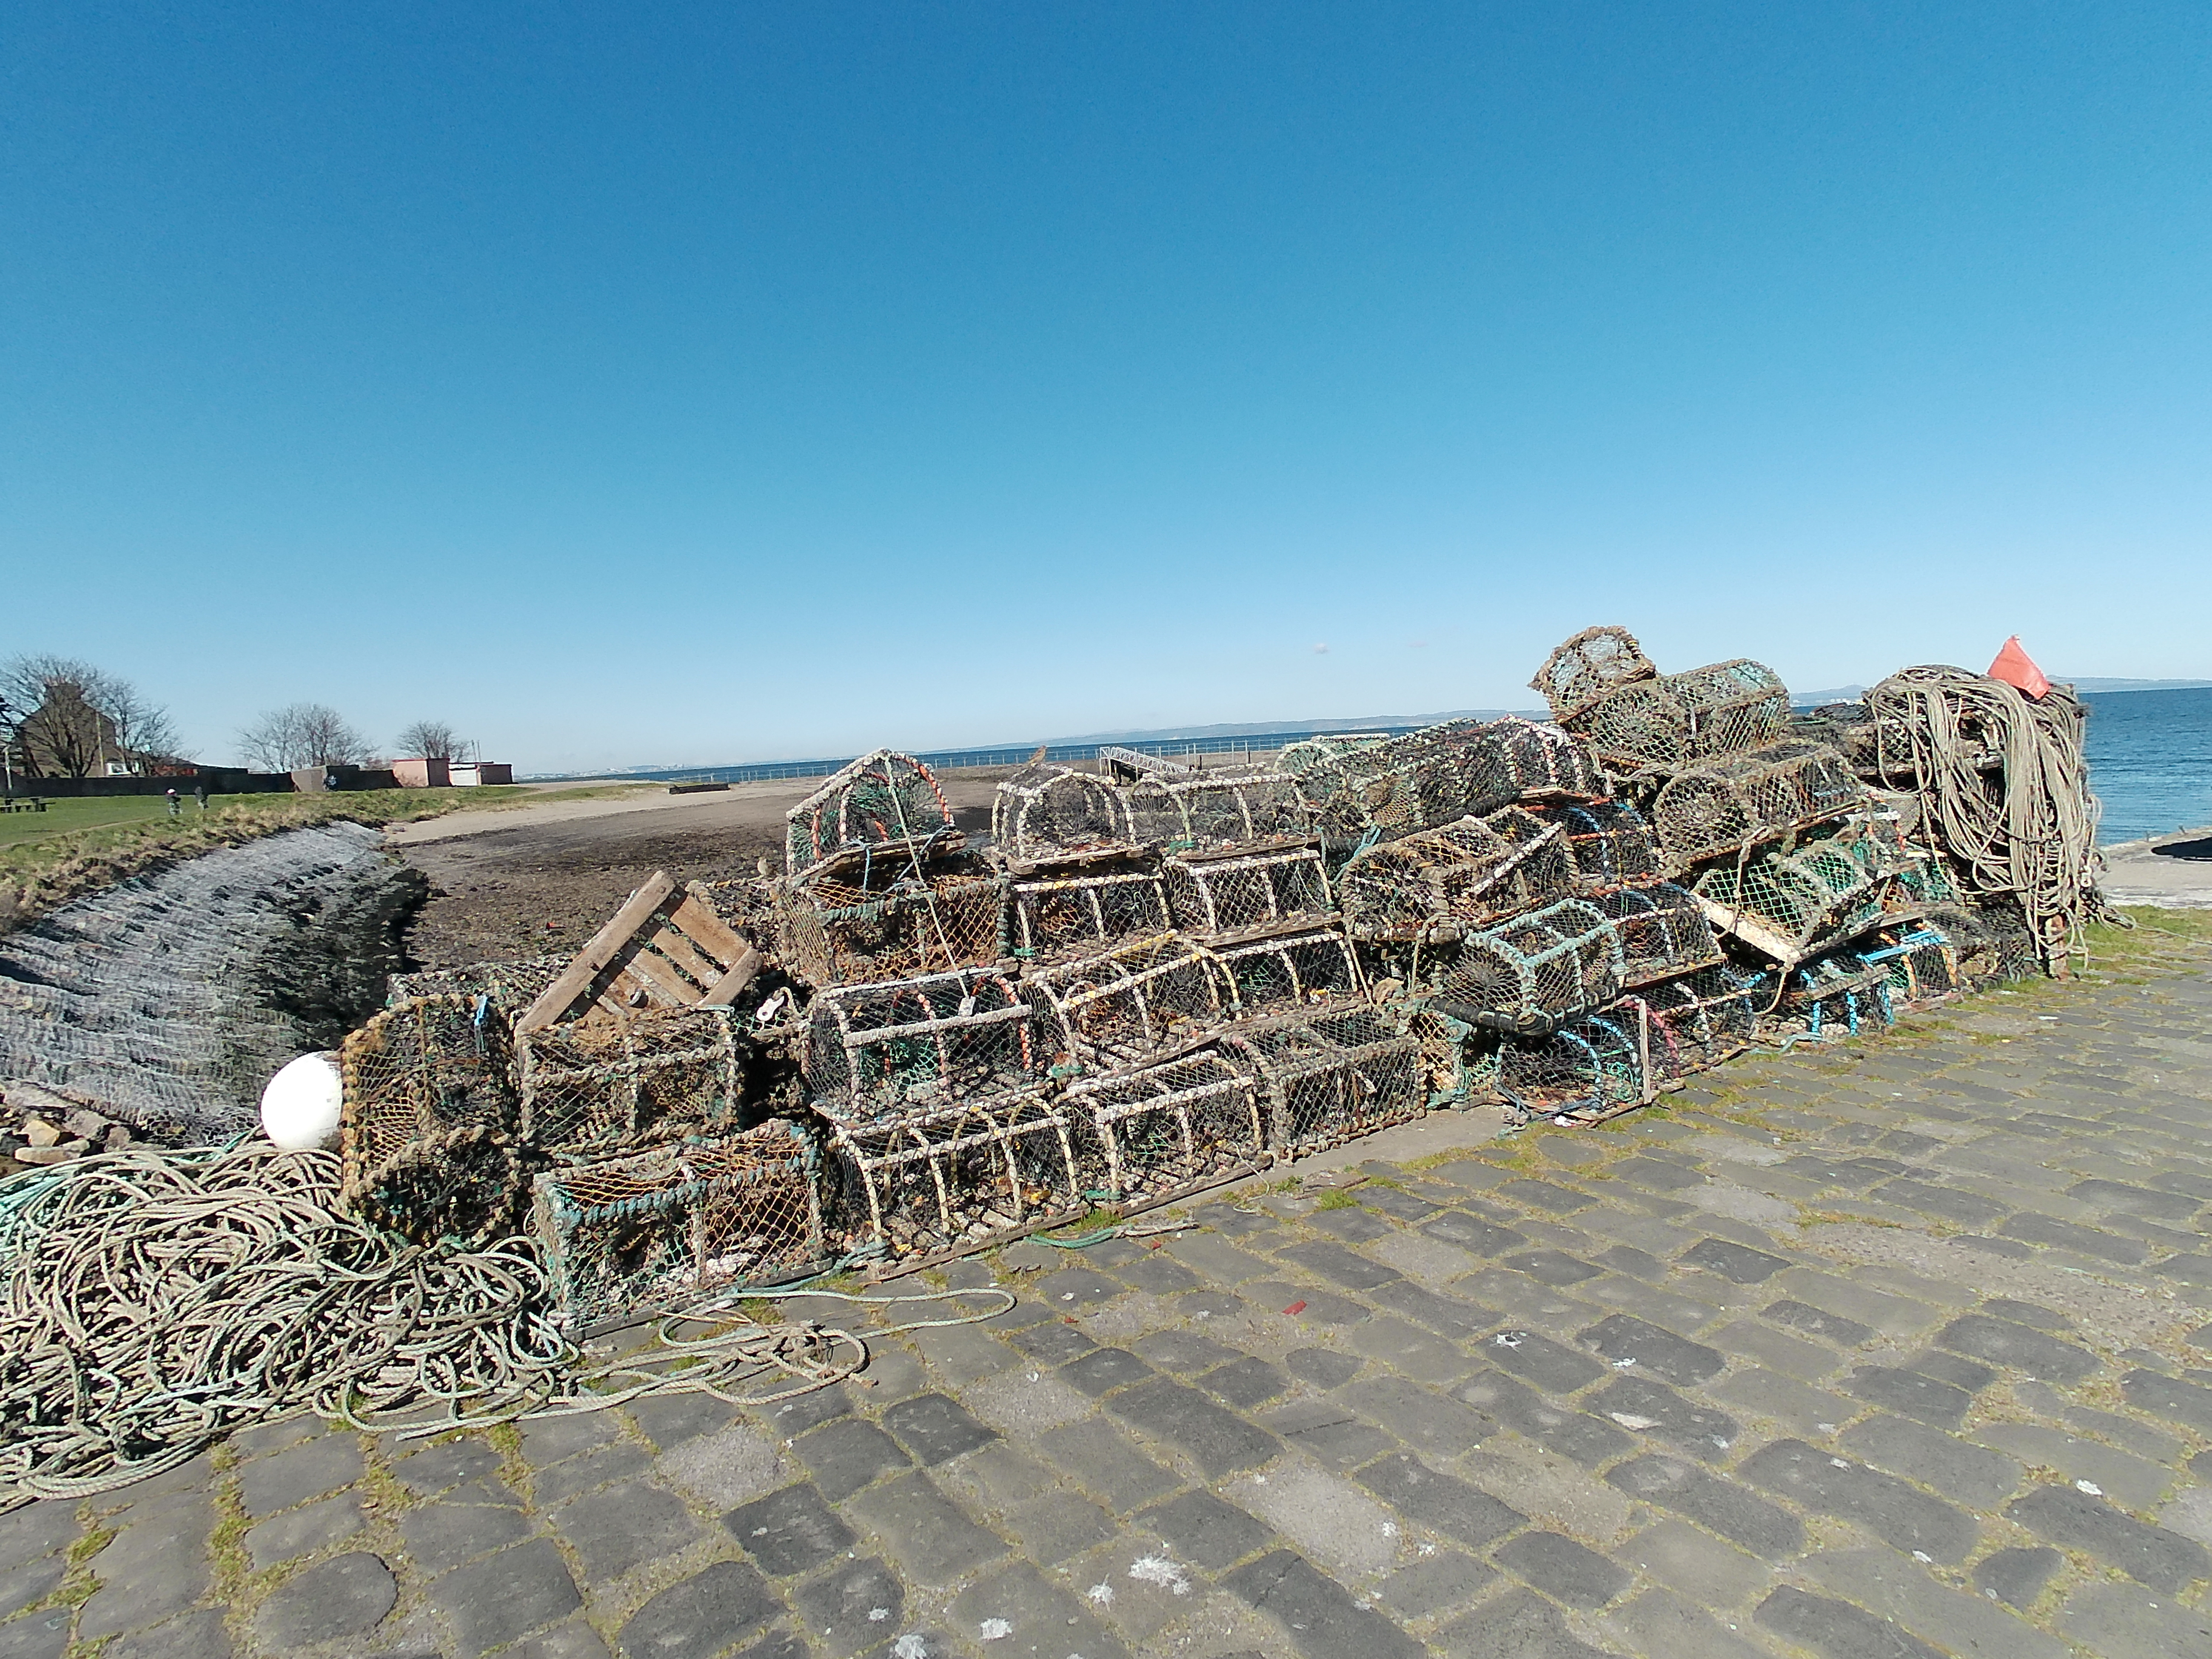
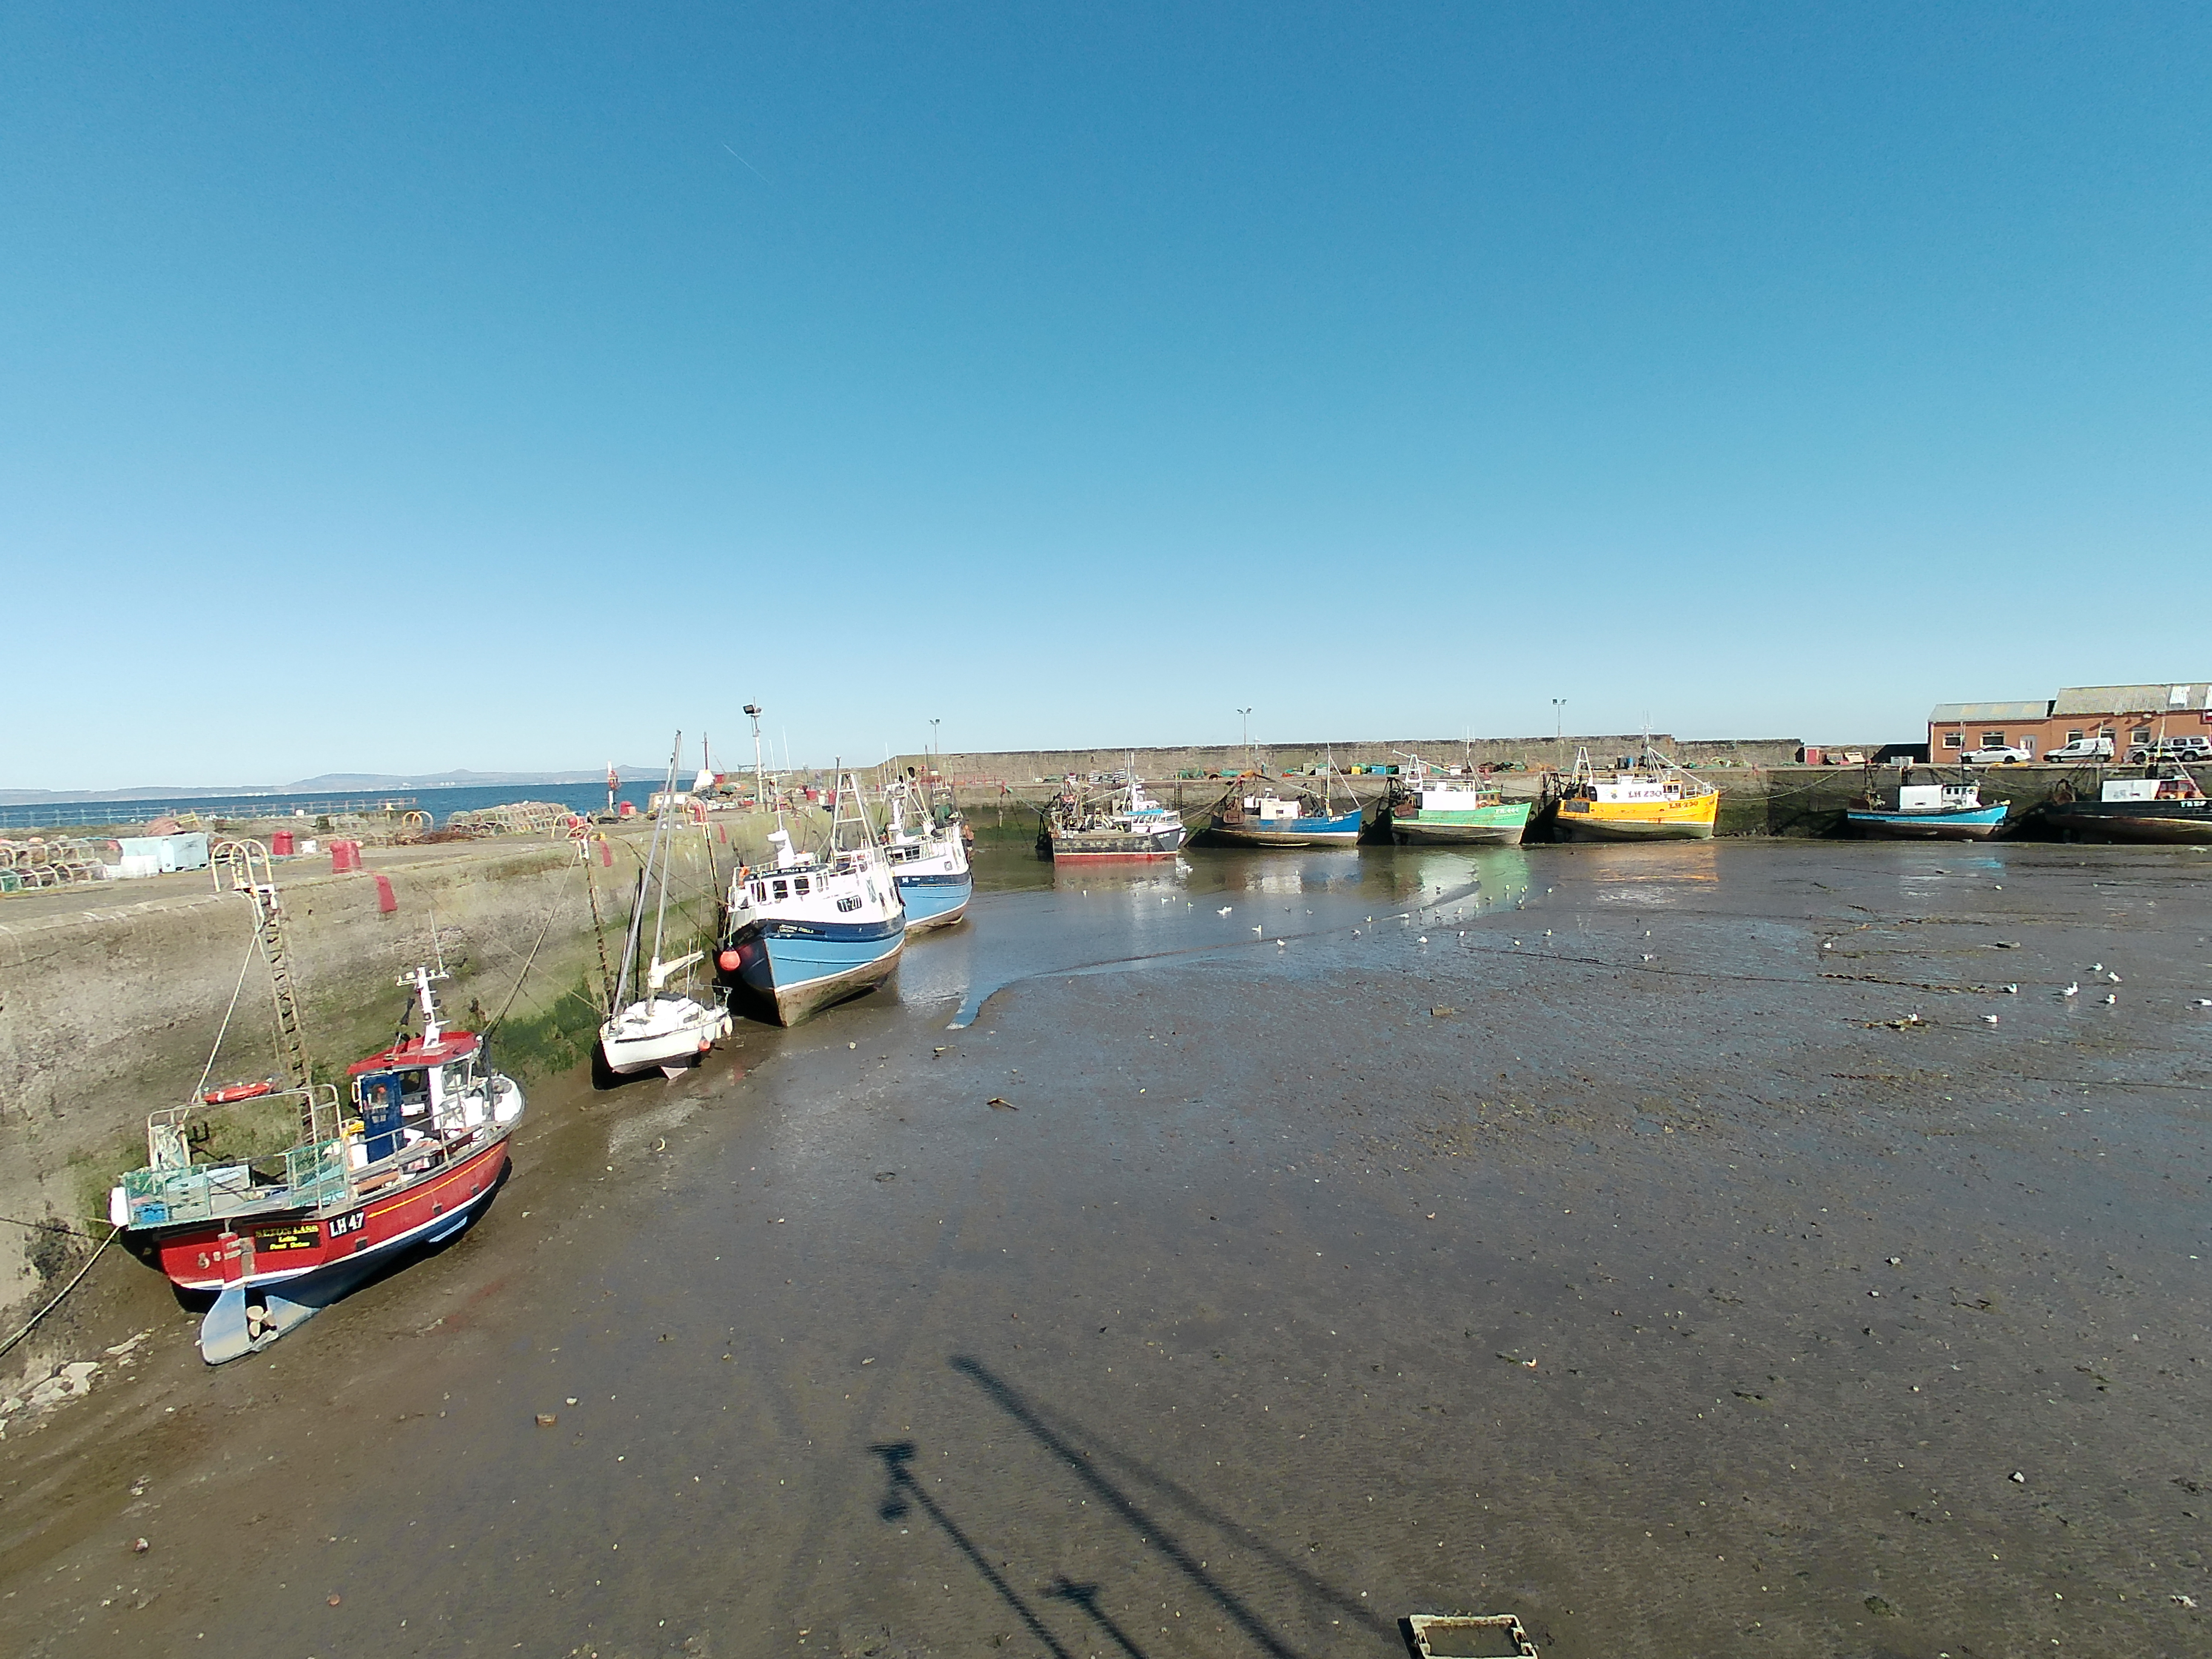
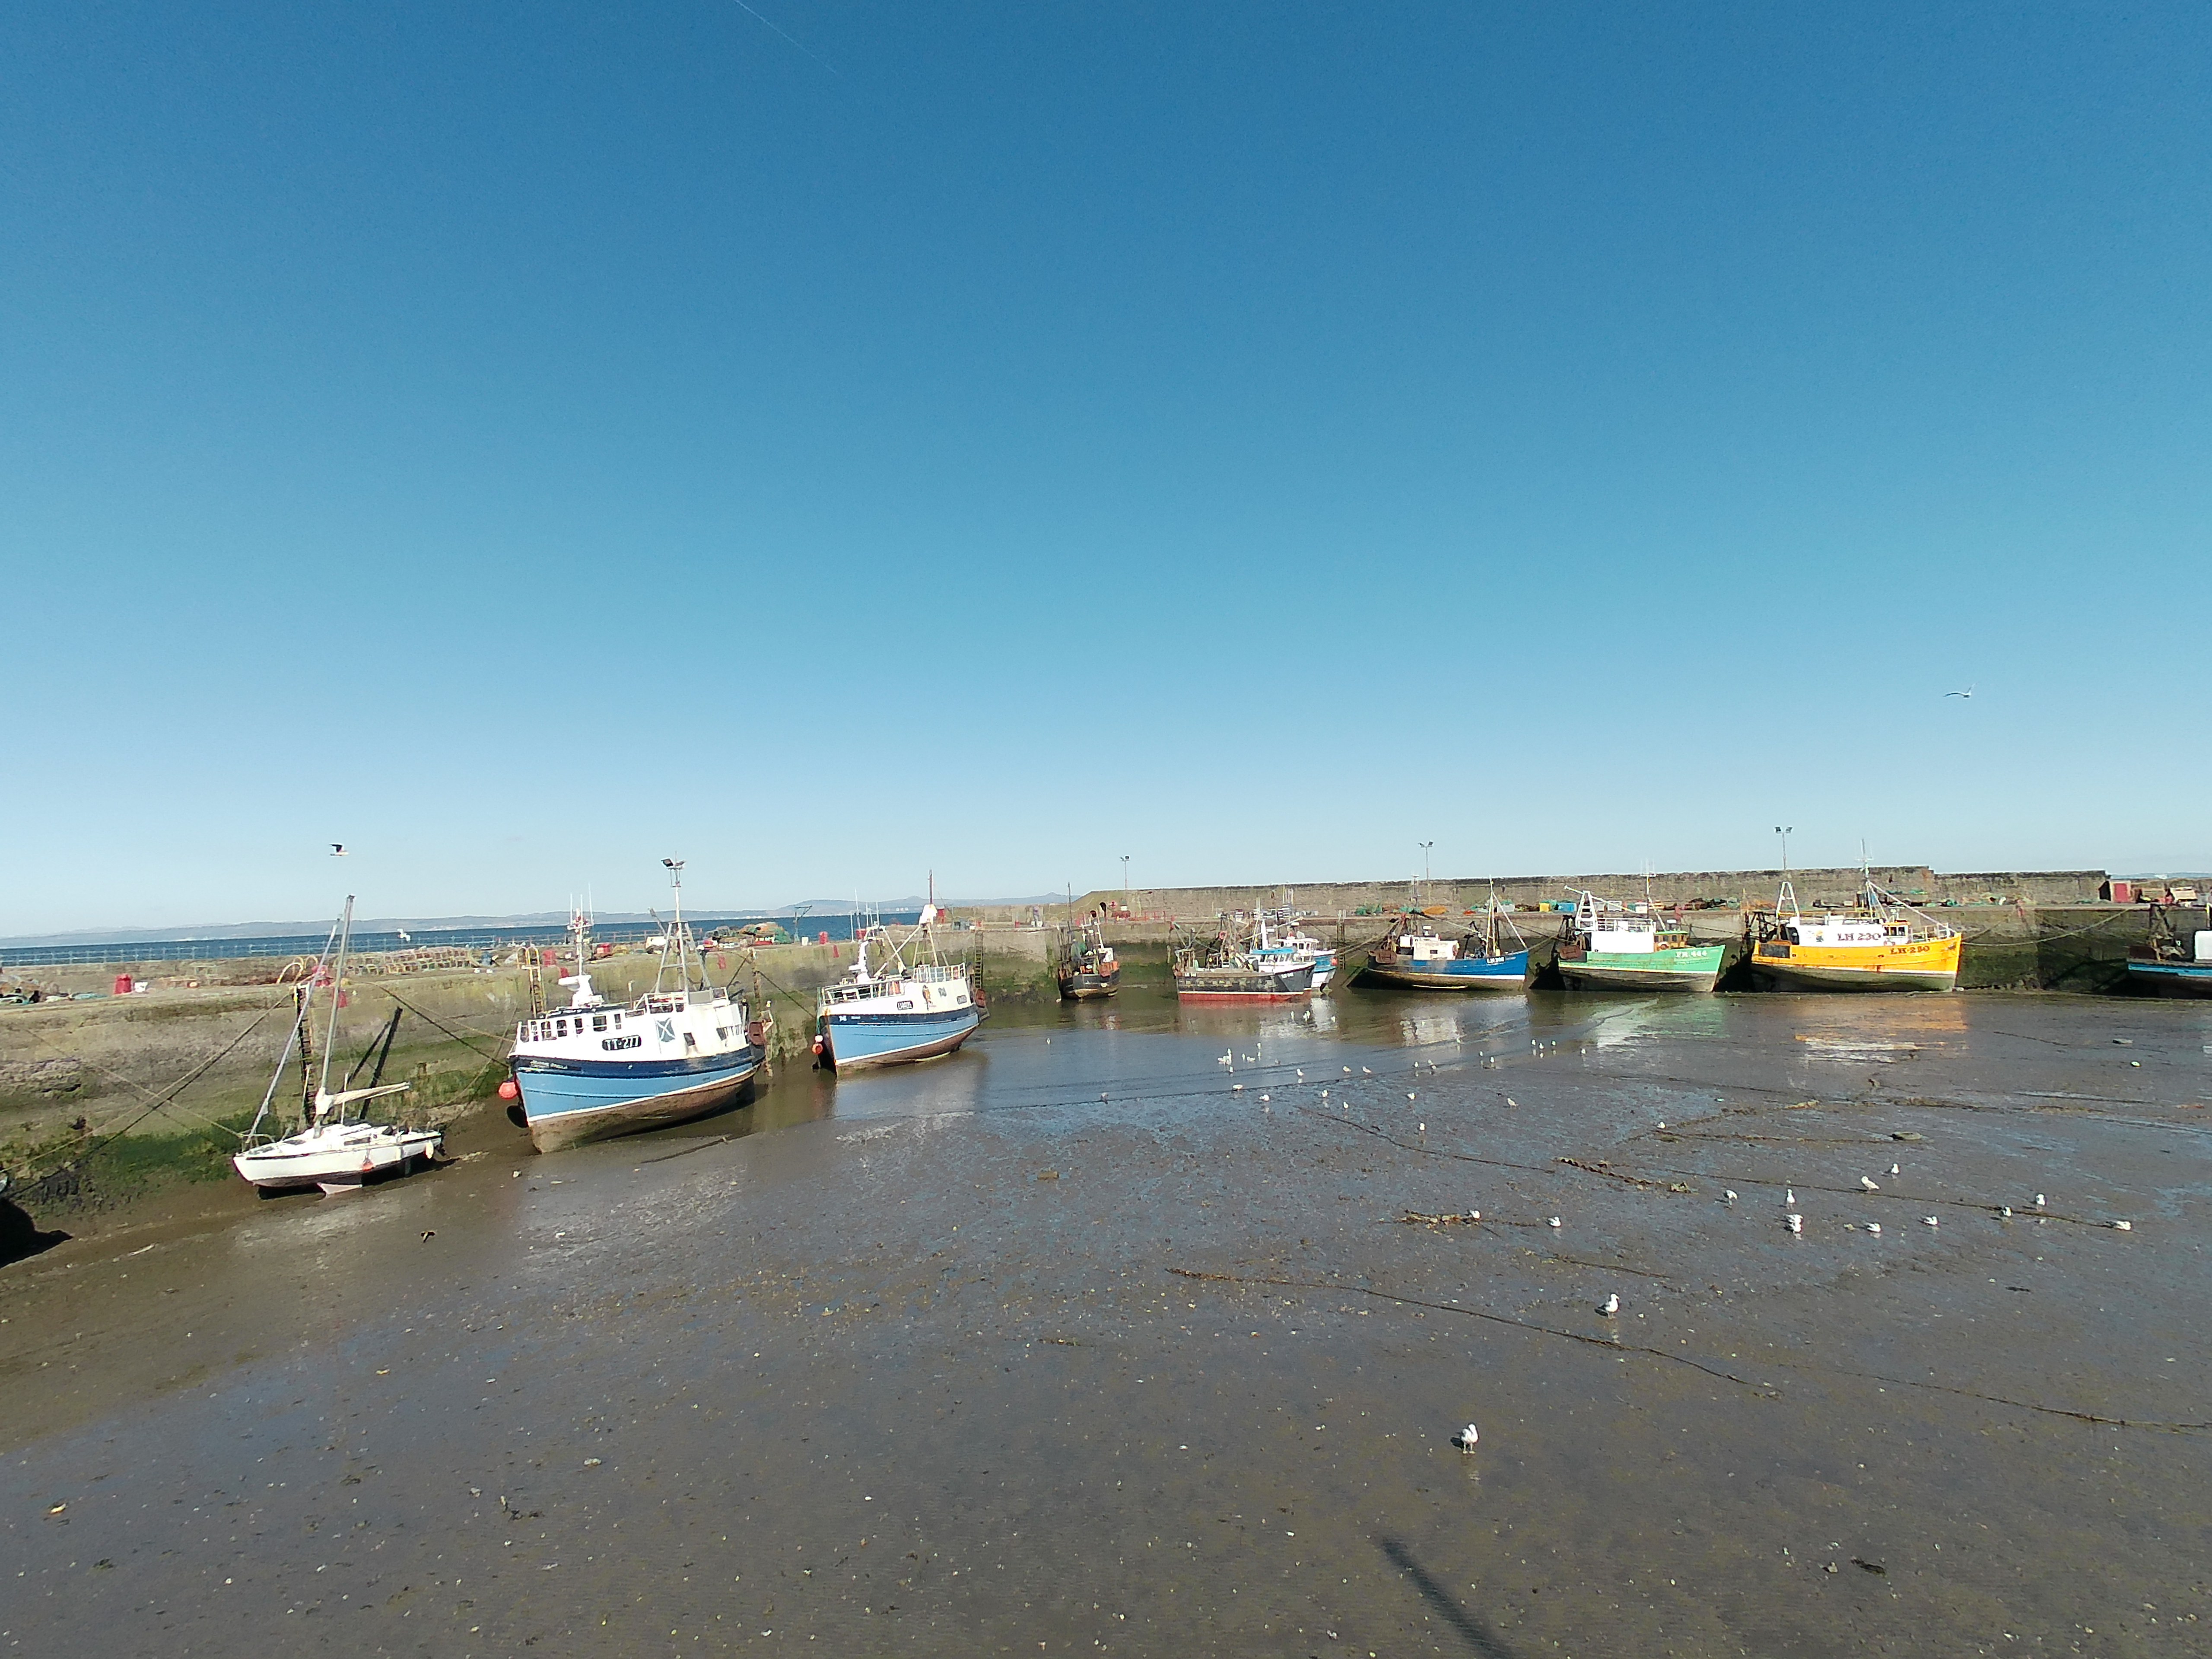
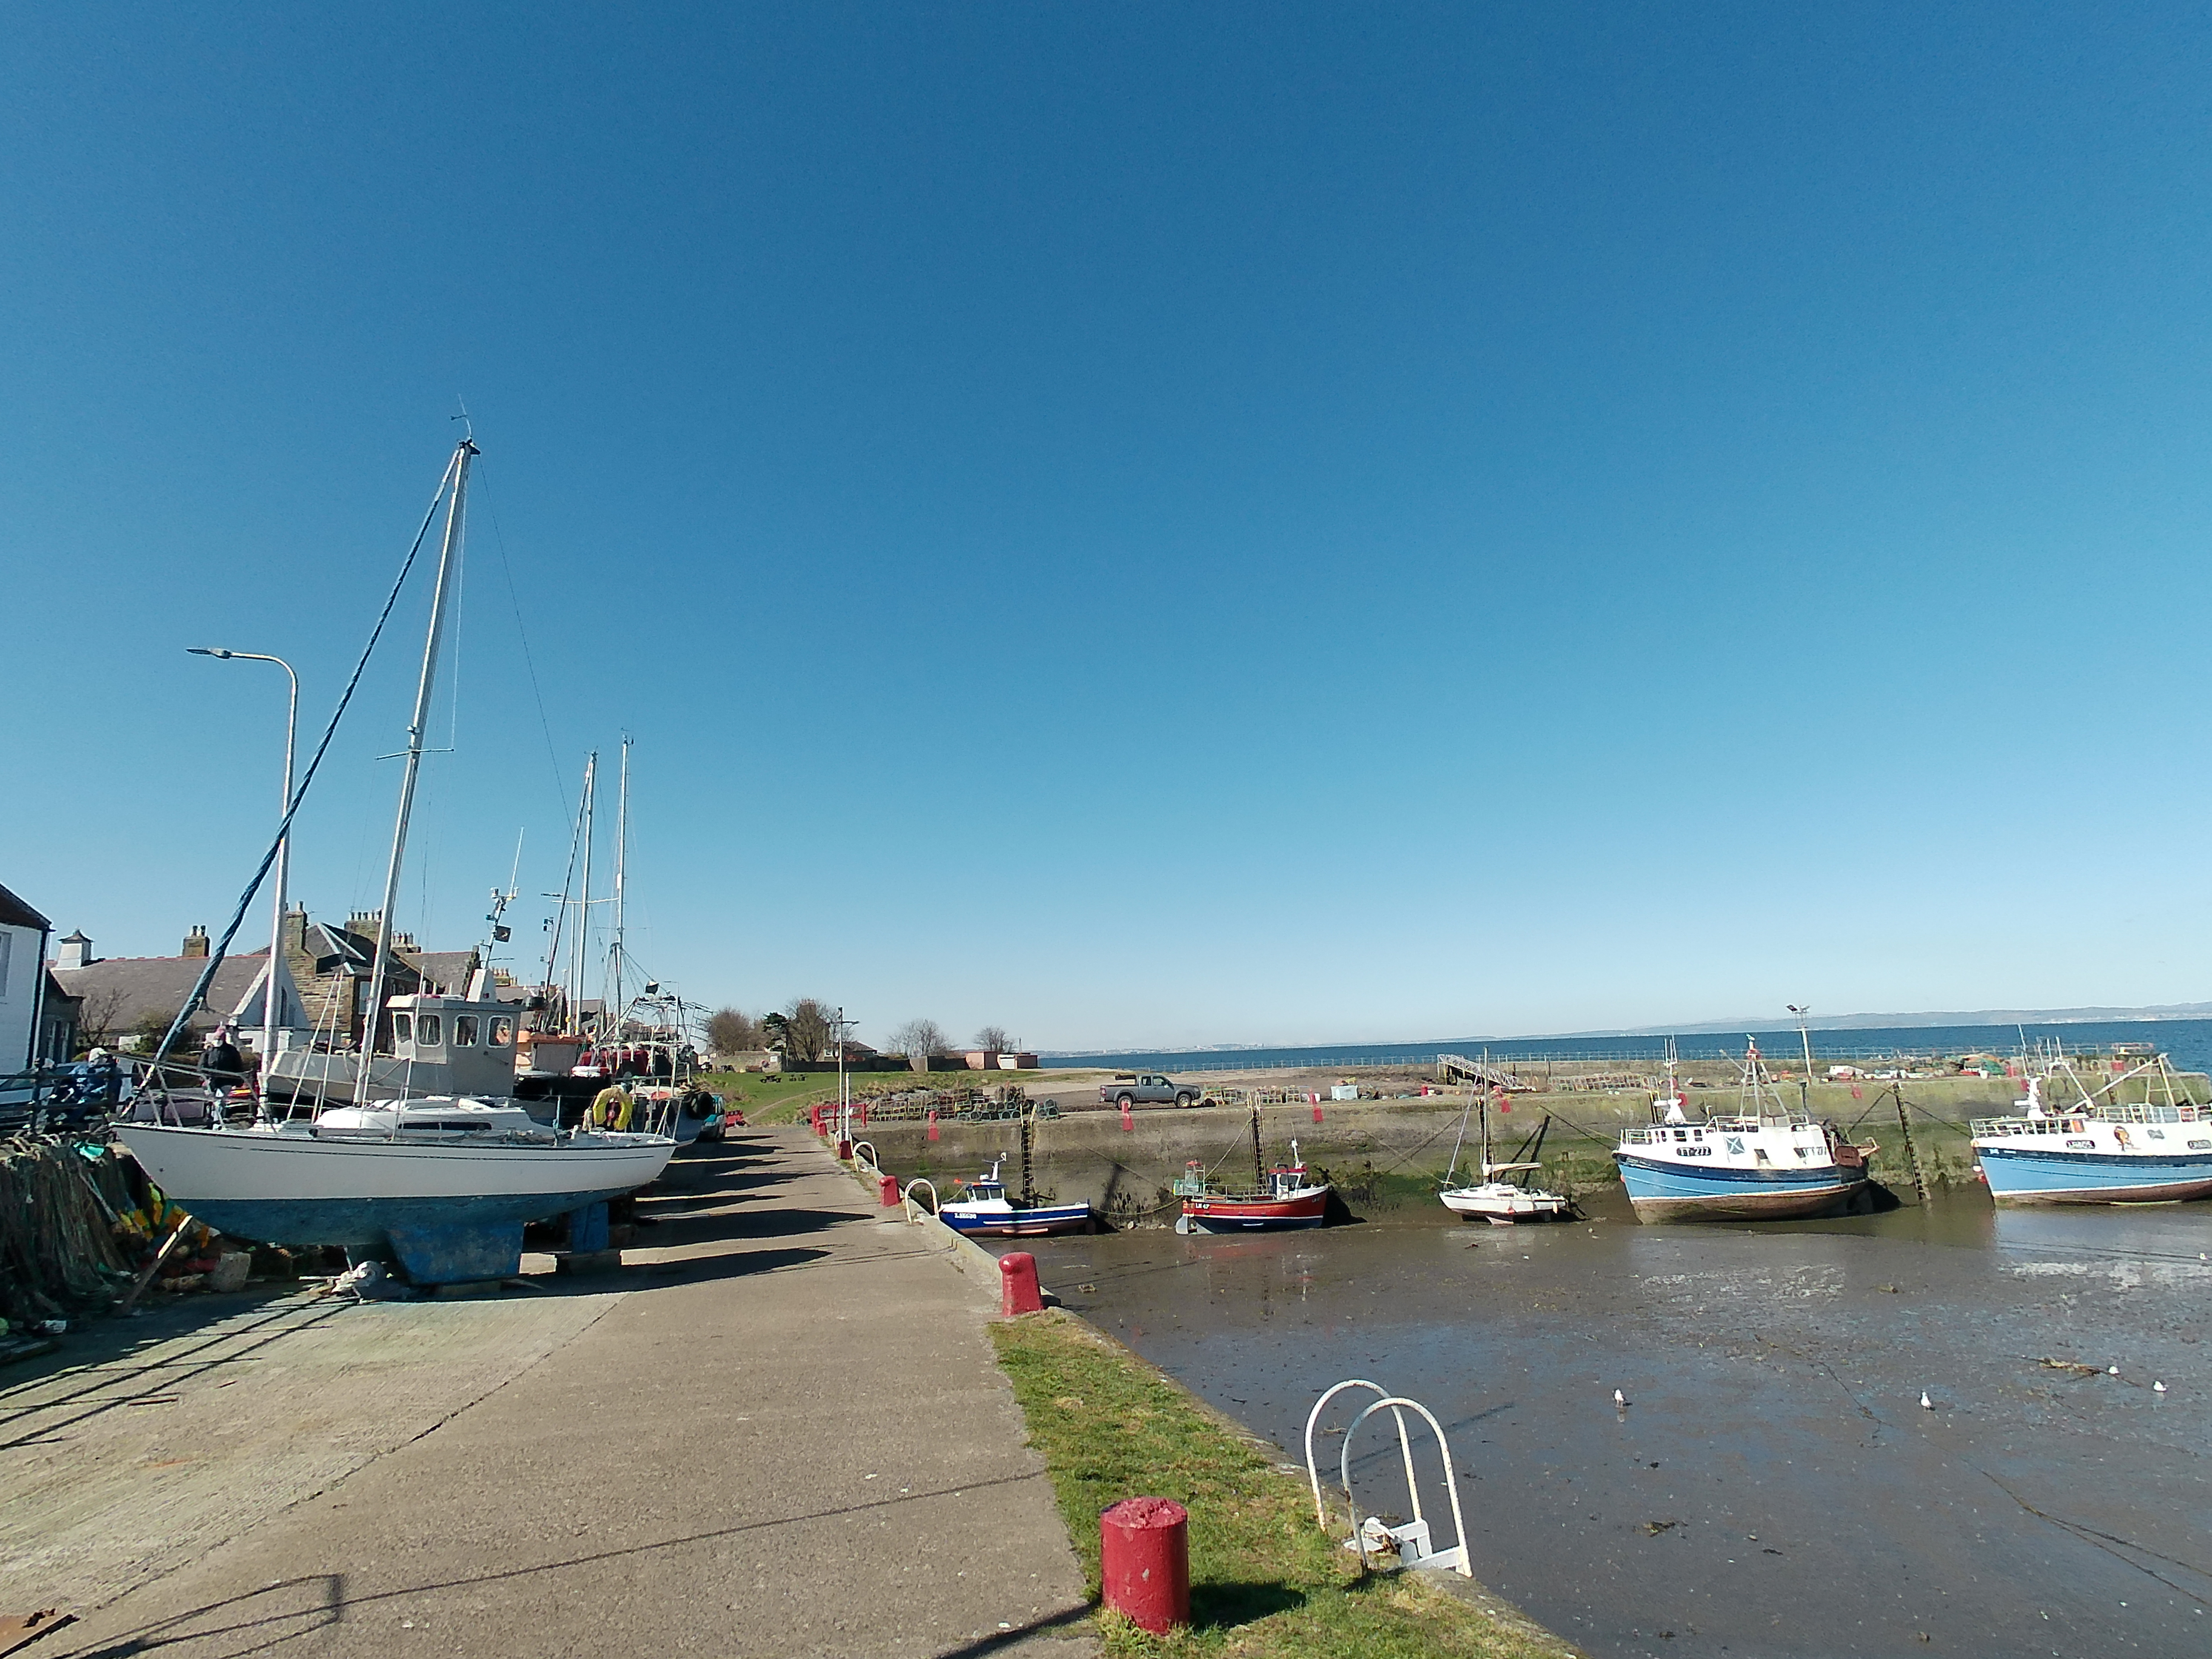
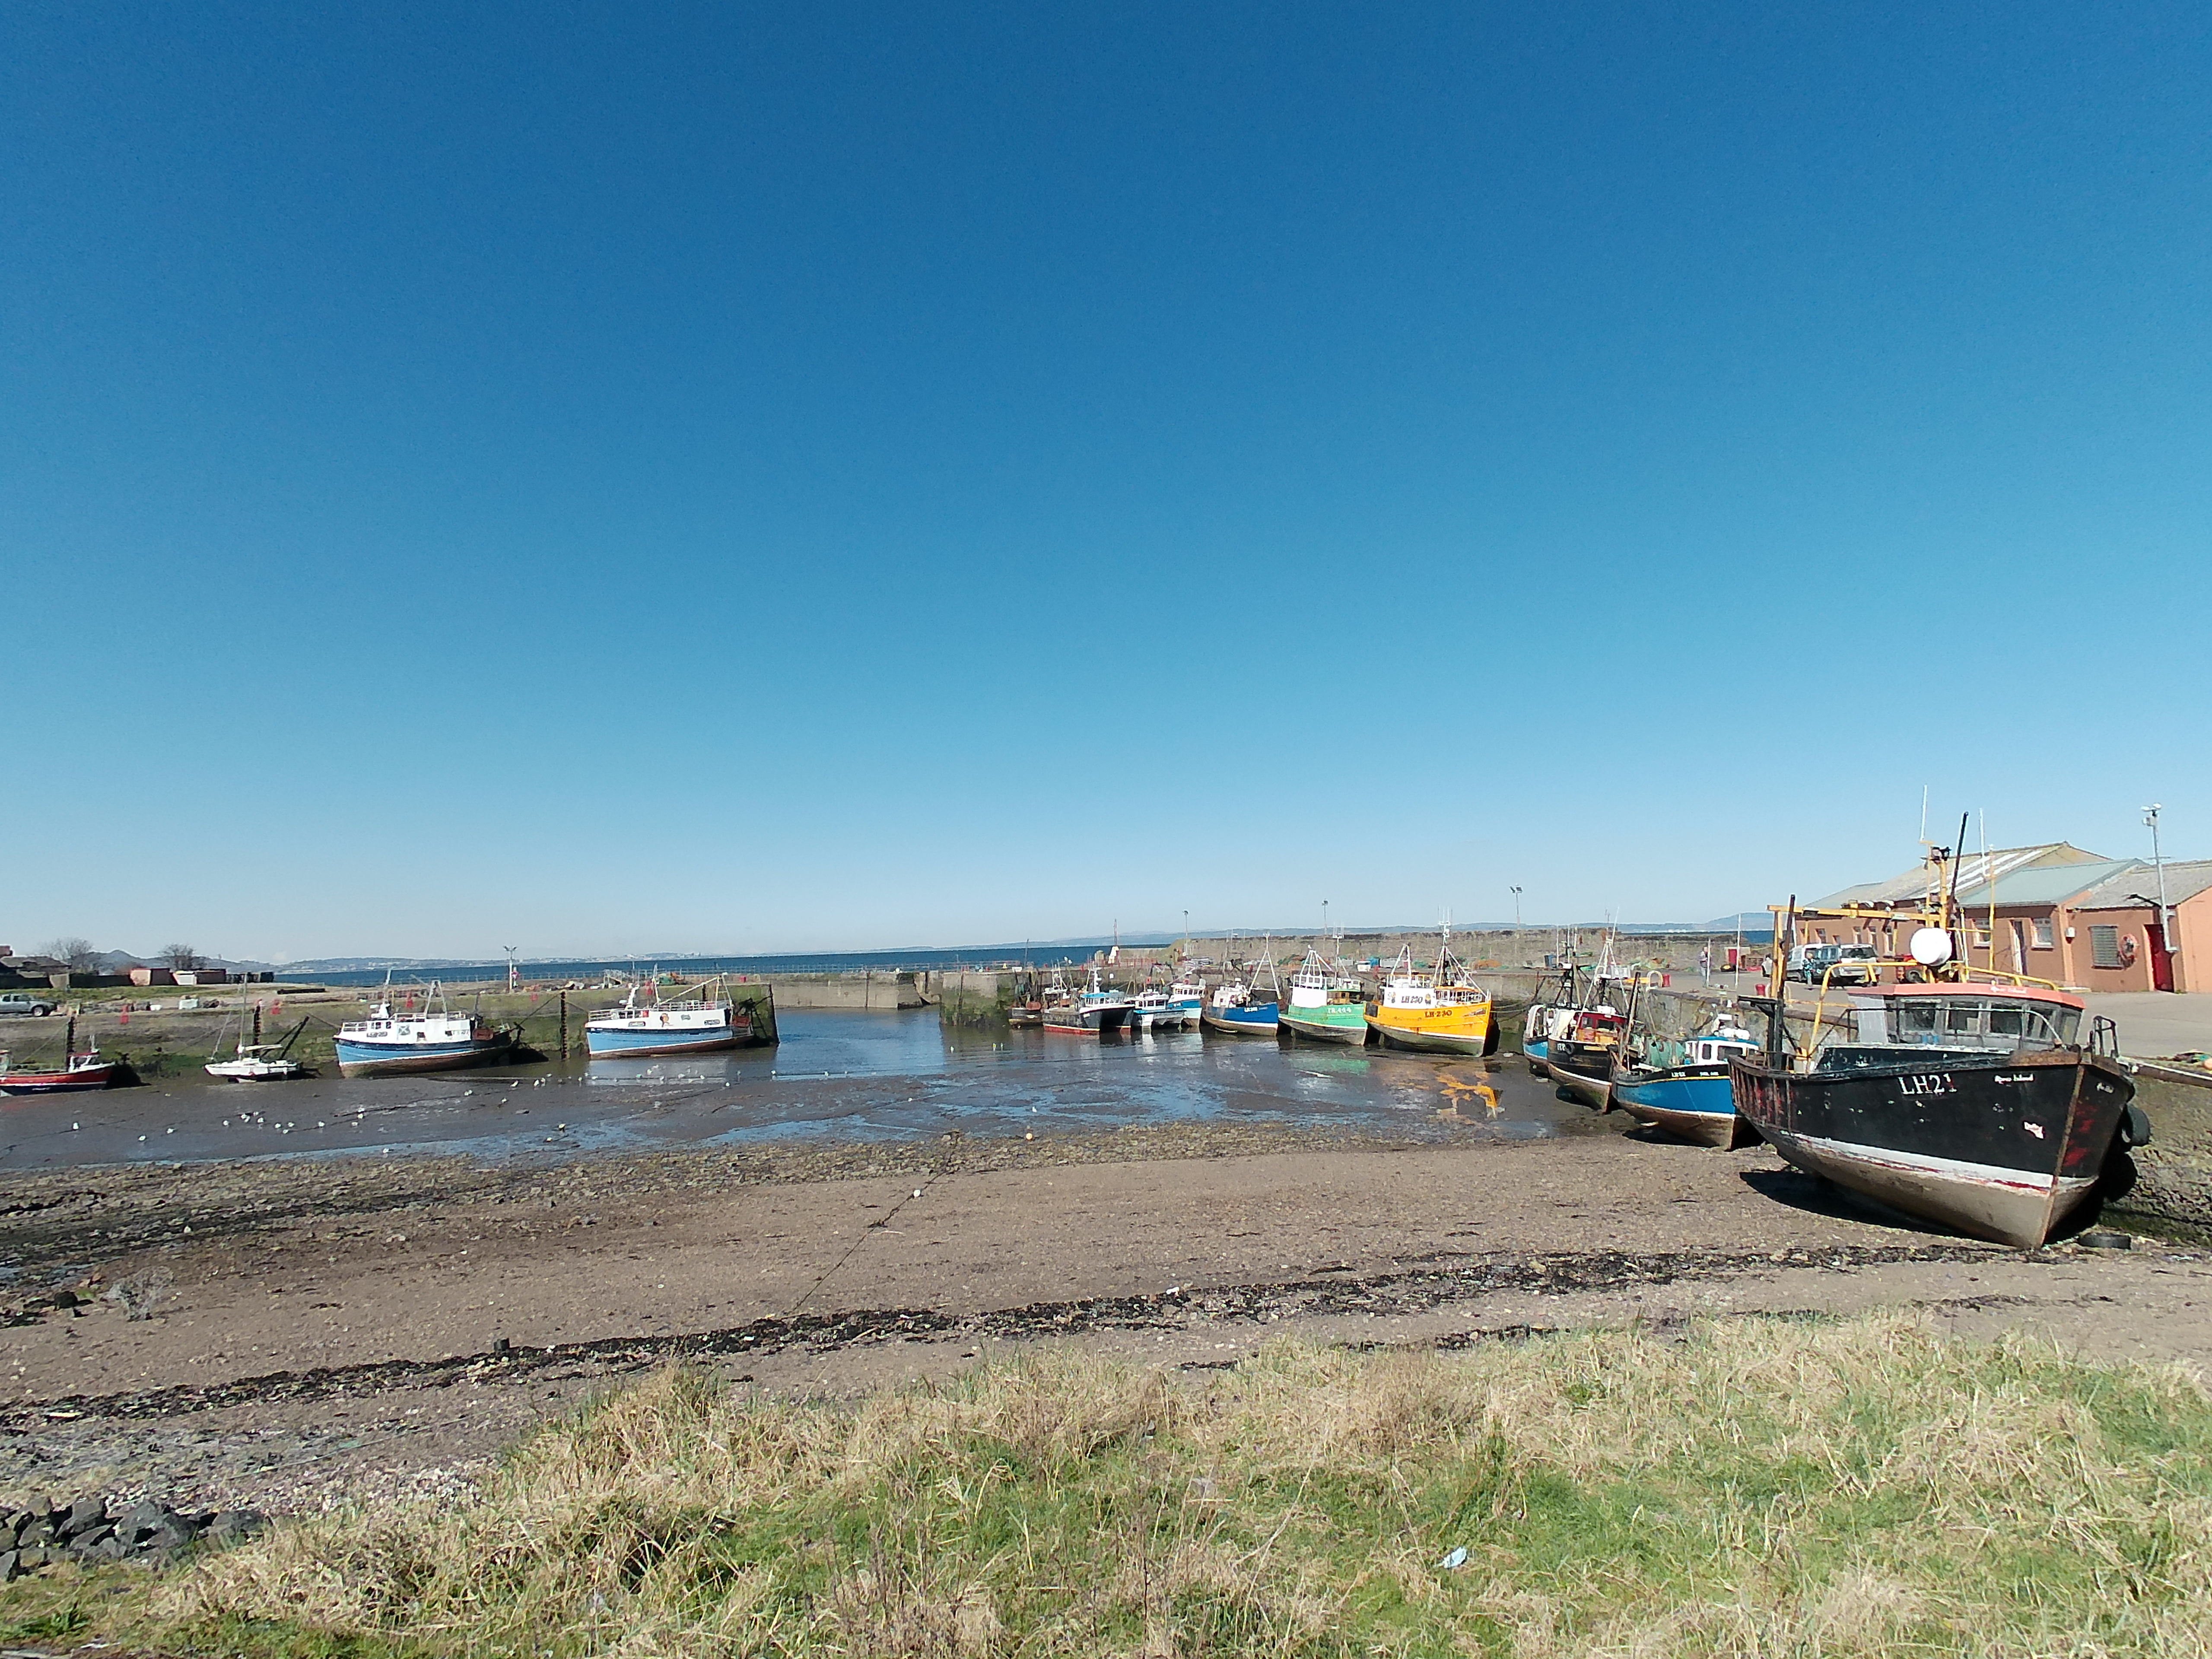
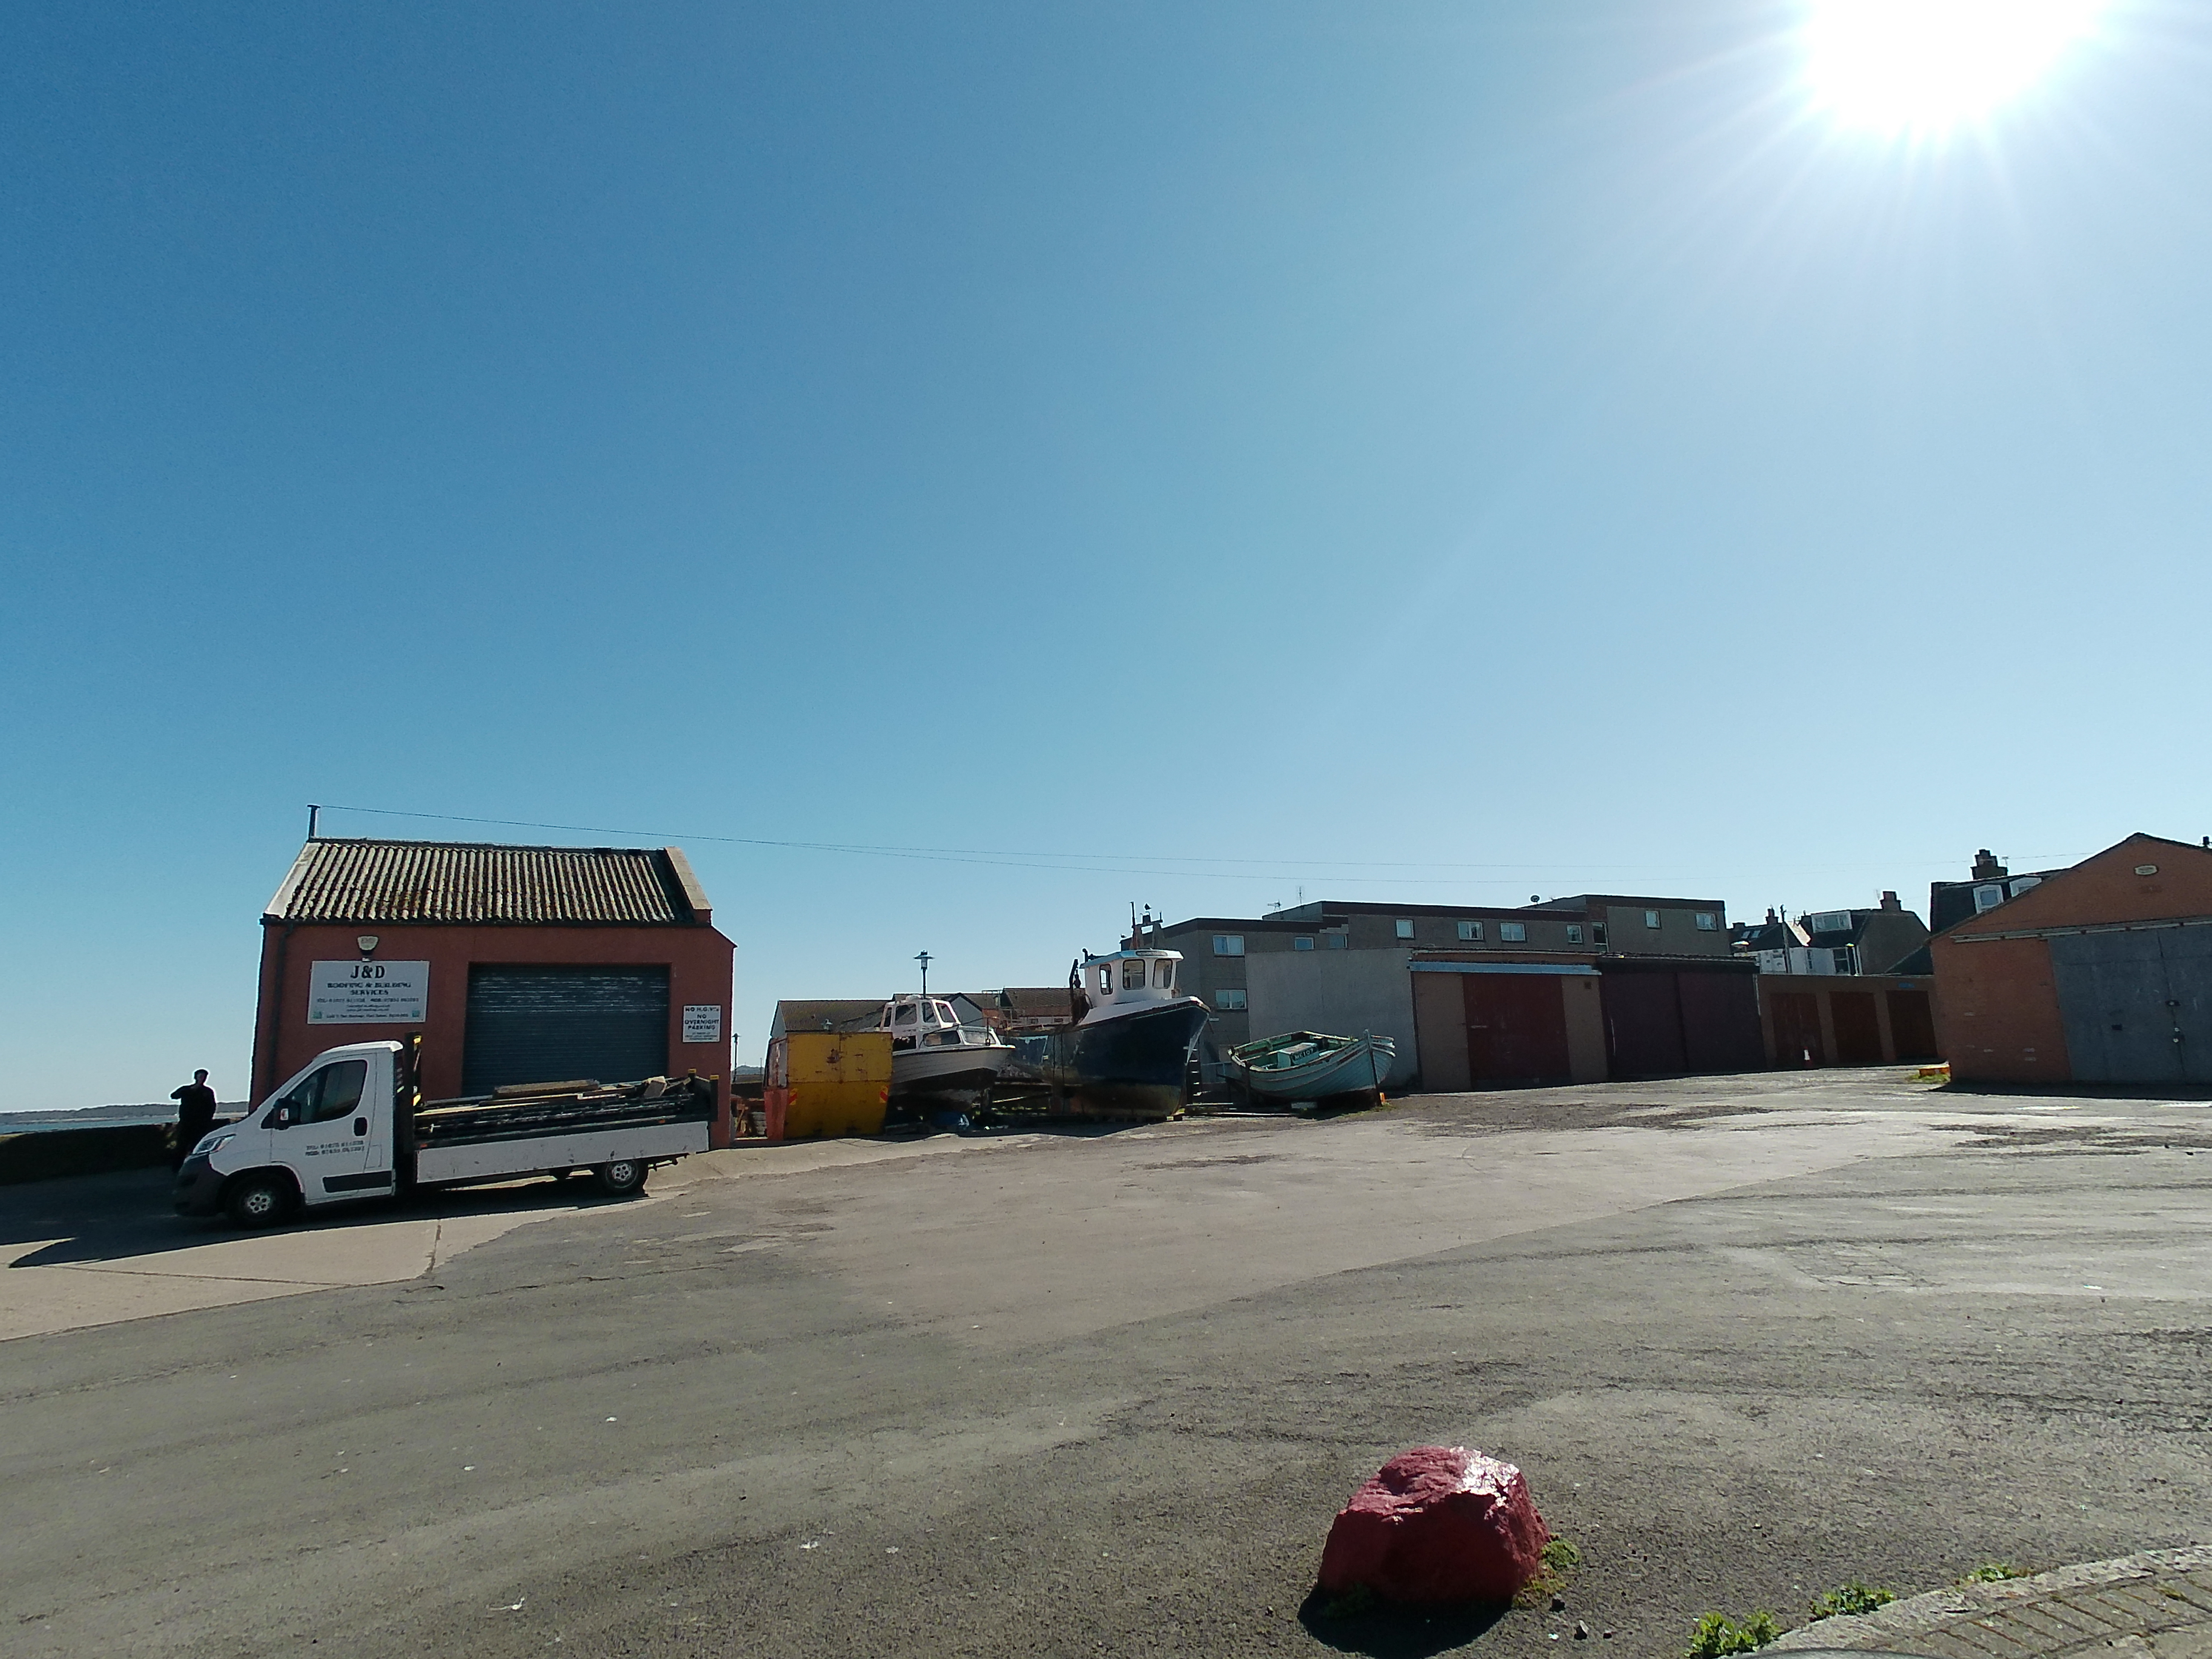
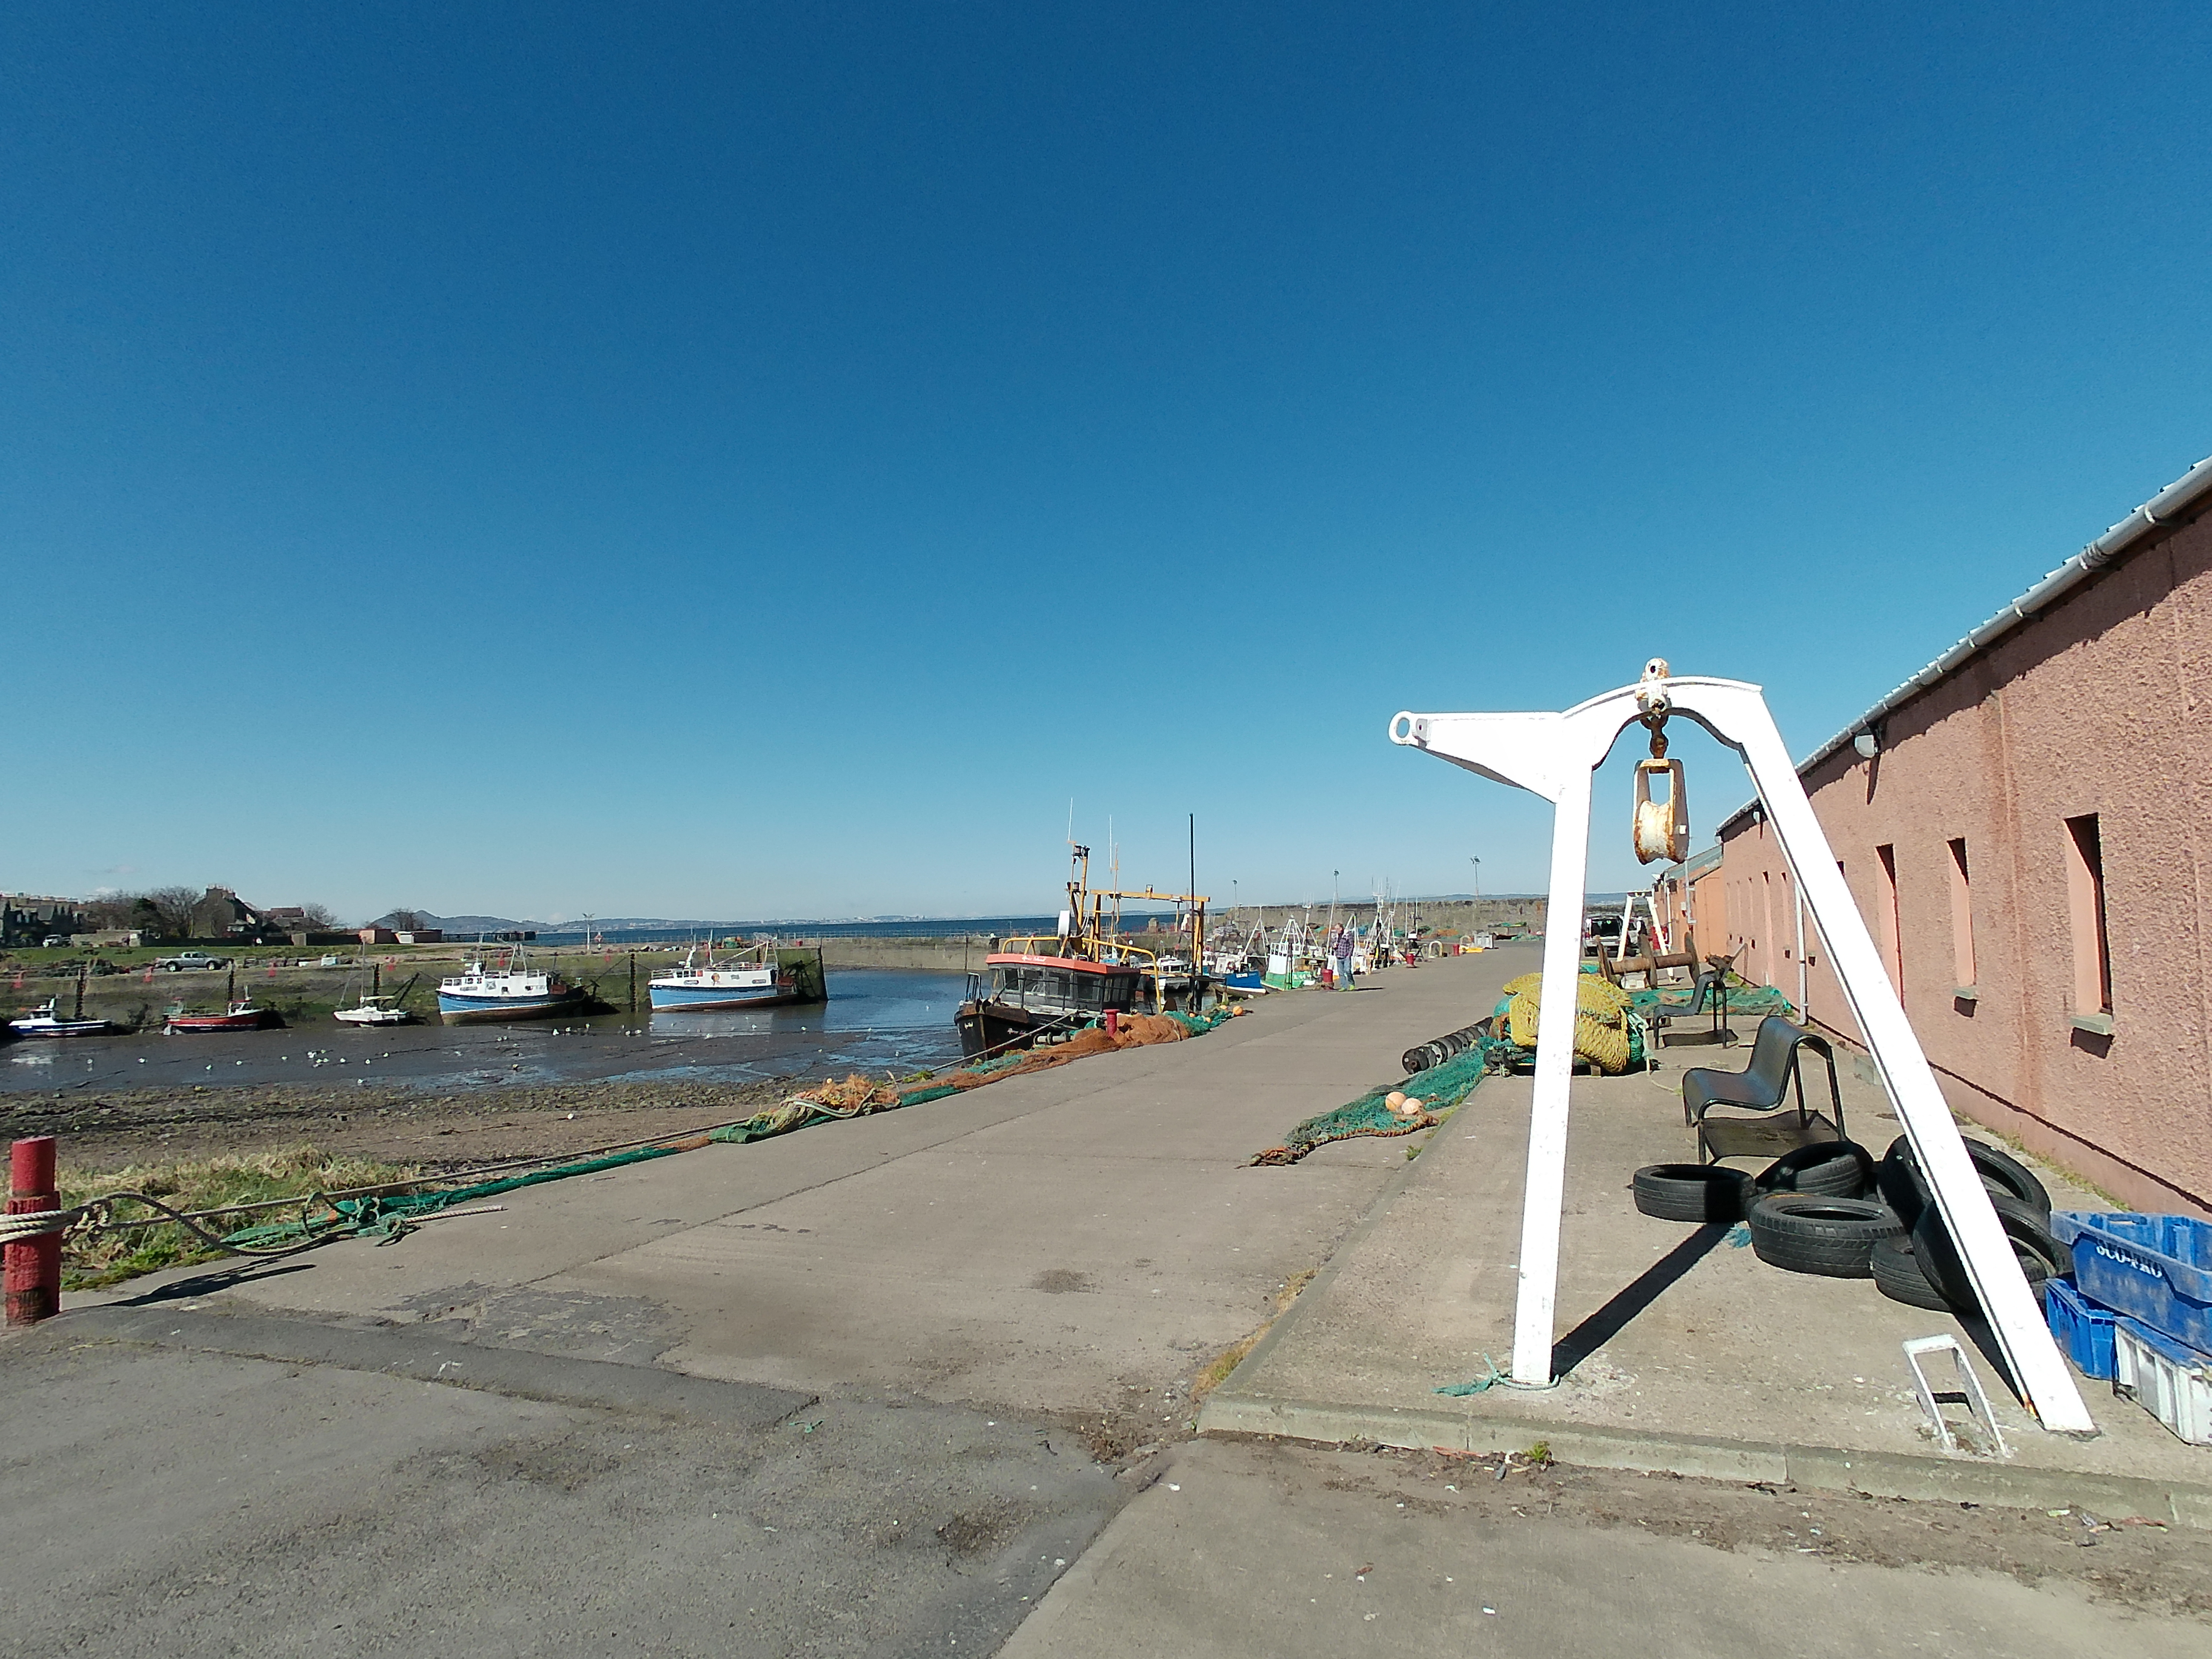
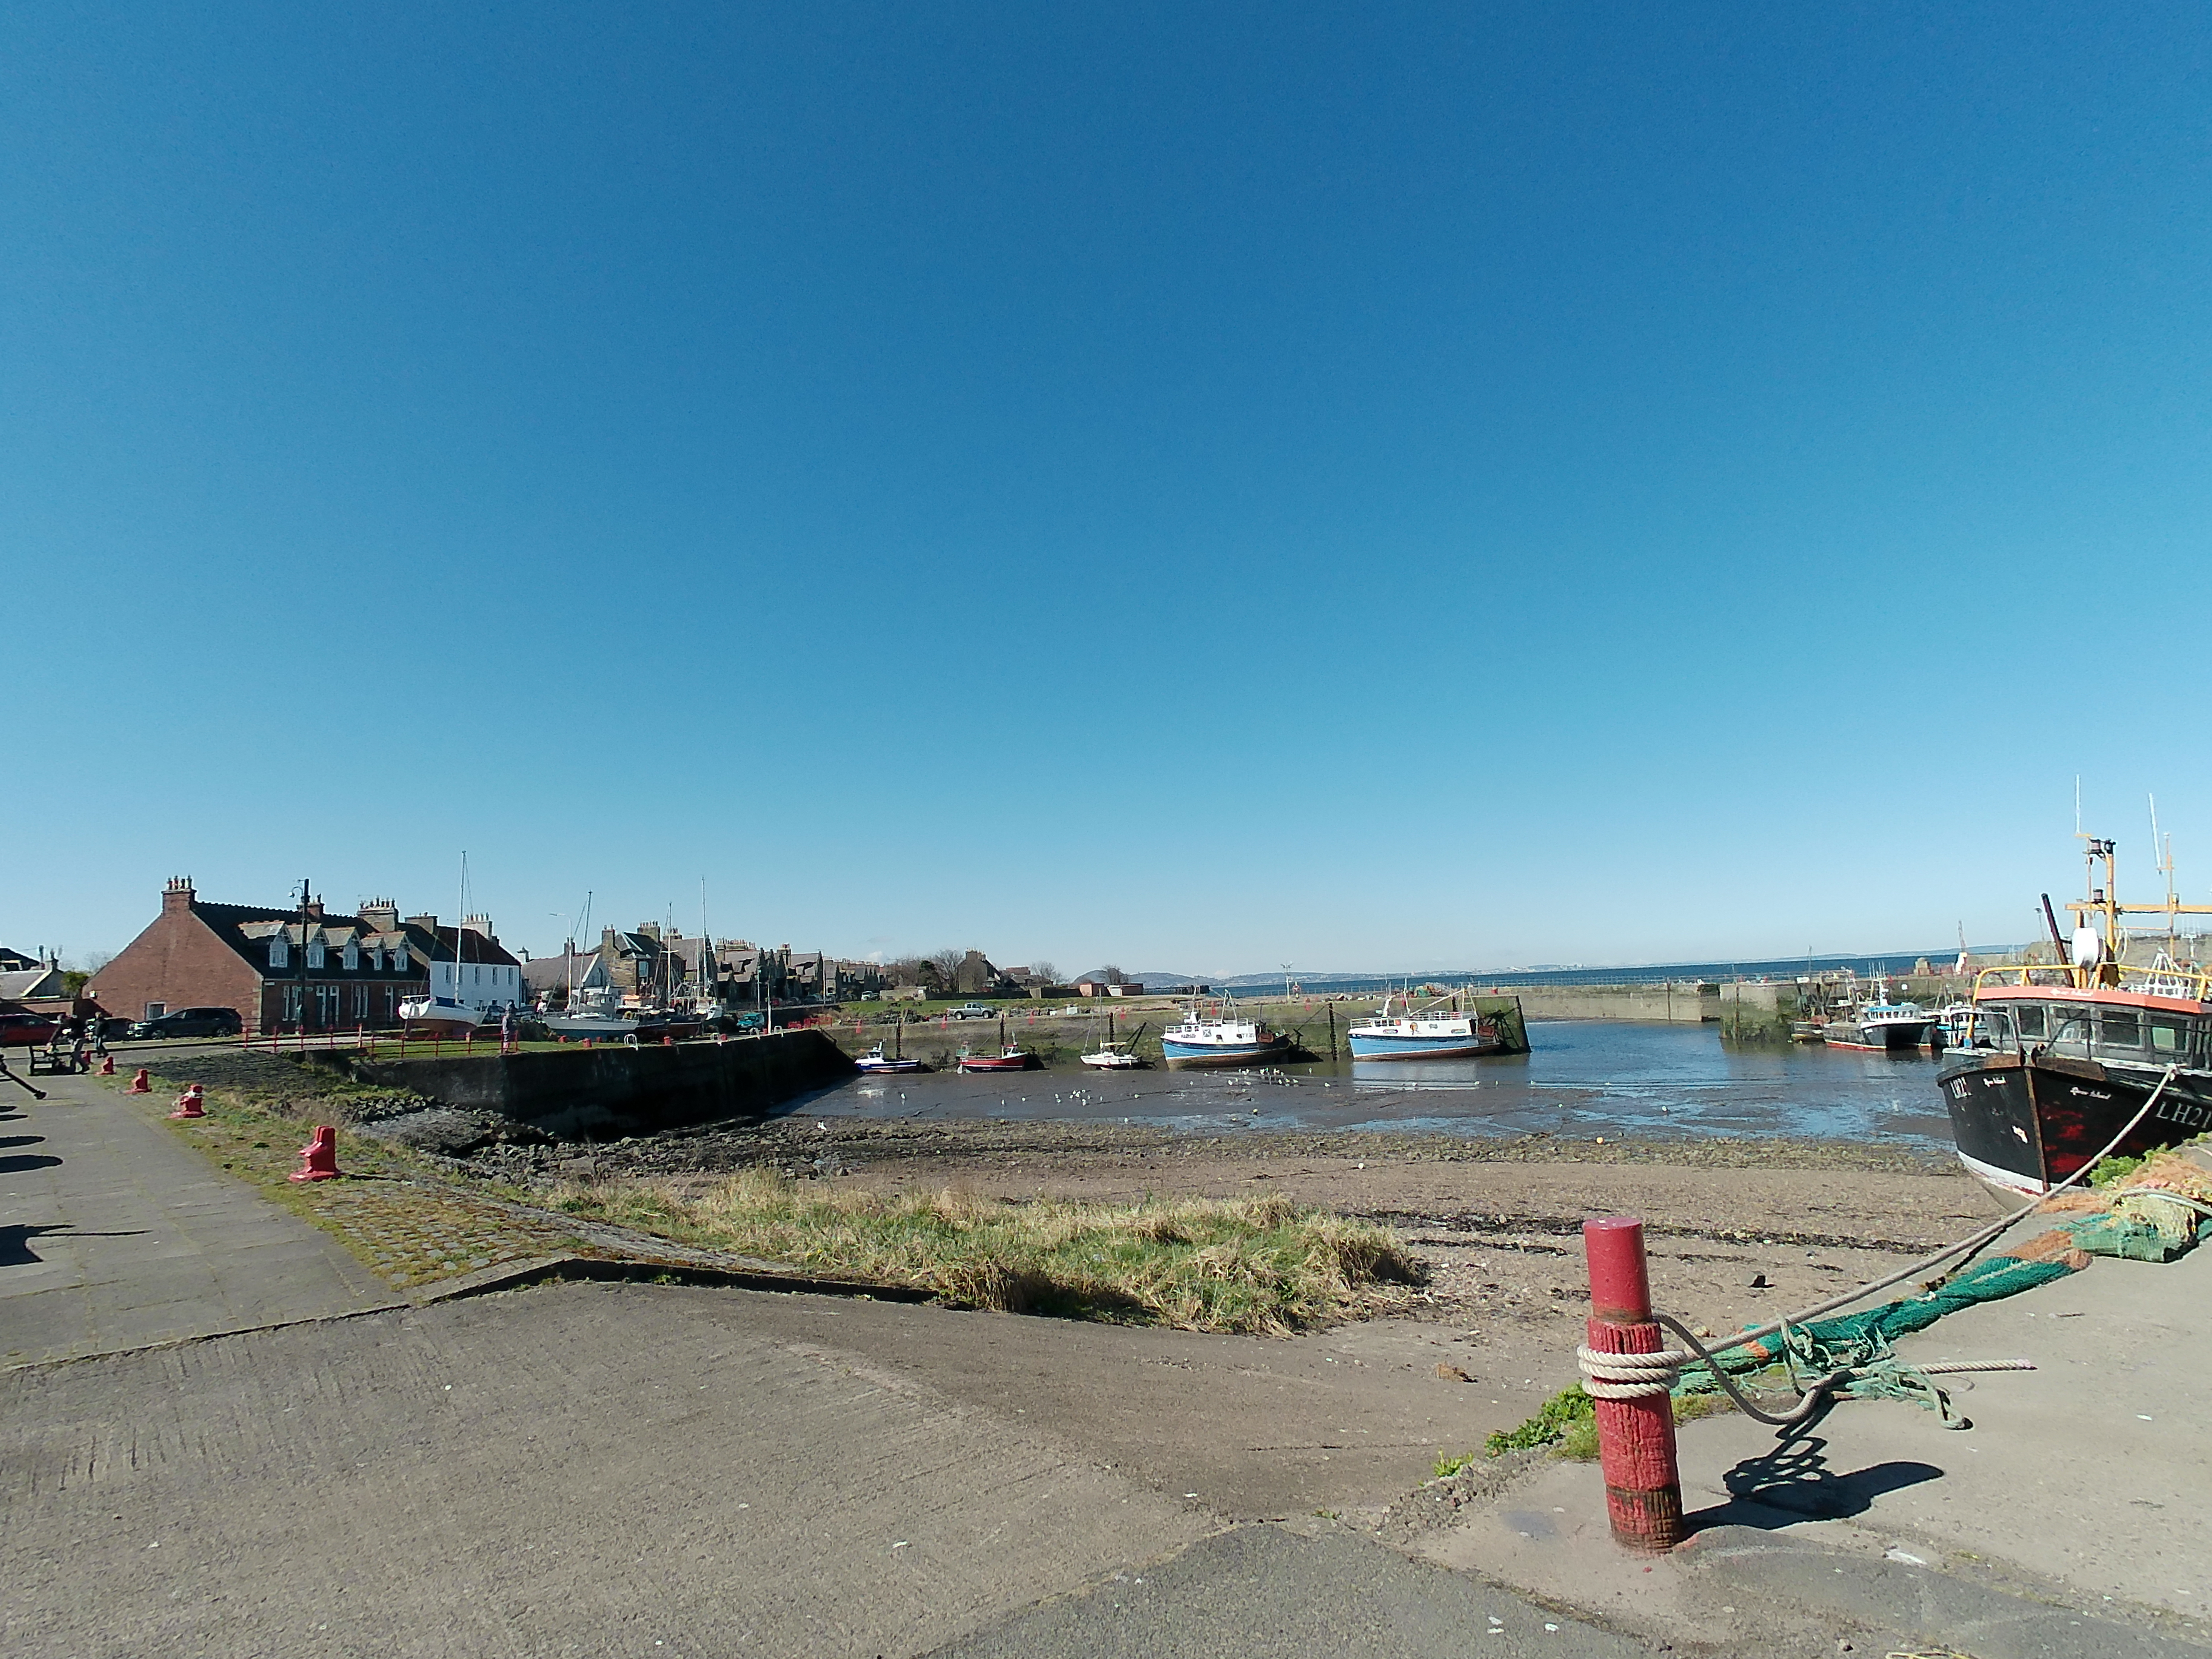
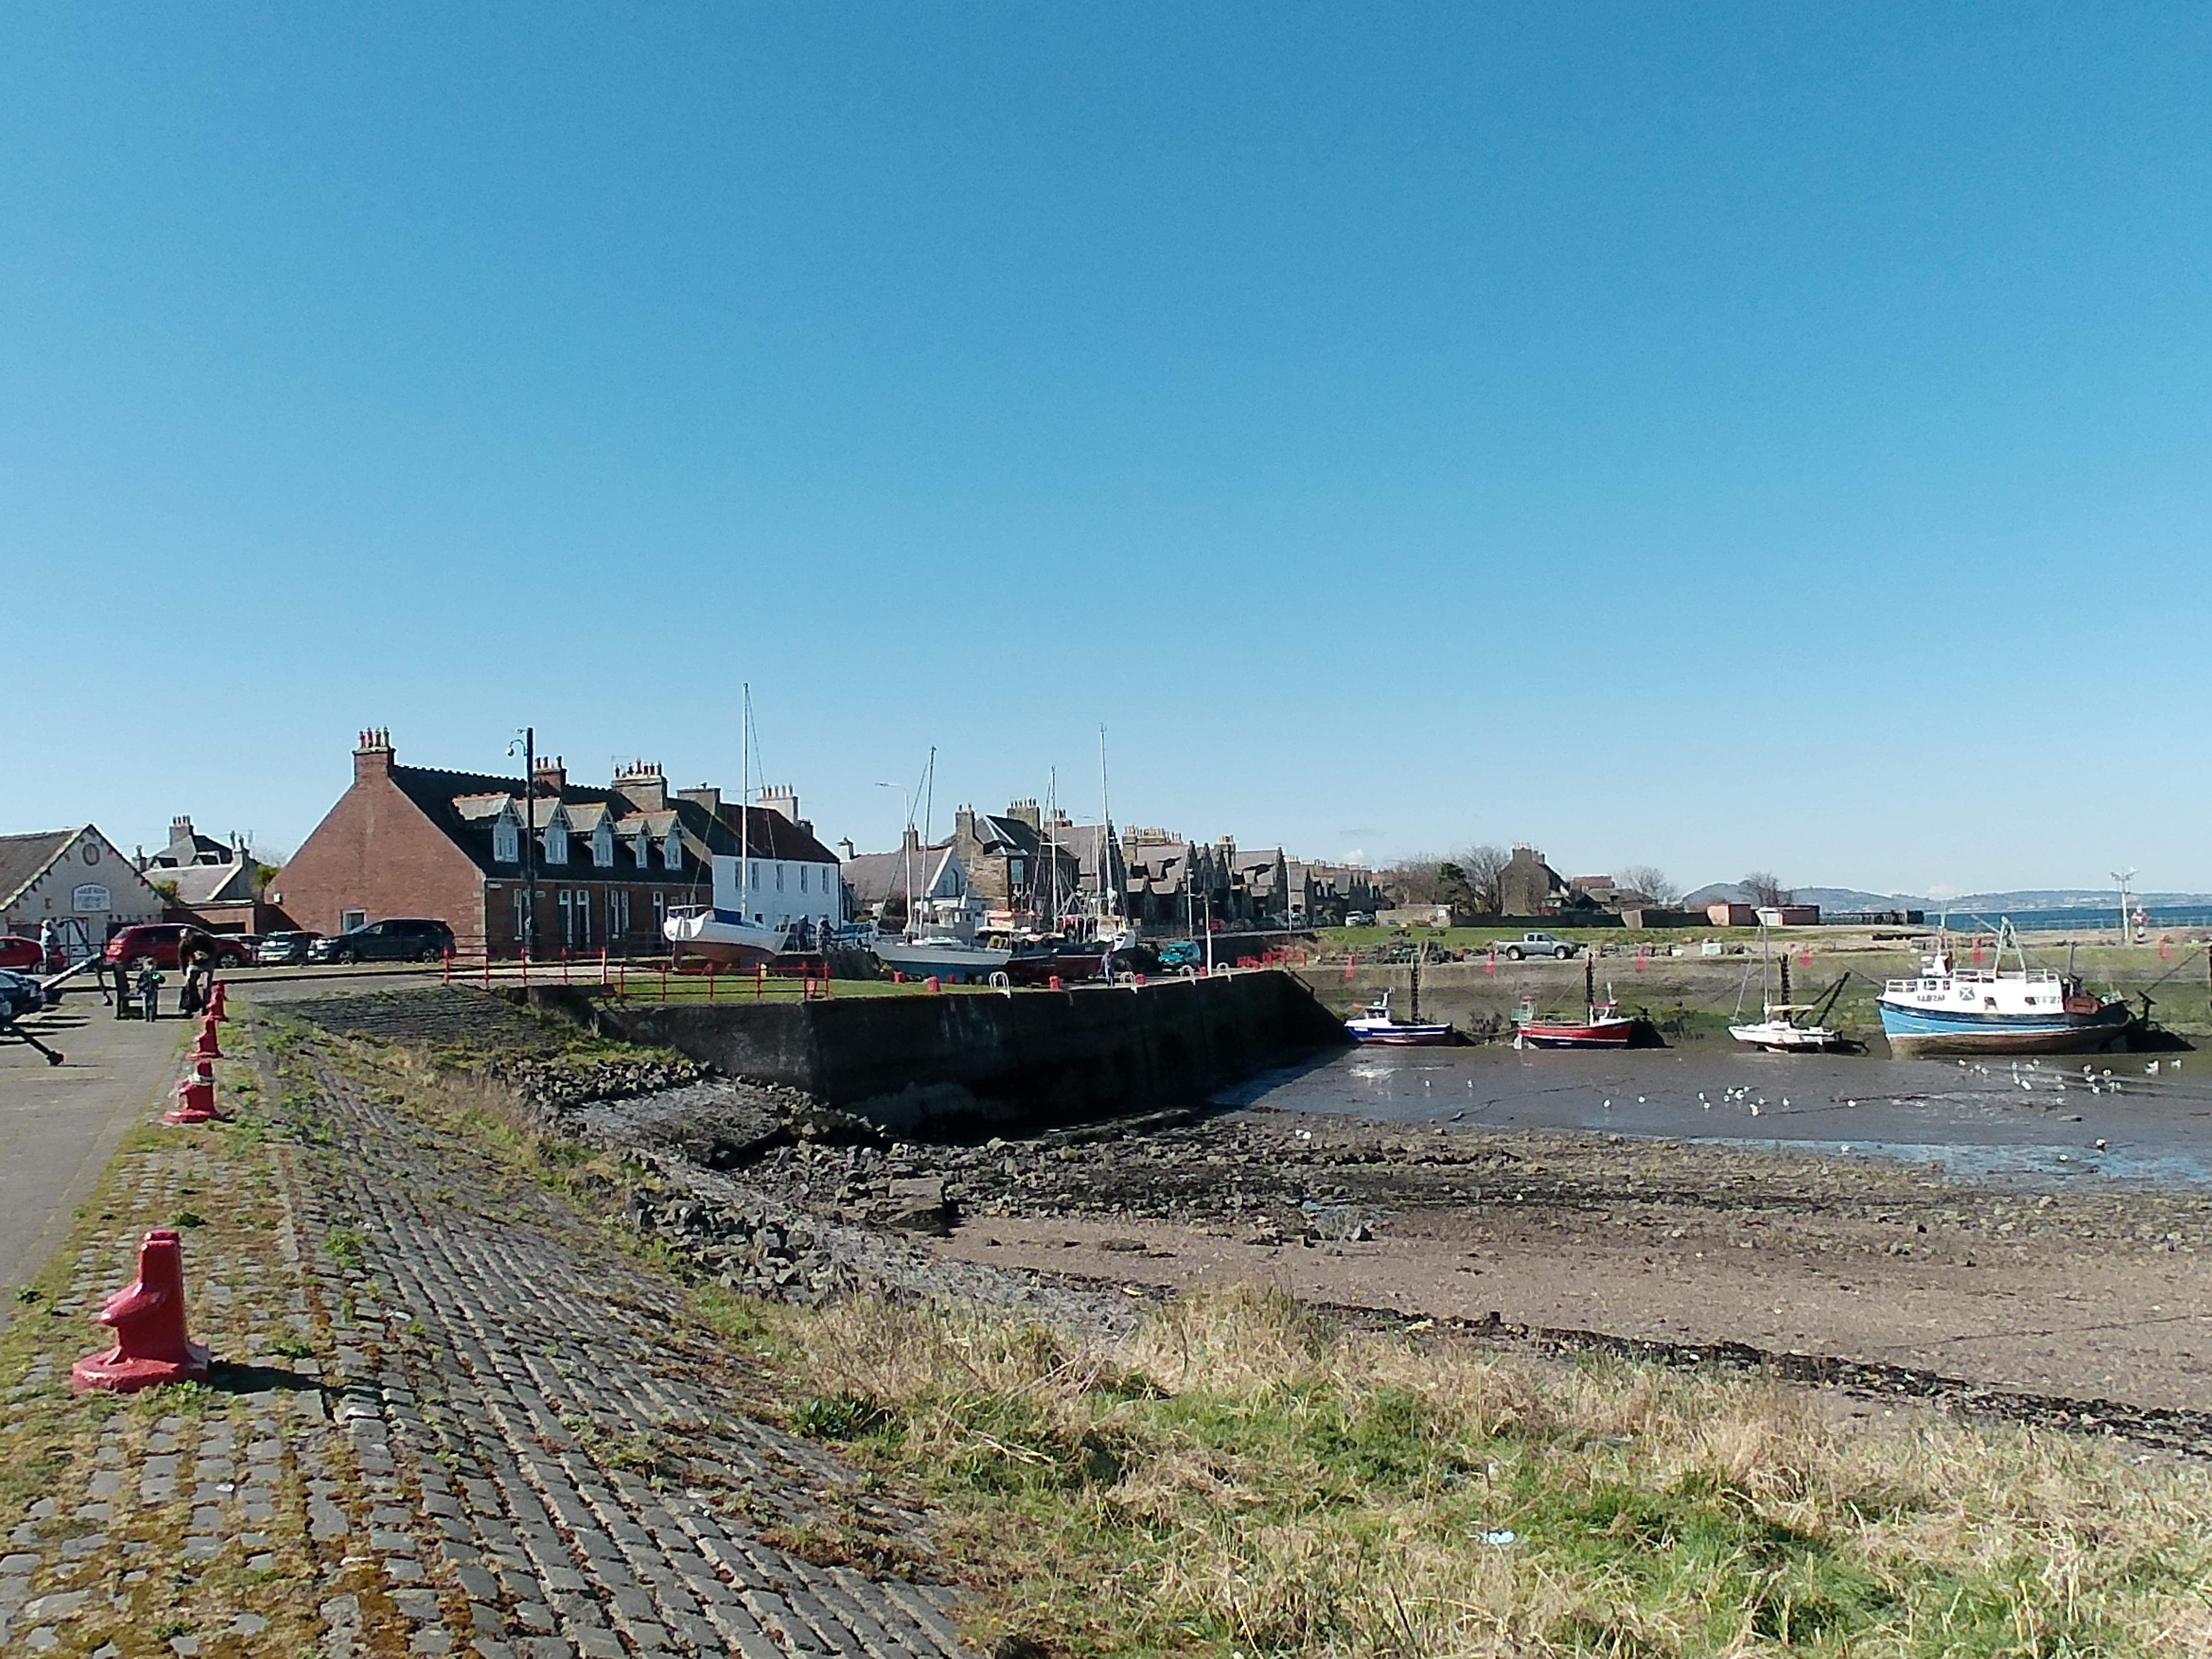
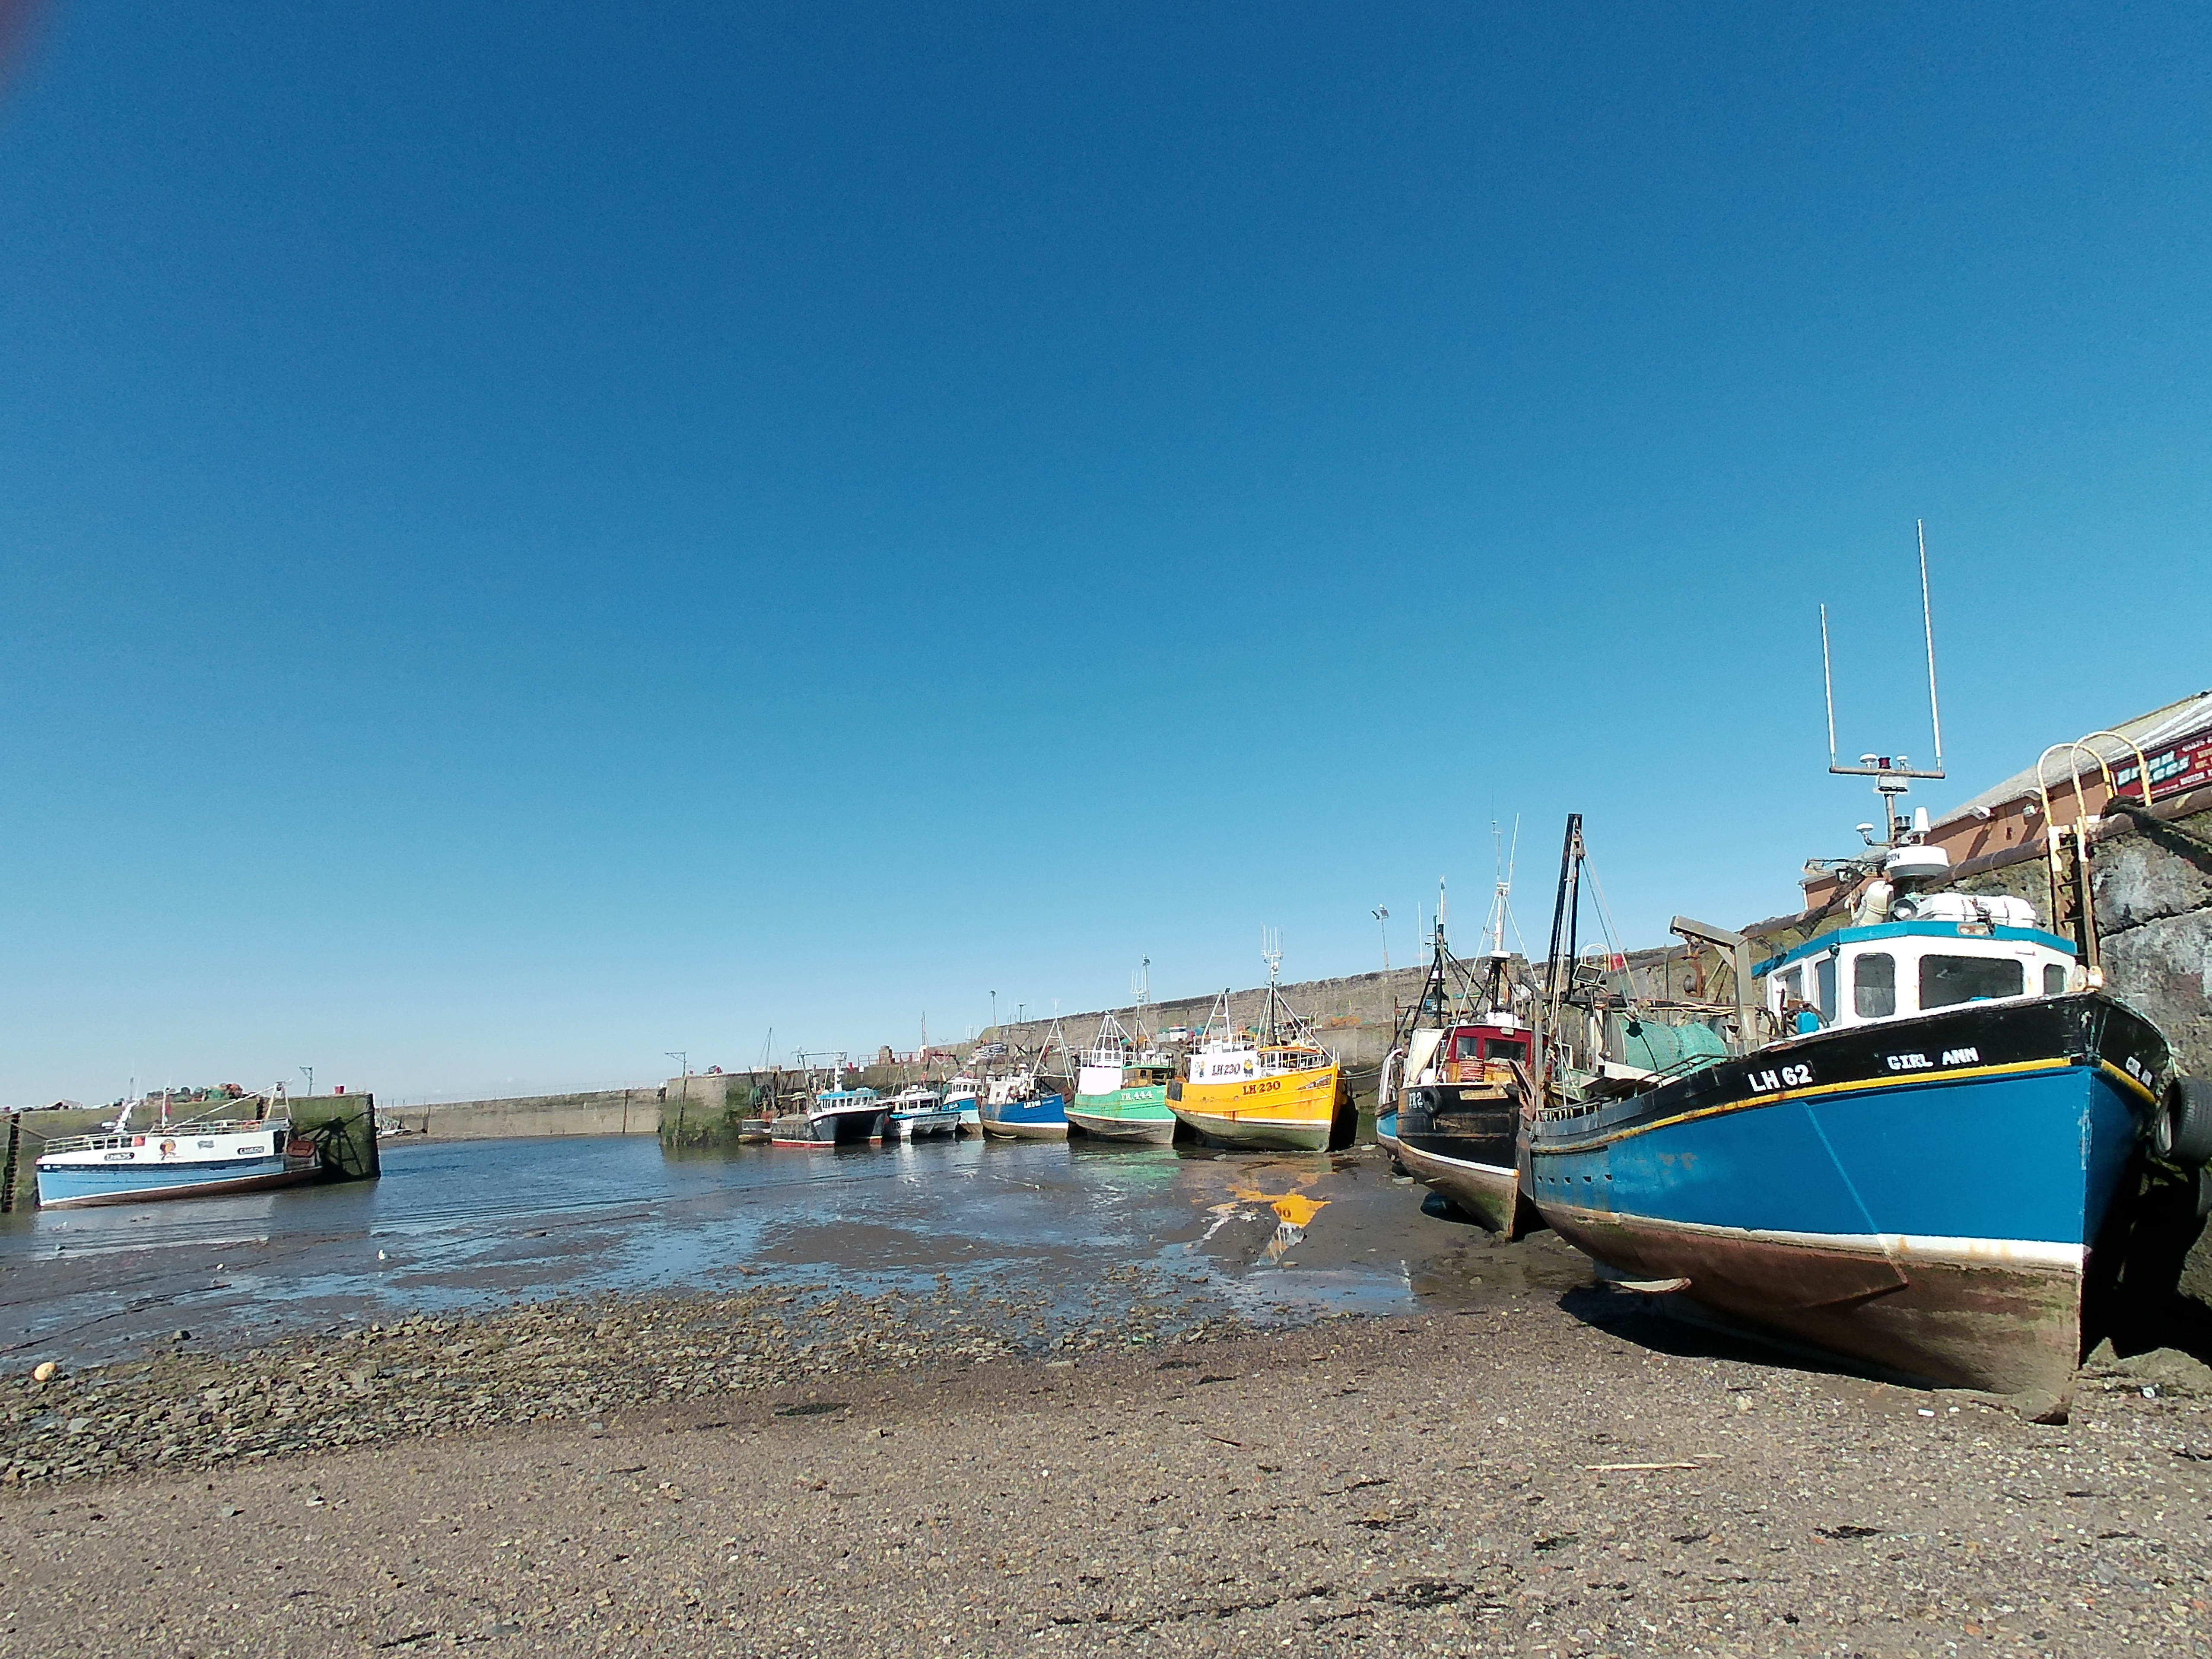
Port Seton Harbour Area The photos in this section are all full wide angle and full size straight out of
the camera BUT there are limitations to the image quality
vs their viewing size. I have a 15" tablet screen and when
viewed at that size on my tablet the image quality is excellent.
I can push the image larger (CTRL + Mouse Centre Wheel Roll Up)
and the image quality still holds up. When viewed on my tablet
at full size, the image quality is well blown out.
I switched the EIS (image stabilisation) OFF and the Distortion
Calibration ON for these images.
Please click on images to open up to camera unedited full size -
20MP, Colour
EFFECT mode is set to NATURAL,
ISO set to AUTO, white balance was set to AUTO and METERING
was set to Multi-Metering. The exposure compensation (EV)
was set to 0
-
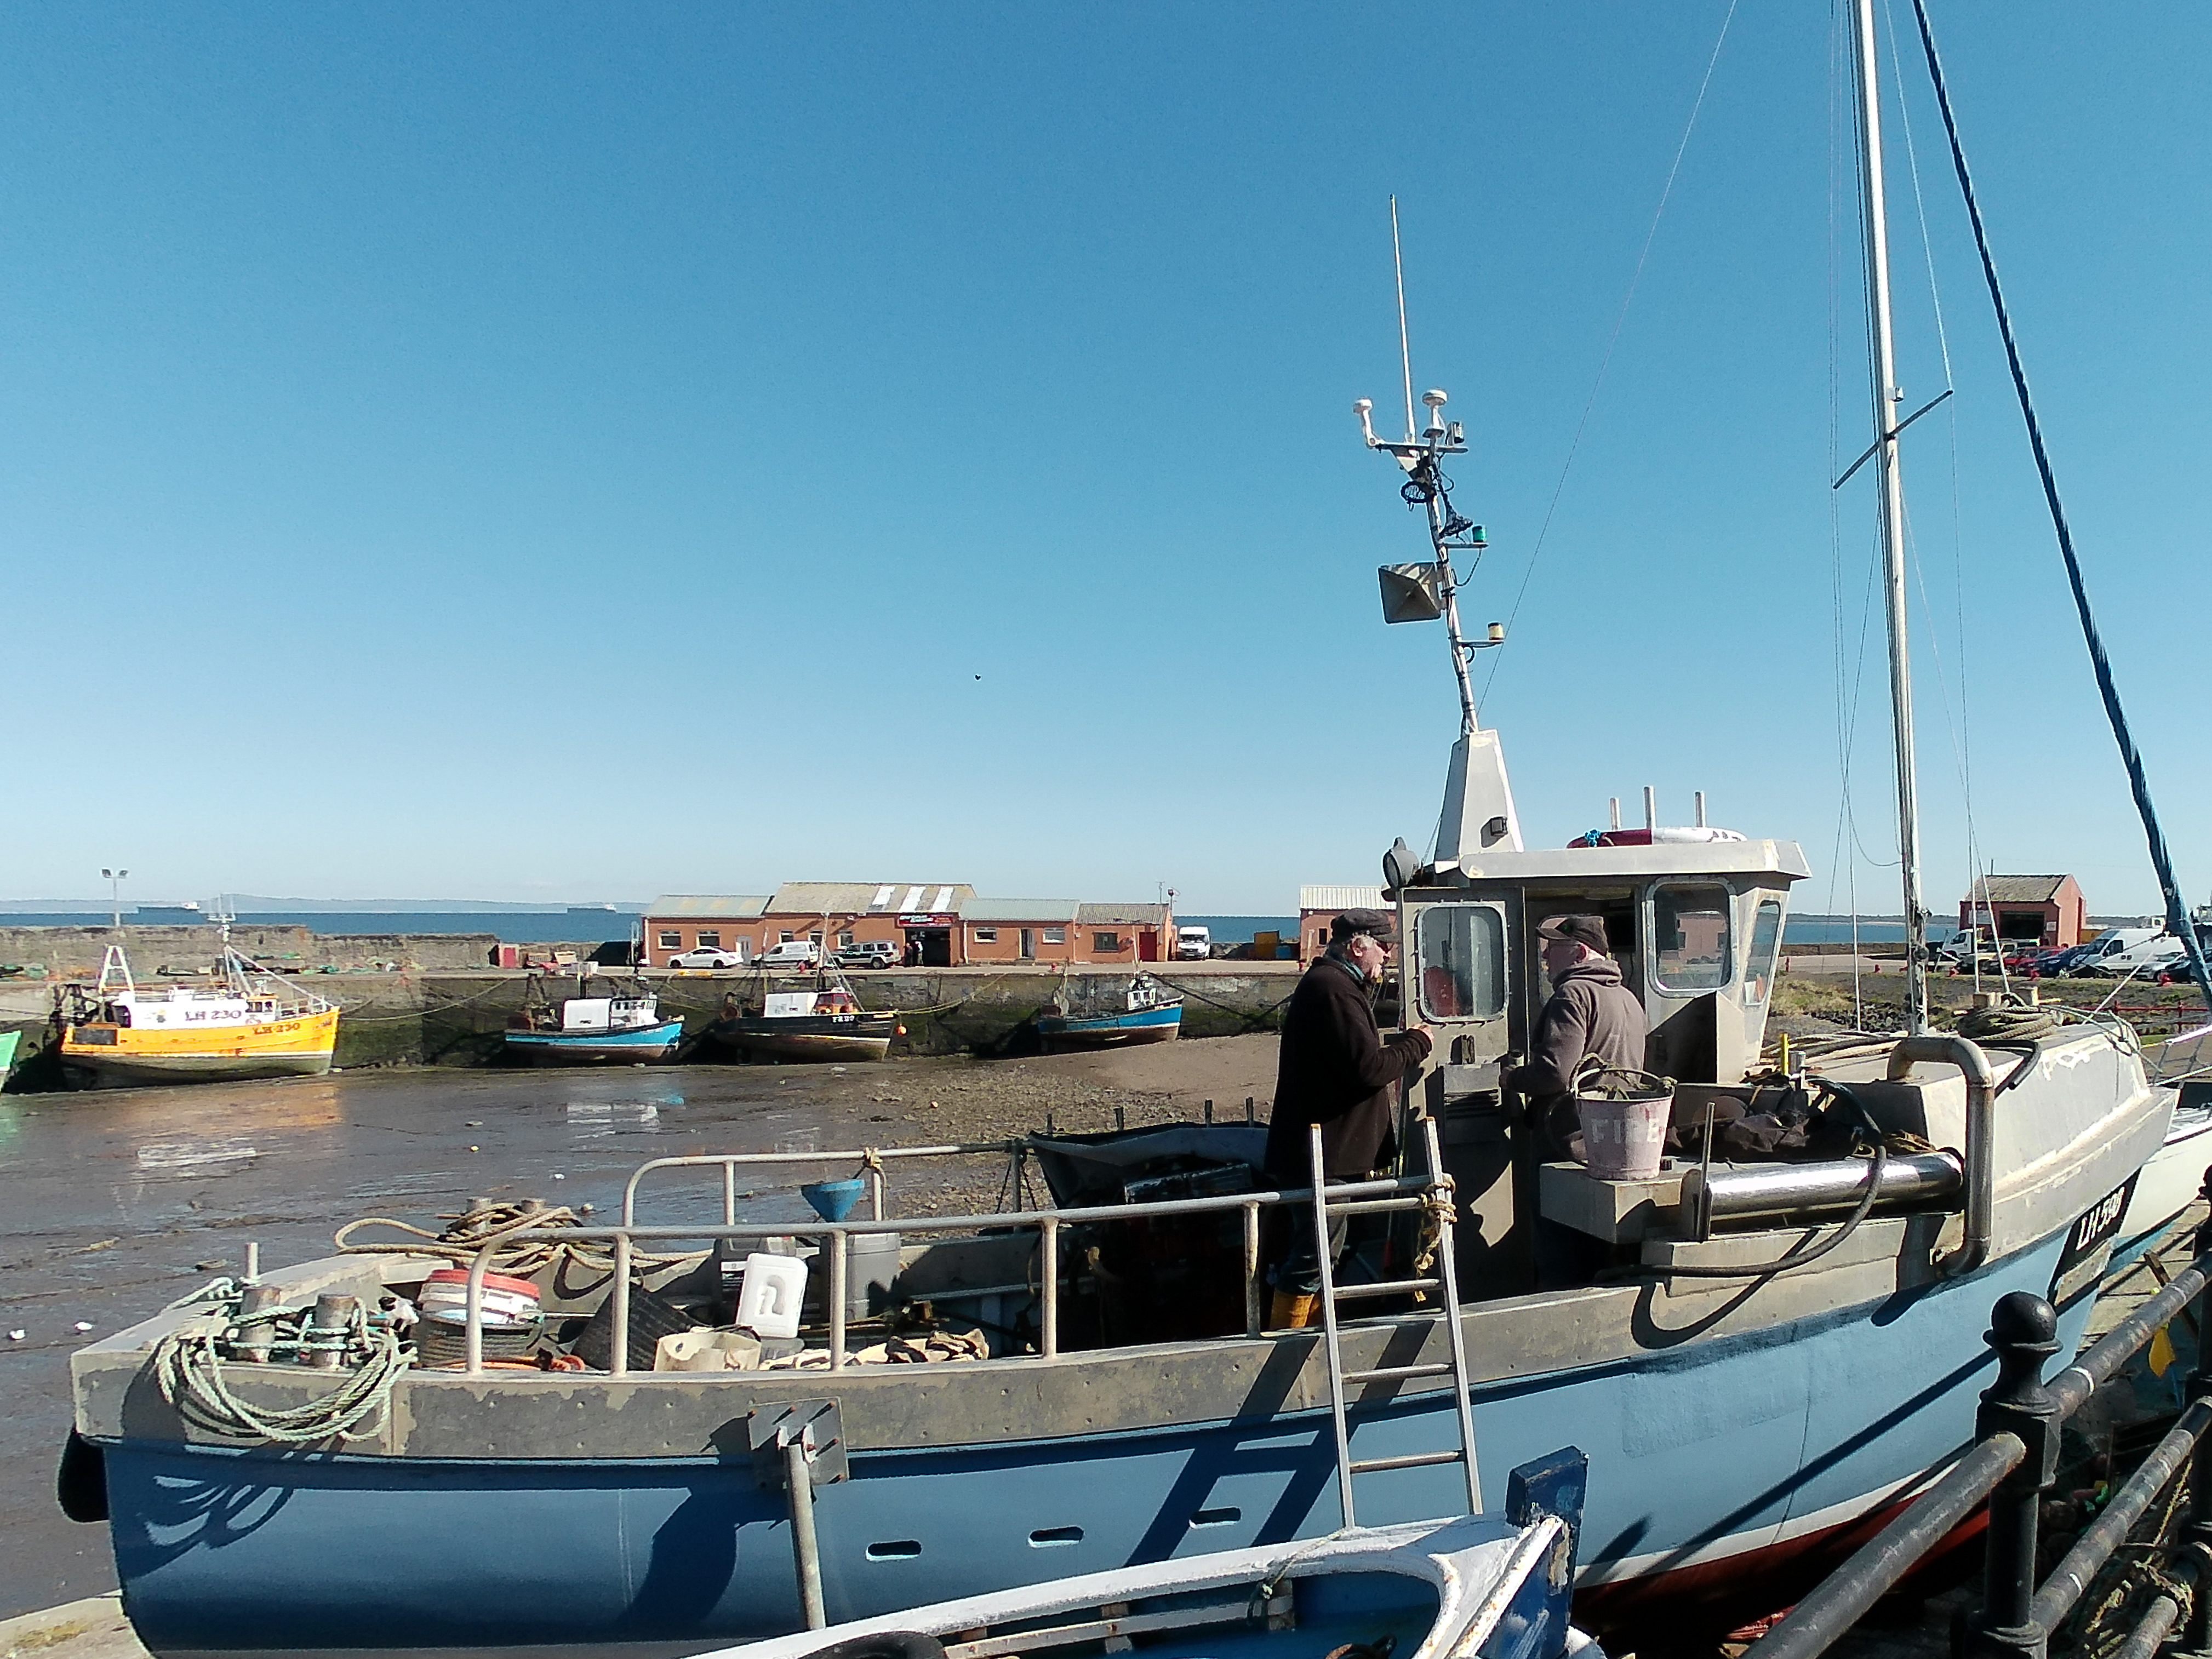
The
image below is a cropped version of the men in the boat image above -
cropped using Lightroom Software on a computer -
Video of Port Seton
This is a video taken straight from the camera and uploaded
without any editing.
It was uploaded in the camera default
American NTSC colour format and
it can be viewed in 4K or lower.
The camera had image stabilisation switched on -
Video of Squirrels
This
is a video taken of squirrels in my back garden in April 2021 - it
is a very dull cold afternoon and it is snowing. The camera has
image stabilisation switched on. The video was converted from an
American NTSC colour format
to
a MPEG-4 British PAL colour format, using Power Director Software.
The downside is that the video conversion limited it to 1080p HD
which is due to the limitations of my (old) version of Power
Director -
This
is the same video of the squirrels uploaded to a computer and
uploaded (unedited) in 4K to YouTube -
If this article has assisted you in any way - please donate to my
Charity of Choice - The Sick Kids